
Publish and Deploy the Driver
Dec 7 2023 at 12:00 AM
- Overview
Overview
Once the Driver has been configured, it needs to be Published by the Raptor Package Manager so that it can be Deployed by the V-Raptor. This document will cover the steps needed to do this, which include:
- Installing the Raptor Package Manager CLI tool on a local machine.
- Configuring the Publish Profile in the Package Manager.
- Authenticating the Publish Profile and including a Certificate.
- Generating the Driver Package in Device Store.
- Customising the Meta Packet and Meta UI files in the Driver Package.
- Signing, Compiling and Distributing the Package.
- Deploying the Driver on V-Raptor.
Install Raptor Package Manager CLI Tool
The following SDK versions of the Raptor Package Manager are available:
- Latest version: 4.0.42.15
- Stable version: 4.0.42.15
- Next version: 4.0.42.xx
- Deprecated Version: 4.0.24.x
Prerequisites for Installation:
To install this CLI tool, ensure the following has been installed:
- DotNetCore (latest version - at least version 6.0.0).
- NuGet (latest release).
- Configured NuGet source(s) that point to the IoT.nxt package server.
Before installing the raptorpm CLI tool, prepare the environment to include a NuGet source that points to the IoT.nxt package server. To do this:
Go to https://dev.azure.com/iotnxt/ and set up a Personal Access Token (PAT). Select the Personal Access Tokens section under the User Settings dropdown (top right) and open the window. Select “New Token” and ensure that the following fields have been filled in (or ticked):
- Name
- Organization
- Expiration (UTC)
- Scopes (Custom defined)
- Packaging (either Read, Read & write, or Read, write & manage)
Click “Create” and then copy (and save) the generated PAT value to a secured location. This value will be used when configuring the local NuGet source.
Ensure DotNet NuGet is already installed, then open the local machine’s terminal/command prompt and execute the following command:
dotnet nuget add source <#packageUrl#> --name private-dev --username <#username#> --password <#password#> --store-password-in-clear-text<#password#>- add the PAT value here.<#username#>- add the relevant email address here.<#packageURL#>- add the artifact store. An example of this would behttps://pkgs.dev.azure.com/iotnxt/_packaging/private-dev/nuget/v3/index.json.
There are two ways to install the raptorpm (Raptor Package Manager) CLI tool:
- Install the raptorpm CLI tool from a NuGet repository.
- Install the raptorpm Package Manager CLI tool from a nupkg file.
Installing the raptorpm CLI tool from a NuGet repository:
Before installing the raptorpm CLI tool, ensure the environment has been prepared with a NuGet source that points to the IoT.nxt package server (see steps above). Once the environment has been prepared, open the local machine’s terminal/command prompt and run the following command (the example is for Windows):
dotnet tool install -g raptorpm --version #.#.#.#
Ensure the version in the command is correct.
| You might need to add an environment variable to this command (a path variable) when installing the raptorpm on a Linux system. For Windows, if the user is using Visual Studio this tool might already be installed as part of the Visual Studio package. |
Installing the raptorpm CLI tool from a nupkg file:
Go to the relevant artifact store and download the latest available release version of the raptorpm.
Once the package has been downloaded:
Copy the NuGet package to a local temp directory, for example (for Windows):
cd C:\NuGets\IoTnxt.Raptor.ToolsUse DotNet to install the NuGet package. Ensure that the package version is correct:
dotnet tool install --add-source . -g raptorpm --version #.#.#.#
A successful installation should show an output similar to this:
You can invoke the tool using the following command: raptorpm
Tool 'raptorpm' (version '#.#.#.#') was successfully installed.
Verify installation:
To verify that the raptorpm tool has been installed, open the terminal/command prompt and execute the following command:
raptor -h`
This should produce the following output:
Description:

Usage:
  raptorpm [options] [command]

Options:
  Verbose, -v     Option to specify if command should be logged in detail
  --version       Show version information
  -?, -h, --help  Show help and usage information

Commands:
  packagemanager  Commands related to managing packages for device store
  devicestore     Commands related to executing functions on the device store
  configure       Commands related to configuring the raptor package manager
If the output reflects the code sample above, the Raptor Package Manager was successfully installed. If this output does not show, check the installation steps above to see where steps might have been left out.
Update to a new raptorpm tool version:
Execute the following command in the terminal/command prompt to update the version:
dotnet tool update raptorpm -g --version #.#.#.# -v q
Uninstall the raptorpm tool:
Uninstall the tool by executing the following command in the terminal/command prompt:
dotnet tool uninstall -g raptorpm
Configure the PublishProfile.json file
Once the raptorpm tool has been installed, the Publish Profile file needs to be configured. The CLI tool requires a Publish Profile in order for the developer to work with more than one publisher/author per Driver package. A Publish Profile can also have more than one Device Store (discussed below). The PublishProfiles.json file makes it possible to configure as many Driver packages (in the Device Store section) necessary for the application’s requirements.
The raptorpm Publish Profile Configuration structure is as follows:
- Publish Profile
- Device Store(s)
- Security Profile(s)
- Device Store(s)
The Publish Profile therefore needs to be configured before the user can set up the Driver package for publication. Security Profiles also need to be set up in the Publish Profile file so that the Driver package (linked in the Device Store section of the Publish Profiles file) is authenticated correctly for publication.
All of these sections are configured in the PublishProfile.json file, and will be discussed below.
There are two ways to configure the PublishProfiles.json file:
- Edit the file directly in the PublishProfiles.json file using a text editor.
- Run terminal/command prompt commands to edit the file and configure the relevant fields.
The section below will show how to run terminal/command prompt commands to configure the PublishProfiles.json file in the raptorpm package.
The Raptor Package Manager will have a sample Publish Profile file available once installed. To create a new file with terminal/command prompt commands, first delete the existing file by running:
raptorpm configure profile delete <SamplePublishProfile>
The sample Publish Profile’s name should be something similar to Sample.Profile.Name. To see the profile name, run:
raptorpm configure profile list
For more command options, see the section below.
1. Add Publish Profile
To see all commands related to configuring the Publish Profile in the terminal/command prompt, begin by running the following:
raptorpm configure profile -h
The output will look similar to the following:
Description:
  Commands related to publish profiles

Usage:
  raptorpm [options] configure profile [command]

Options:
  Verbose, -v     Option to specify if command should be logged in detail
  -?, -h, --help  Show help and usage information

Commands:
  add <ProfileName> <ProfileDescription> <Authors>   Add publish profile
  <Company> <Product> <Copyright>
  edit <ProfileName>                                 Edit a predefined publish profile
  list                                               Returns a list of the configured publish profiles available
  delete <ProfileName>                               Delete a preconfigured publish profile command
The following commands can be executed:
addeditlistdelete
The section below will discuss how to add a Publish Profile. First, to see all available commands related to adding a profile, run the following command:
raptorpm configure profile add -h
The output will be:
Description:
  Add publish profile

Usage:
  raptorpm [options] configure profile add <ProfileName> <ProfileDescription> <Authors> <Company> <Product> <Copyright>

Arguments:
  <ProfileName>         Specify Profile Name
  <ProfileDescription>  Specify Profile Description
  <Authors>             Specify author information which will be included in the package information,
  <Company>             Specify company information which will be included in the package information
  <Product>             Specify product name which will be included in the package information
  <Copyright>           Specify copyright information which will be included in the package information

Options:
  PackageIconFileName, -i <PackageIconFileName>       Specify the package icon file name which will be used when
                                                      compiling a package
  DeviceStoreName, -dsName <DeviceStoreName>          *Specify the device store name Also known as the device store
                                                      identifier. [default: ]
  DeviceStoreDescription, -dsDescription              Specify the device store description or purpose related to the
  <DeviceStoreDescription>                            device store [default: ]
  DeviceStoreCertificateSubjectName, -dsSubjectName   *Specify the device store X509 certificate subject name used tot
  <DeviceStoreCertificateSubjectName>                 secure and verify packages from this profile or author [default:
                                                      ]
  DeviceStoreUrl, -dsUrl <DeviceStoreUrl>             Specify the device store url. [default: ]
  DeviceStoreSecurityName, -secName                   *Specify device store security profile name. [default: ]
  <DeviceStoreSecurityName>
  DeviceStoreSecurityDescription, -secDescription     Specify device store security description [default: ]
  <DeviceStoreSecurityDescription>
  DeviceStoreSecurityIsActive, -secIsActive           Option to specify a name to greet. true or false [default: True]
  UserName, -secUser <secUser>                        Option to specify a username.
  Password, -secPassword <secPassword>                Option to specify a password.
  AuthenticationType, -secAuthentication              Option to specify a authentication type.
  <Basic|Digest|None|Password>
  ApiKeyLegend, -secApiKeyLegend <secApiKeyLegend>    Option to specify the api key legend or header key value.
  ApiKeyValue, -secApiKey <ApiKeyValue>               Option to specify the api key value in clear text.
  Force, -f                                           Option to force add the configuration ignoring existing profiles
                                                      and overwriting them. [default: False]
  Verbose, -v                                         Option to specify if command should be logged in detail
  -?, -h, --help                                      Show help and usage information
To add a Publish Profile, use the command:
raptorpm configure profile add <ProfileName> <ProfileDescription> <Authors> <Company> <Product> <Copyright>
As specified in the help section, the arguments that need to be passed are the following:
<ProfileName>- provide a profile name.<ProfileDescription>- provide a profile description.<Authors>- provide the name(s) of the author(s) responsible for the profile.<Company>- provide the company name (e.g. IoT.nxt).<Product>- provide the product name (e.g. V-Raptor).<Copyright>- indicate copyright information that will be included in the package information.
Note that it is best practice to include double quotes (inverted commas) for each argument, for example “IoT.nxt” for the Company name).
An example of this command is as follows:
raptorpm configure profile add "ProfileA" "Publish Profile A for Company X" "John Doe" "Company X" "Driver Y" "Copyright information related to the driver comes here" -i "Icon.ico"
Once a profile has been added, the output in the terminal/command prompt will be as follows:
Successfully added profile ProfileA
One can also run the following command to check whether the profile has been added:
raptor configure profile list -a -s -d
The output will look similar to the following, and should include the newly added profile:
Publish Profiles:
┌─────────────────────┬────────────────────────────┬──────────┬───────────────┬────────────────┬────────────────┬──────────────────┐
│ Profile Name        │ Description                │ IsActive │ Author(s)     │ Company        │ Product        │ Copyright        │
├─────────────────────┼────────────────────────────┼──────────┼───────────────┼────────────────┼────────────────┼──────────────────┤
│ Sample.Profile.Name │ Sample Profile Description │ True     │ Sample Author │ Sample Company │ Sample Product │ Sample Copyright │
└─────────────────────┴────────────────────────────┴──────────┴───────────────┴────────────────┴────────────────┴──────────────────┘

Device Stores:
┌─────────────────────┬─────────────────────────────────┬─────────────────────────────────┬─────────────────────────────────┬───────────────────┐
│ Profile Name        │ Device Store Name               │ Description                     │ X509 Certificate Subject Name   │ Device Store Url  │
├─────────────────────┼─────────────────────────────────┼─────────────────────────────────┼─────────────────────────────────┼───────────────────┤
│ Sample.Profile.Name │ Sample.Device.Store.Device.Name │ Sample Device Store Description │ Sample.Certificate.Subject.Name │ https://sampleurl │
└─────────────────────┴─────────────────────────────────┴─────────────────────────────────┴─────────────────────────────────┴───────────────────┘

Device Store Security Configuration:
┌─────────────────────┬─────────────────────────────────┬────────────────────────────────────┬────────────────────────────────────────────┬──────────┬─────────────────┬─────────────┬───────────┬────────────────┬─────────────────────┐
│ Profile Name        │ Device Store Name               │ Device Store Security Profile      │ Description                                │ IsActive │ Username        │ HasPassword │ HasApiKey │ Api Key legend │ Authentication Type │
├─────────────────────┼─────────────────────────────────┼────────────────────────────────────┼────────────────────────────────────────────┼──────────┼─────────────────┼─────────────┼───────────┼────────────────┼─────────────────────┤
│ Sample.Profile.Name │ Sample.Device.Store.Device.Name │ Sample.Security.Configuration.Name │ Sample Security Configuration Description. │ True     │ Sample.Username │ True        │ True      │ Sample-Api-Key │ Basic               │
└─────────────────────┴─────────────────────────────────┴────────────────────────────────────┴────────────────────────────────────────────┴──────────┴─────────────────┴─────────────┴───────────┴────────────────┴─────────────────────┘
2. Set up Device Store
To see all commands related to setting up the Device Store in the PublishProfiles.json file, run the following command:
raptorpm configure devicestore -h
The output will be the following:
Description:
  Commands related to configuration on the device store management

Usage:
  raptorpm [options] configure devicestore [command]

Options:
  Verbose, -v     Option to specify if command should be logged in detail
  -?, -h, --help  Show help and usage information

Commands:
  add <ProfileName> <DeviceStoreName> <DeviceStoreDescription> <DeviceStoreType>
  <DeviceStoreCertificateSubjectName> <DeviceStoreUrl>                              Command to add device store to an existing publish profile configured
  edit <ProfileName> <DeviceStoreName>                                              Command related to editing configured device store options
  list                                                                              Command to list the available device store configurations
  delete <ProfileName> <DeviceStoreName>                                            Command related to deleting preconfigured device store options profile
The following commands are listed above:
addeditlistdelete
To see all commands related to adding a Device Store, run the following command:
raptorpm configure devicestore add -h
The output will look similar to the following:
Description:
  Command to add device store to an existing publish profile configured

Usage:
  raptorpm [options] configure devicestore add <ProfileName> <DeviceStoreName> <DeviceStoreDescription> <DeviceStoreType> <DeviceStoreCertificateSubjectName> <DeviceStoreUrl>

Arguments:
  <ProfileName>                        Specify Profile Name
  <DeviceStoreName>                    Specify the device store name Also known as the device store identifier.
  <DeviceStoreDescription>             Specify the device store description or purpose related to the device store
  <DeviceStoreType>                    Specify the device store type.
  <DeviceStoreCertificateSubjectName>  Specify the device store X509 certificate subject name used tot secure and verify packages from this profile or author
  <DeviceStoreUrl>                     Specify the device store url.

Options:
  DeviceStoreSecurityName, -secName <DeviceStoreSecurityName>                       Specify device store security profile name. [default: ]
  DeviceStoreSecurityDescription, -secDescription <DeviceStoreSecurityDescription>  Specify device store security description [default: ]
  DeviceStoreSecurityIsActive, -secIsActive                                         Option to specify a name to greet. true or false [default: True]
  UserName, -secUser <secUser>                                                      Option to specify a username.
  Password, -secPassword <secPassword>                                              Option to specify a password.
  PasswordInClearText, -secClear                                                    Option to specify if we save the password in clear text.
  AuthenticationType, -secAuthentication <Basic|Digest|None|Password>               Option to specify a authentication type.
  ApiKeyLegend, -secApiKeyLegend <secApiKeyLegend>                                  Option to specify the api key legend or header key value.
  ApiKeyValue, -secApiKey <ApiKeyValue>                                             Option to specify the api key value in clear text.
  Verbose, -v                                                                       Option to specify if command should be logged in detail
  -?, -h, --help                                                                    Show help and usage information
The following can be configured under Device Store:
DeviceStoreSecurityName, -secName <DeviceStoreSecurityName>DeviceStoreSecurityDescription, -secDescription <DeviceStoreSecurityDescription>DeviceStoreSecurityIsActive, -secIsActiveUserName, -secUser <secUser>Password, -secPassword <secPassword>PasswordInClearText, -secClearAuthenticationType, -secAuthentication <Basic|Digest|None|Password>ApiKeyLegend, -secApiKeyLegend <secApiKeyLegend>ApiKeyValue, -secApiKey <ApiKeyValue>Verbose, -v
The help function above provides descriptions of each field and the arguments that need to be added to the command to configure the fields correctly in the PublishProfiles.json file.
Before configuring the fields above, run the following command to first add the Device Store:
raptorpm configure devicestore add <ProfileName> <DeviceStoreName> <DeviceStoreDescription> <DeviceStoreType> <DeviceStoreCertificateSubjectName> <DeviceStoreUrl>
An example of this would be:
raptorpm configure devicestore add "ProfileA" "Development.Store" "Profile A Development Store" "NuGet" "development.profilea" "http://companyx.devicestore"
| A Device Store profile can only be added to an existing Publish Profile instance as the Publish Profile name needs to be used to create the Device Store profile. Ensure that a Publish Profile has been configured before adding a Device Store profile. |
| In this example, a placeholder name was added for the Certificate under DeviceStoreCertificateSubjectName. This can be done until the Certificate is configured (which will be shown below). |
3. Set up Device Store Security - Authentication
To view all commands related to setting up the Device Store Security section in the PublishProfiles.json file, run the following command:
raptorpm configure devicestoresecurity -h
The output will be as follows:
Description:
  Commands related to security configuration on the device store profiles

Usage:
  raptorpm [options] configure devicestoresecurity [command]

Options:
  Verbose, -v     Option to specify if command should be logged in detail
  -?, -h, --help  Show help and usage information

Commands:
  add <ProfileName> <DeviceStoreName> <DeviceStoreSecurityName> <Basic|Digest|None|Password>   Command related to adding a new device store security configuration
  edit <ProfileName> <DeviceStoreName> <DeviceStoreSecurityName> <Basic|Digest|None|Password>  Command related to editing a preconfigured device store security configuration profile
  delete <ProfileName> <DeviceStoreName> <DeviceStoreSecurityName>                             Command related to deleting a preconfigured device store security configuration profile.
Once again, the user is able to add, edit and delete a Device Security profile configuration. The section below will look at how to add a Device Security profile configuration.
To view all available commands related to adding this profile, run the following command:
raptorpm configure devicestoresecurity add -h
The output will be the following:
Description:
  Command related to adding a new device store security configuration

Usage:
  raptorpm [options] configure devicestoresecurity add <ProfileName> <DeviceStoreName> <DeviceStoreSecurityName> <AuthenticationType>

Arguments:
  <ProfileName>                 Specify Profile Name
  <DeviceStoreName>             Specify the device store name Also known as the device store identifier.
  <DeviceStoreSecurityName>     Specify device store security profile name.
  <Basic|Digest|None|Password>  Option to specify a authentication type.

Options:
  DeviceStoreSecurityDescription, -secDescription <DeviceStoreSecurityDescription>  Specify device store security description [default: ]
  DeviceStoreSecurityIsActive, -secIsActive                                         Option to specify a name to greet. true or false [default: True]
  UserName, -secUser <secUser>                                                      Option to specify a username.
  Password, -secPassword <secPassword>                                              Option to specify a password.
  PasswordInClearText, -secClear                                                    Option to specify if we save the password in clear text.
  ApiKeyLegend, -secApiKeyLegend <secApiKeyLegend>                                  Option to specify the api key legend or header key value.
  ApiKeyValue, -secApiKey <ApiKeyValue>                                             Option to specify the api key value in clear text.
  Force, -f                                                                         Option to force add the configuration ignoring existing profiles and overwriting them. [default: False]
  Verbose, -v                                                                       Option to specify if command should be logged in detail
  -?, -h, --help                                                                    Show help and usage information
To add the Device Security profile configuration with authentication (including an API key), run the following command:
raptorpm configure devicestoresecurity add [options] <ProfileName> <DeviceStoreName> <DeviceStoreSecurityName> <AuthenticationType> -secUser <secUser> -secPassword <secPassword> -secApiKeyLegend <secApiKeyLegend>-secApiKey <ApiKeyValue>
An example of this would be:
raptorpm configure devicestoresecurity add "ProfileA" "Development.Store" "Development.Basic.Security" "Basic" -secUser "Administrator" -secPassword "LnqEJ5KH2J7Qafn8" -secApiKeyLegend "X-NuGet-ApiKey" -secApiKey "NuGet-Api-Key-Value"
| A Device Security profile can only be added to an existing Device Store instance as the Publish Profile name as well as the Device Store name need to be used to create the Device Security profile. Ensure that a Publish Profile and a Device Store has been configured before adding a Device Security profile. |
Activate the Publish Profile
To activate the Publish Profile, run the context command. To see all possible commands related to this, first run the following:
raptorpm configure context -h
The output will be as follows:
Description:
  Commands related to configuring context

Usage:
  raptorpm [options] configure context [command]

Options:
  Verbose, -v     Option to specify if command should be logged in detail
  -?, -h, --help  Show help and usage information

Commands:
  set <DefaultProfileName> <DefaultDeviceStoreName>
  <DefaultDeviceStoreSecurityProfileName>             Set the raptor package manager context which includes publish profile name, devices store and security profile name
  current-context                                     Displays the current context configured for the raptor package manager
The available commands are set and current-context. For the purposes of this example, the section below will discuss the set command (to set the initial Raptor Package Manager context).
To view all commands related to setting the Raptor Package Manager context (with set), run the following:
raptorpm configure context set -h
The output will be as follows:
Description:
  Set the raptor package manager context which includes publish profile name, devices store and security profile name

Usage:
  raptorpm [options] configure context set <DefaultProfileName> <DefaultDeviceStoreName> <DefaultDeviceStoreSecurityProfileName>

Arguments:
  <DefaultProfileName>                     Specify default publish profile Name
  <DefaultDeviceStoreName>                 Specify default device store name
  <DefaultDeviceStoreSecurityProfileName>  Specify default device store security profile name

Options:
  Verbose, -v     Option to specify if command should be logged in detail
  -?, -h, --help  Show help and usage information
The following arguments need to be passed with the set command:
<DefaultProfileName>- provide a default Publish Profile name.<DefaultDeviceStoreName>- provide a default Device Store name.<DefaultDeviceStoreSecurityProfileName>- provide a default Device Security profile name.
These names need to reflect the relevant Publish Profile, Device Store and Device Store Security names that were created in the previous steps.
To set the context, run the following:
raptorpm [options] configure context set <DefaultProfileName> <DefaultDeviceStoreName> <DefaultDeviceStoreSecurityProfileName>
An example of this would be:
raptorpm configure context set "ProfileA" "Development.Store" "Development.NoSecurity"
4. Configure Signing Certificate
In order to sign the Driver (this will be discussed in later sections of this document), a Certificate needs to be set up in the PublishProfiles.json file. The private and public Certificates needed for this process to be completed will be provided by IoT.nxt. This Certificates, in pem format, will need to be linked to the relevant Publish Profile.
To view all commands related to configuring the package to use a specific Certificate, run the following:
raptorpm configure certificate set -h
The output will be as follows:
Description:
  Configure raptor package manager default certificate

Usage:
  raptorpm [options] configure certificate set <PublicCertificateFilePath> <PrivateCertificateFilePath> <CertificateSubjectName> [<AllowInvalidCRL> [<VerifyUsingSigningCertificates>]]

Arguments:
  <PublicCertificateFilePath>       Specify the public certificate file path, .crt in pem format
  <PrivateCertificateFilePath>      Specify the private certificate file path, .key in pem format
  <CertificateSubjectName>          Specify the certificate subject name. If not specified will use the one in the certificate files
  <AllowInvalidCRL>                 Specify whether certificate validation will succeed if the CRL list is missing or invalid. [default: False]
  <VerifyUsingSigningCertificates>  Specify whether the SigningCertificates are used to verify certificates or not. [default: False]

Options:
  CertificatePassword, -p <CertificatePassword>  Specify the certificate password [default: ]
  SigningCertificates, -c <SigningCertificates>  Specify the signing certificates file path. Put in quotes and comma seperated to specify more than one. [default: ]
  EncryptedPrivateCertificateFile, -e            Specify whether the private certificate file, key file, is encrypted. . [default: False]
  Verbose, -v                                    Option to specify if command should be logged in detail
  -?, -h, --help                                 Show help and usage information
The command that will be discussed is the configure certificate set command, which configures the raptorpm CLI tool to use the relevant Certificate during the signing process.
To set the Certificate, run the following:
raptorpm [options] configure certificate set <PublicCertificateFilePath> <PrivateCertificateFilePath> <CertificateSubjectName> [<AllowInvalidCRL> [<VerifyUsingSigningCertificates>]]
An example of this would be the sample code below. Note that in this example it is assumed that the command is being executed in the same folder within which the Certificate files are located (i.e. signingcertificate.crt and signingcertificate.key). Absolute paths are also supported for this instance. Note also that the password is set, and that the argument AllowInvalidCRL is enabled:
configure certificate signingcertificate.crt signingcertificate.key signingcertificate-subjectname true -p password
The configure certificate set command will copy the public and private Certificates to the user’s configuration folder (located in the user directory), where <#UserName#> is the current user’s username. Also note that pfx files can be found in this folder.
C:\Users\<#UserName#>\.raptor\PackageManager\Certificates
| Note that the public Certificate will be used by the Driver Store during the Driver’s authentication/verification process. |
Verify that the Signing Certificate has been installed:
To verify that the Certificate has been installed, run the following:
raptorpm configure certificate search <SubjectName>
If the Certificate exists, the output will be something similar to:
C:\>raptorpm configure certificate search <SubjectName>
[RaptorEnvironmentExtension.ConfigureServices] Injecting IRaptorEnvironment
Certificate with subject name <SubjectName> located
For more options related to searching for Certificates, run:
raptorpm configure certificate search -h
The output will be as follows:
Description:
  Search for a X509 certificate in cli tool directory or certificate store by subject name.

Usage:
  raptorpm [options] configure certificate search <SubjectName>

Arguments:
  <SubjectName>  Subject name of x509 certificate

Options:
  SearchMode, -m <m>  Specify the search mode. [CertificateStore; Directory or Both] [default: Both]
  Verbose, -v         Option to specify if command should be logged in detail
  -?, -h, --help      Show help and usage information
5. Sample PublishProfiles.json file:
Once all the fields have been configured, the file will be structured and populated like the example below. The file will contain the following fields:
- Publish Profile
- Profile Name
- Profile Description
- Author Profile
- Device Store configurations
- A list of the Device Stores that have been configured for this Publish Profile
- Device Store Name
- Device Store Description
- Certificate Subject Name
- Device Store Security Configuration
- Context
{
  "Profiles": {
    "Sample.Profile.Name": {
      "ProfileName": "Sample.Profile.Name",
      "ProfileDescription": "Sample Profile Description",
      "IsActive": true,
      "AuthorProfile": {
        "Authors": "Sample Author",
        "Company": "Sample Company",
        "Product": "Sample Product",
        "Copyright": "Sample Copyright",
        "PackageIconFileName": null,
        "DeviceStoreConfigurations": {
          "Sample.Device.Store.Device.Name": {
            "Name": "Sample.Device.Store.Device.Name",
            "Description": "Sample Device Store Description",
            "Url": "https://sampleurl",
            "CertificateSubjectName": "Sample.Certificate.Subject.Name",
            "DeviceStoreSecurityConfiguration": {
              "Sample.Security.Configuration.Name": {
                "Name": "Sample.Security.Configuration.Name",
                "Description": "Sample Security Configuration Description.",
                "Active": true,
                "UserName": "Sample.Username",
                "Password": "Sample.Password",
                "AuthenticationType": 1,
                "ApiKeyLegend": "Sample-Api-Key",
                "ApiKeyValue": "SampleApiKeyValue"
              }
            }
          }
        }
      }
    }
  },
  "DefaultProfileName": "Sample.Profile.Name",
  "DefaultDeviceStoreName": "Sample.Device.Store.Device.Name",
  "DefaultDeviceStoreSecurityProfileName": "Sample.Security.Configuration.Name"
}
Import Driver Package Template / Create Driver Package
Once the Raptor Package Manager CLI tool has been installed and configured, the Driver Package Template can be imported so that the Driver can be signed, verified, compiled and distributed. This step publishes deployment configuration and Driver information, making the Driver available for deployment in V-Raptor.
The CLI tools related to this process can be accessed with the following command:
raptorpm packagemanager -h
This will show all commands related to the packagemanager:
Description:
  Commands related to managing packages for device store

Usage:
  raptorpm [options] packagemanager [command]

Options:
  Verbose, -v     Option to specify if command should be logged in detail
  -?, -h, --help  Show help and usage information

Commands:
  sign <Input> <SubjectName>    Digitally sign a package by X509 certificate subject name.
  verify <Input> <SubjectName>  Verify the signed package by X509 certificate subject name.
  compile <Input>               Compile a distribution package by author profile id
  distribute <Input>            Command to distribute package by device store profile
  signcdistribute <Input>       Sign, compile and distribute driver UI and Meta package
  template                      Command related to assist in getting started with a driver package template
To get started with the Driver package, import the template. Navigate to the relevant folder and run the following command in the terminal/command prompt to get command options related to importing the template:
raptorpm packagemanager template create -h
The output will show the following:
Description:
  Command to assist in creating driver package template used for distribution

Usage:
  raptorpm [options] packagemanager template create

Options:
  DriverName, -n <DriverName>  Option to specify a driver name value.
  Version, -s <Version>        Option to specify a version value.
  Verbose, -v                  Option to specify if command should be logged in detail
  -?, -h, --help               Show help and usage information
To import the template, add the -n <DriverName> and -s <Version> options to the command (as shown in the example below):
raptorpm packagemanager template create -n "IoTnxt.Raptor.Device.Teltonika" -s "4.0.21.1-rc
This will create a folder with the following folder structure:
- IoTnxt.Raptor.Device.Teltonika.v.4.0.21.1-rc
- Content
- deployment.json
- Data
- PackageInfo.json
- Content
How the Driver Package works
The Driver Package contains two files that provide information about how to deploy the Driver and what Driver meta information will be seen on the UI. These two files are:
deployment.json- provides information about how to deploy the Driver (Driver Meta Package).PackageInfo.json- provides Driver meta information that will be displayed in the UI (or can be seen in the CLI) (Driver UI Package).
Driver Meta Package
The Driver Meta Package (deployment.json) file will look similar to this. The template will provide a sample of this file that needs to be configured according to the application’s requirements:
{
  "Configs": {
    "Type": "ConfigSection",
    "Data": {
      "DevicesOptions.json": "{\n\t\"Devices\":{}\n}"
    }
  },
  "Certificate": {
    "Type": "CertificateSection",
    "AlternateNames": [
      "localhost"
    ]
  },
  "Kubernetes": {
    "Type": "KubernetesSection",
    "ContainerName": "containerdesitination",
    "RunCommand": "dotnet",
    "RunCommandArguments": [
      "deviceX.driver.service.dll"
    ],
    "EnvironmentalVariables": null,
    "OverrideExisting": true,
    "OverrideConfigs": false,
    "UsePersistentStorage": false,
    "StorageAmountBytes": 1048576,
    "IssueCertificates": true
  },
  "Endpoints": {
    "Type": "EndpointSection",
    "RpcTargets": {
      "default": "collector"
    },
    "RpcServer": true,
    "RpcClient": true
  }
}
This file describes what can be bundled with the Driver, which container should be used and more, including:
Configs:In this section you can include default configuration files. A good example of this file would be a “DevicesOptions.json” configuration file with sample configurations that can be enabled/disabled depending on the application’s requirements. This should not include configuration files that have passwords or generated content. Configuration files that have custom configurations can be included. Files such as the RPC files and database files should not be included in this section.
Certificate:Indicate whether or not there should be a Certificate. This will always be the case with a Driver build, so this section is mandatory.
Kubernetes:This is a very important section for the publication of the Driver as this section dictates which container will be deployed. For example, if a Docker container is being used with a CI/CD pipeline, this will be specified here along with the container’s name, type, etc.
Setting the
runcommand in this section also allows the user to have full control over what is being executed. If this is not specified, the default run command will be used.Endpoints:This section specifies with which other microservices the Driver will need to communicate. Generally, this is the client (Collector Service). Configure the RPC options necessary to communicate with Collector in this section.
Driver UI Package
The Driver UI Package (PackageInfo.json) file will look similar to the sample code below. The template will provide a sample of this file that needs to be configured according to the application’s requirements:
{
  "author": "IoT.Nxt",
  "authorUrl": "https://www.iotnxt.com/",
  "configKey": "",
  "description": "This package does this",
  "deviceCategory": "",
  "additionalDeviceCategories": [],
  "devicePackageVendor": "",
  "devicePackageVersion": "4.0.21.1-rc",
  "documentationUrl": "",
  "displayName": "IoTnxt.Raptor.Device.Teltonika",
  "driverType": "",
  "features": [],
  "imageUrl": "",
  "inlineDocumentation": "",
  "metaTags": [],
  "protocolType": "",
  "additionalProtocolTypes": [],
  "serviceInfo": "",
  "summary": "",
  "supportedDevices": [],
  "vendorUrl": "",
}
This file provides basic Driver meta information that can be displayed using the deployment manager. Certain fields in this file will be present in the UI (or will be used to filter and/or search for the Driver in the UI), such as:
authordescriptiondevicePackageVersiondevicePackageVendordisplayName
Other fields will not be visible in the UI but can be accessed in the CLI.
| The user can also add a link to documentation (under documentationUrl) that discusses the Driver and any other important relevant information. |
To access the information in the CLI (once the files have been customised), run the following commands (based on the package name and version):
raptorpm devicestore packageinfo -h
The command provided above will show the user all the options available when the user would like to see package information that has been configured in the Driver UI Package. The output will show as follows:
Description:
  Get package info based on the package name and version provided

Usage:
  raptorpm [options] devicestore packageinfo <PackageName> <Version>

Arguments:
  <PackageName>  Specify Package Name
  <Version>      Specify Package Version

Options:
  Verbose, -v     Option to specify if command should be logged in detail
  -?, -h, --help  Show help and usage information
To request an output that shows Driver UI Package information in the CLI, run the following command (with the appropriate <PackageName> and <Version>, as provided in the example below):
raptorpm devicestore packageinfo IoTnxt.Raptor.Device.Murdock.UI 4.0.41.1-alpha-2210141419
In this example, once the command is executed, the output will look similar to the following:
                                                Package Info
─────────────────────────────────────────────────────────────────────────────────────────────────────────────
  Key                          Value
─────────────────────────────────────────────────────────────────────────────────────────────────────────────
  Author                       IoTnxt
  AuthorUrl                    https://www.iotnxt.com/
  ConfigKey
  Description                  Murdock Device
  DeviceCategory               Protocol
  AdditionalDeviceCategories   Protocol1 , Protocol2
  DevicePackageVendor          IoT.nxt
  VendorUrl                    https://en.wikipedia.org/wiki/The_A-Team
  DevicePackageVersion
  DocumentationUrl             https://community.iotnxt.com/docs/raptor/supported-devices/v-raptor/drivers/
  DisplayName                  Murdock Device
  DriverType                   A-Team
  Features                     Guns , Bombs
  InlineDocumentation          This is where the instructions should be
  MetaTags
  PackageLastUpdated           Friday, 14 October 2022
  ProtocolType                 TCP
  AdditionalProtocolTypes      TCP , UDP
  ServiceInfo                  Some info
  Summary                      Watch out for murdock
  SupportedDevices             Too many to list
─────────────────────────────────────────────────────────────────────────────────────────────────────────────

                                       Additional Package Meta Info
──────────────────────────────────────────────────────────────────────────────────────────────────────────
  Key                        Value
──────────────────────────────────────────────────────────────────────────────────────────────────────────
  Id                         IoTnxt.Raptor.Device.Murdock.UI
  Version                    4.0.41.1-alpha-2210141419
  Authors                    Robotron
  Requirelicenseacceptance   false
  Description                This package contains functionality related to IoTnxt.Raptor.Device.Murdock
──────────────────────────────────────────────────────────────────────────────────────────────────────────
| The information provided in the CLI will depend on how the PackageInfo.json file was configured in the Driver Package. |
Sign, Compile and Distribute the Driver Package (Publish the Driver)
Once the Driver Meta Package and Driver UI Package have been customised, the Driver package is ready to be distributed (made ready to publish in V-Raptor).
1. Sign the Driver Package
Signing package content files will add a digital signature to the file. The sign command (see below) requires the path of the file that is going to be signed and the subject name of the installed Certificate (see more details about the Certificate above under “Publish Profiles”). The private key on the Certificate is used as the key to sign the file.
Run the command:
raptorpm packagemanager sign -h
This shows all the options available that are related to the sign command in the CLI. The output will look as follows:
Description:
  Digitally sign a package by X509 certificate subject name.

Usage:
  raptorpm [options] packagemanager sign <Input> <SubjectName>

Arguments:
  <Input>        Provide the file path of the package to sign.
  <SubjectName>  Provide the X509 certificate subject name. This certificate will be used to sign the package

Options:
  OutputFilePath, -o <o>                                       Specify the full output file path and name of the file to use for the secured file. [default: ]
  packagecontenttype, -p <DeploymentPackage|MetaPackage|None>  Specify the package type [default: DeploymentPackage]
  Verbose, -v                                                  Option to specify if command should be logged in detail
  -?, -h, --help                                               Show help and usage information
To sign a file, the command will look similar to this example:
raptorpm packagemanager sign "C:\Demo\IoTnxt.Raptor.Device.Teltonika.v.4.0.21.1-rc\Content\deployment.json" "test.raptor.iotnxt.io"
The command is followed by the <Input> (the file path) and the <SubjectName> (which in this case is “test.raptor.iotnxt.io”). The output will look similar to:
Secured package file written to the following path: C:\Demo\IoTnxt.Raptor.Device.Teltonika.v.4.0.21.1-rc\Content\deployment.secured.json
The chosen file has now been signed.
Each Driver Meta Package and Driver UI Package in the NuGet stream has the option to be signed. When signed, the packages will contain a digital signature which will be used to verify the package. This signature helps V-Raptor identify the Driver as a trusted Driver.
Signatures will be visible in the V-Raptor UI and indicate the following:
- Yellow checkmark: the Driver is not signed.
- Green checkmark: the Driver content is signed.
- Red checkmark: the Driver is signed but the signature is not trusted.
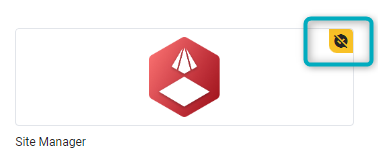
Figure 1 - Driver Signature Example - Yellow (not signed)
The image above shows an example of a listed Driver on V-Raptor that has not been signed. This is indicated with the yellow checkmark that has a line through it.
2. Compile the Driver Package
To compile the Driver Package with all its configuration and deployment information, run the following command (to see all options related to the compile command):
raptorpm packagemanager compile -h
The output will show as follows:
compile:
Description:
  Compile a distribution package by author profile id

Usage:
  raptorpm [options] packagemanager compile <Input>

Arguments:
  <Input>  Option to specify a input file path of the package to created or packaged.

Options:
  ProfileName, -p <p>                  Specify the author profile id to use during package construct. [default: ]
  Output, -o <o>                       Specify the output directory [default: ]
  Description, -d <d>                  Specify package description [default: ]
  DistributionPackageType, -t <NuGet>  Specify the package type as the destination output [default: NuGet]
  Verbose, -v                          Option to specify if command should be logged in detail
  -?, -h, --help                       Show help and usage information
To compile a specific Driver Package, run the compile command with the input file path of the package (as shown in the example below):
raptorpm packagemanager compile "IoTnxt.Raptor.Device.Teltonika.v.4.0.21.1-rc" "ProfileA"
The compile command will produce the following two nupkg files in the package folder:
IoTnxt.Raptor.Device.Teltonika.UI.4.0.21.1-rc.nupkgIoTnxt.Raptor.Device.Teltonika.UI.Meta.4.0.21.1-rc.nupkg
These files make it possible for the package to be distributed and published to V-Raptor.
3. Distribute the Driver Package
For commands and arguments related to the distribute command, run:
raptorpm packagemanager distribute -h
The output will show as follows:
Description:
  Command to distribute package by device store profile

Usage:
  raptorpm [options] packagemanager distribute <Input>

Arguments:
  <Input>  Option to specify a input file path of the package to distribute.

Options:
  ProfileName, -p <p>                                          Specify the author profile id to use during package construct. [default: ]
  DeviceStoreName, -d <d>                                      Option to specify the device store name to upload to. [default: ]
  DeviceStoreSecurityProfile, -s <DeviceStoreSecurityProfile>  Option to specify the device store security profile name to use during upload. [default: ]
  IgnoreDuplicates, -i <IgnoreDuplicates>                      Option to specify if the process should ignore duplicates at destination use during upload. [default: True]
  Verbose, -v                                                  Option to specify if command should be logged in detail
  -?, -h, --help                                               Show help and usage information
For each of the nupkg files compiled above, run the following command(s) (replace the example file name with the relevant file name):
raptorpm packagemanager distribute IoTnxt.Raptor.Device.Teltonika.UI.4.0.21.1-rc.nupkg
raptorpm packagemanager distribute IoTnxt.Raptor.Device.Teltonika.UI.Meta.4.0.21.1-rc.nupkg
This will publish the Driver Package to the V-Raptor Device Store. The Driver will be available in the UI under Deployment Manager -> Deploy New Driver -> Choose a driver (in V-Raptor):
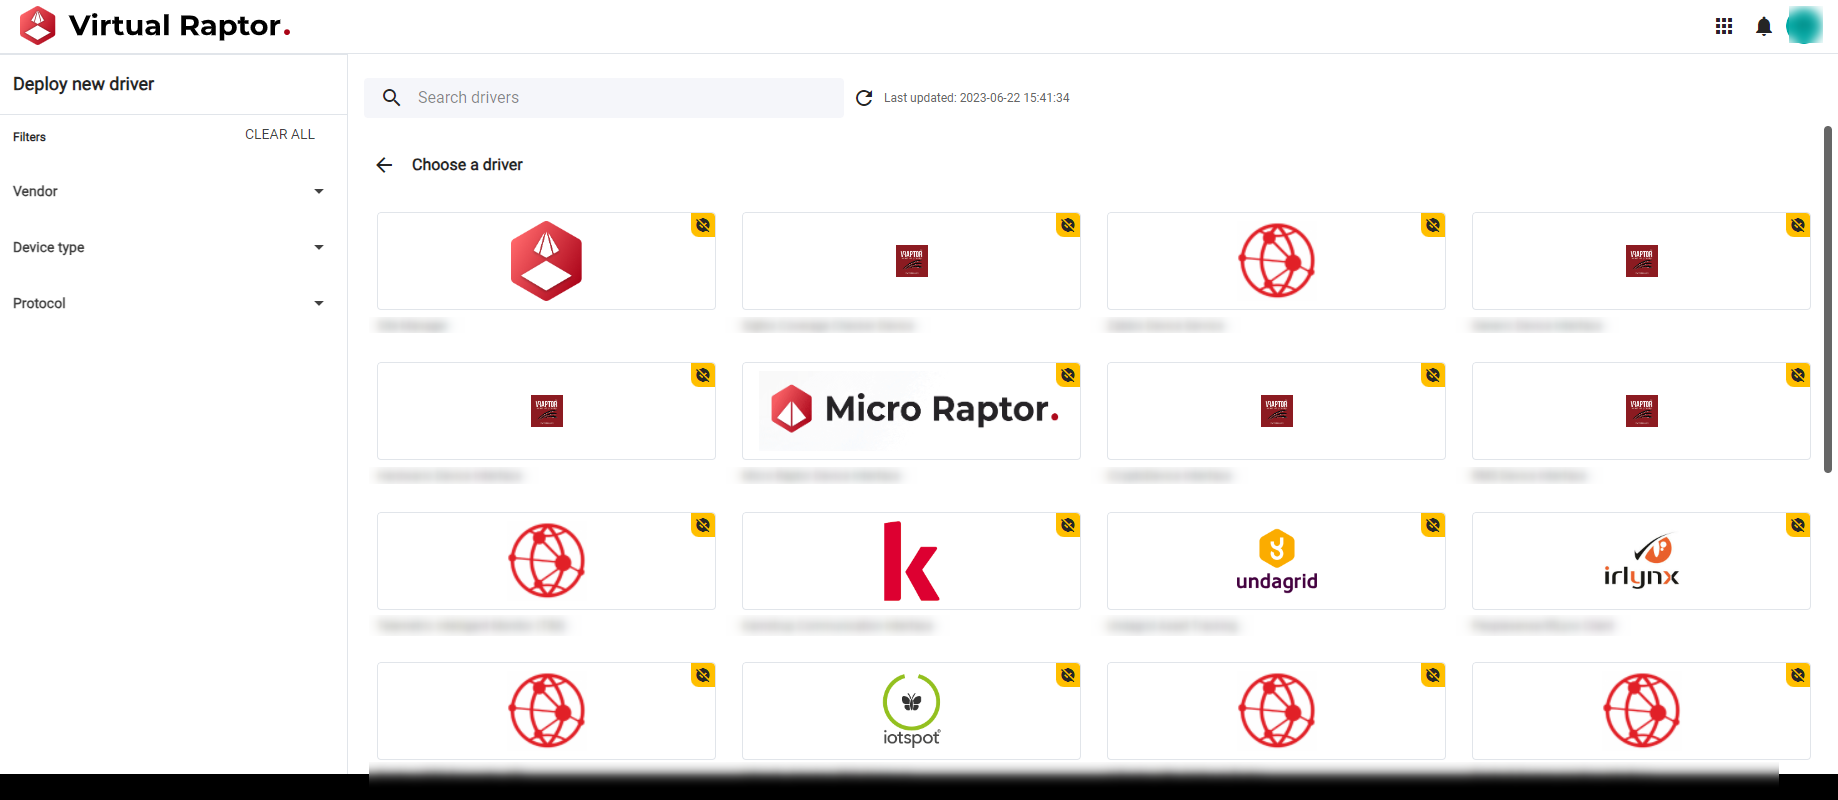
Figure 2 - List of Drivers in the V-Raptor UI (Deploy new driver)
The CLI can also be used to check whether the Driver has been distributed.
To see all the Device Stores available, run:
raptorpm devicestore list
The output will look similar to this:
[RaptorEnvironmentExtension.ConfigureServices] Injecting IRaptorEnvironment
Package list result using the following arguments: Include pre-release packages [True],Skip [0],Take [1000] returned:
Current Context Configuration: Profile Name : [IoTnxt], Device Store : [devStore], Security Profile : [devStoresec]
Package list result using the following arguments:
Include pre-release packages [True],
Skip [0],
Take [1000]
===============
Package: [IoTnxt.Raptor.Apps.xxxx]
Latest Version: [2.0.4]
===============
Package: [IoTnxt.Raptor.Device.xxxxx]
Latest Version: [2.0.4]
===============
Package: [IoTnxt.Raptor.Device.xxxxx]
Latest Version: [2.0.4]
===============
Package: [IoTnxt.Raptor.Device.xxxxx]
Latest Version: [2.0.4]
===============
Package: [IoTnxt.Raptor.Device.xxxxx]
Latest Version: [2.0.4]
===============
Package: [IoTnxt.Raptor.Device.xxxxx]
Latest Version: [2.0.4]
===============
Package: [IoTnxt.Raptor.Device.xxxxx]
Latest Version: [2.0.4]
Look for the relevant Device Store on the list. If it is not on the list, retake the steps to create, sign, compile and distribute the Driver Package and check the list again.
4. CLI packagemanager command options
It is possible to sign, compile and distribute the package with one command only. Run the following command to see all options:
raptorpm packagemanager -h
The output will show as follows:
Description:
  Commands related to managing packages for device store

Usage:
  raptorpm [options] packagemanager [command]

Options:
  Verbose, -v     Option to specify if command should be logged in detail
  -?, -h, --help  Show help and usage information

Commands:
  sign <Input> <SubjectName>    Digitally sign a package by X509 certificate subject name.
  verify <Input> <SubjectName>  Verify the signed package by X509 certificate subject name.
  compile <Input>               Compile a distribution package by author profile id
  distribute <Input>            Command to distribute package by device store profile
  signcdistribute <Input>       Sign, compile and distribute driver UI and Meta package
  template                      Command related to assist in getting started with a driver package template
Note that one of the options is signcdistribute. This allows the user to sign the package, compile it and distribute both the Meta and UI packages at the same time.
To see all commands related to signcdistribute, run:
raptorpm packagemanager signcdistribute -h
The output will show as follows:
Description:
  Sign, compile and distribute driver UI and Meta package

Usage:
  raptorpm [options] packagemanager signcdistribute <Input>

Arguments:
  <Input>  Option to specify a input file path of the package to distribute.

Options:
  ProfileName, -p <p>                      Specify the author profile id to use during package construct. [default: ]
  DeviceStoreName, -d <d>                  Option to specify the device store name to upload to. [default: ]
  DeviceStoreSecurityProfile, -s           Option to specify the device store security profile name to use during
  <DeviceStoreSecurityProfile>             upload. [default: ]
  ThrowExceptionOnAlreadySigned, -e        Throw an exception when a file is already signed and stop process, or
                                           specify false to continue [default: True]
  IgnoreDuplicates, -i <IgnoreDuplicates>  Option to specify if the process should ignore duplicates at destination use
                                           during upload. [default: True]
  SkipSigningProcess, -k                   Option to specify if the process should skip the signing process. [default:
                                           False]
  Verbose, -v                              Option to specify if command should be logged in detail
  TimeoutSeconds, -timeout <timeout>       Get or set the option to configure the interval in seconds prior to an
                                           command throwing a timeout exception. [default: 30]
  -?, -h, --help                           Show help and usage information
In this case, the <Input> is the input file name of the package (not the individual nupkg files as they do not yet exist). This command will create the nupkg files, sign the Driver Package and distribute the nupkg files in the package.
To do this, run (in this example, IoTnxt.Raptor.Device.MothTracking.v.2.0.4-alpha is the name of the package folder):
raptorpm packagemanager signcdistribute IoTnxt.Raptor.Device.MothTracking.v.2.0.4-alpha
The output (for the example used above) will show as follows:
Validation Options and arguments
Validation Options and arguments : Passed
Signing of files for package content
Expected files to sign:
Meta: IoTnxt.Raptor.Device.MothTracking.v.2.0.4-alpha\Content\deployment.json
UI: IoTnxt.Raptor.Device.MothTracking.v.2.0.4-alpha\Data\PackageInfo.json
Signing of files for package content: Passed
Compiling Packages
Compiling Packages: Passed
Distribute Meta Package
Distribute UI Package
Distribute Packages: Passed
Deploy the Driver
To deploy the Driver once it has been published, open the V-Raptor portal and navigate to Deployment Manager:

Figure 3 - Deployment Manager
Click on the “Deploy New Driver” button:
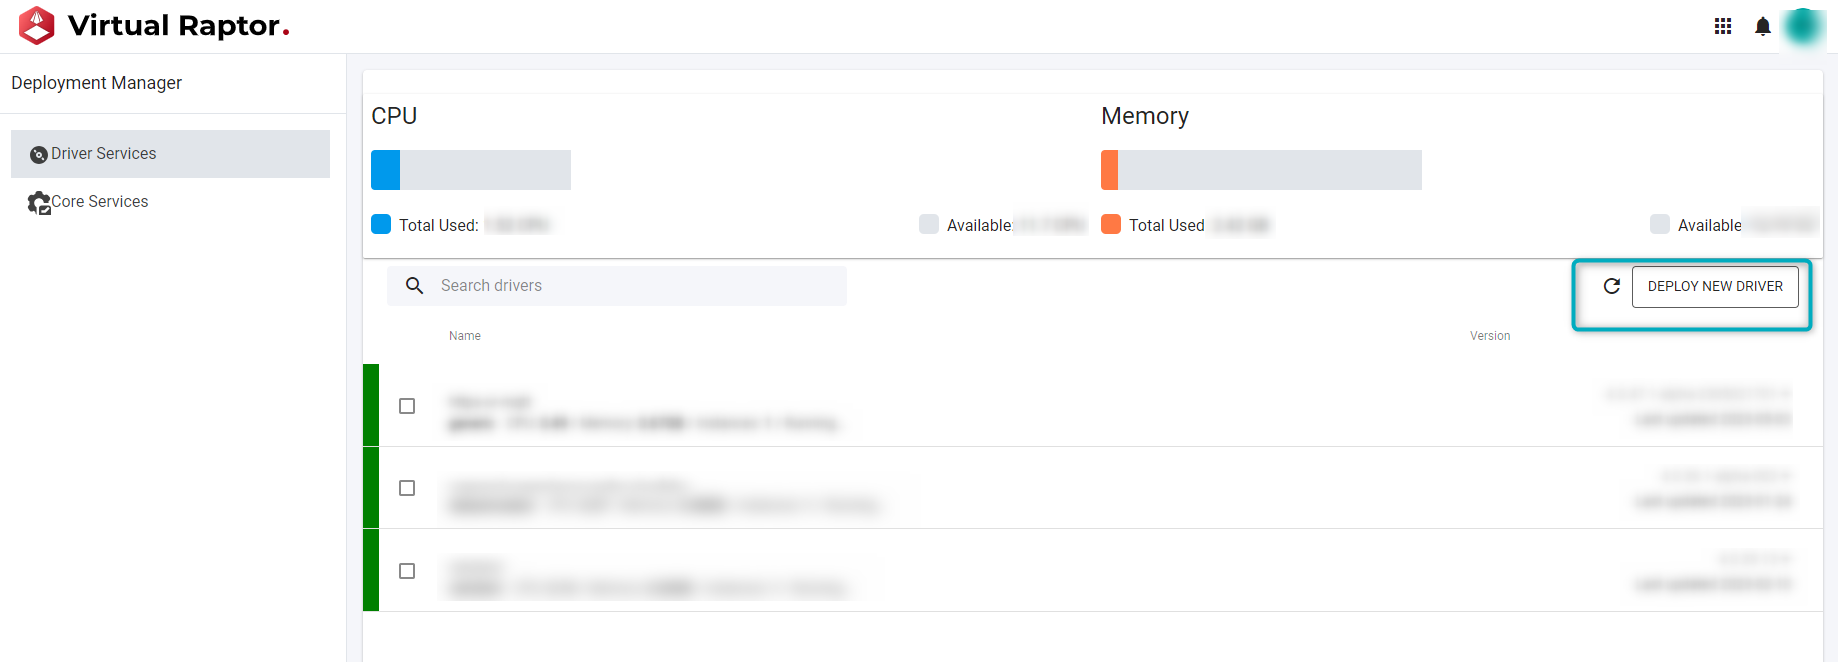
Figure 4 - Deploy New Driver
In the “Deploy new driver” page, search for the published Driver. Search by scrolling, using the search bar or searching by Vendor, Device Type or Protocol. Once the Driver is found, click on it:
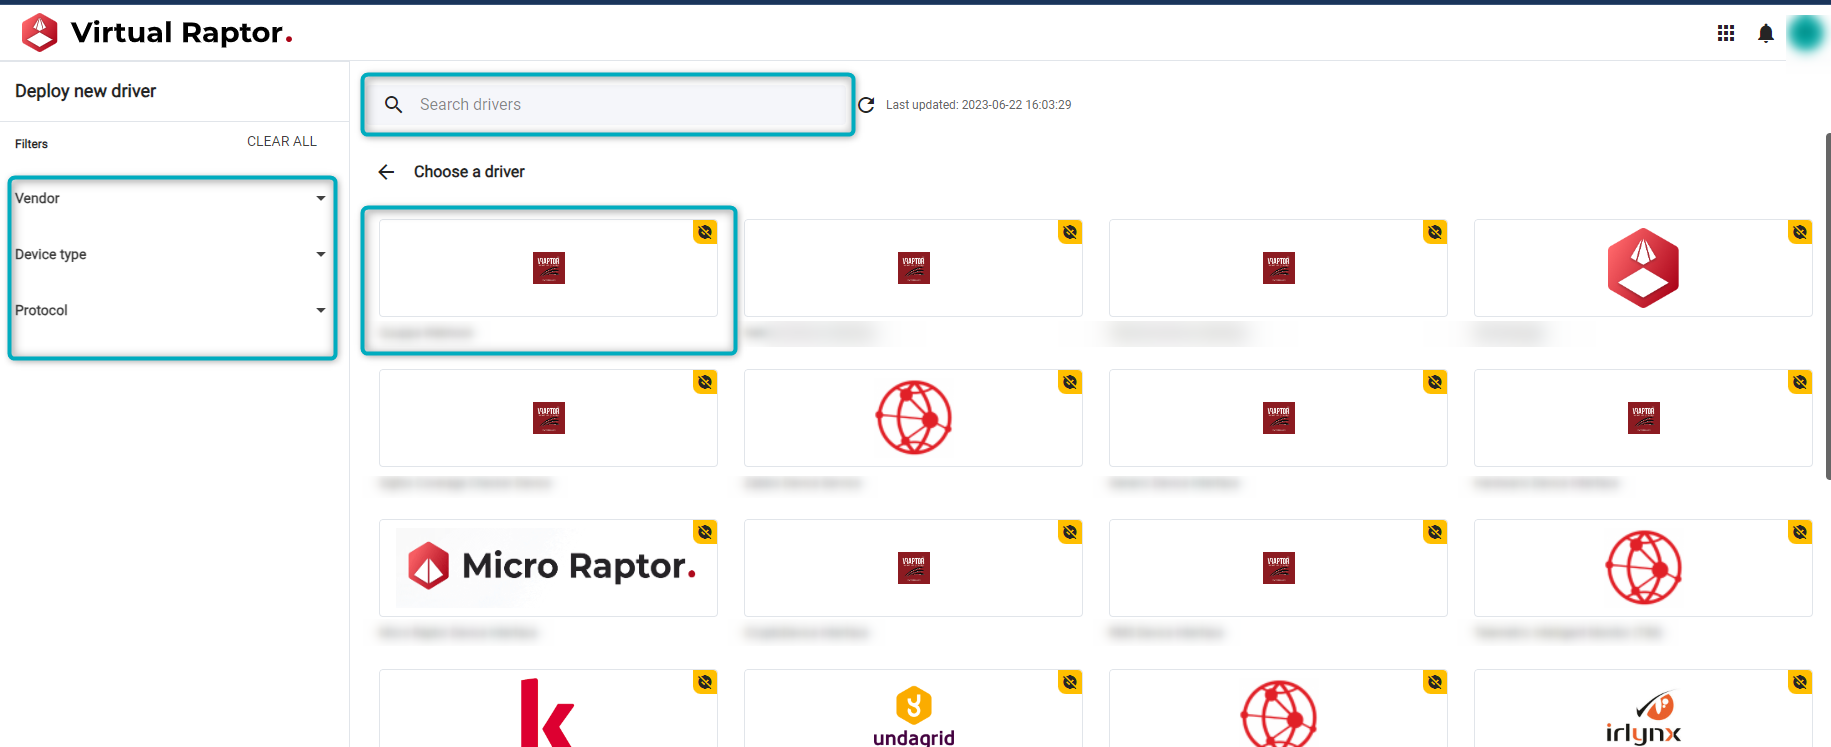
Figure 5 - Choose a Driver
Once the Driver is selected, a window popup on the right will prompt the user to add a Device name and then click on the “Deploy” button:
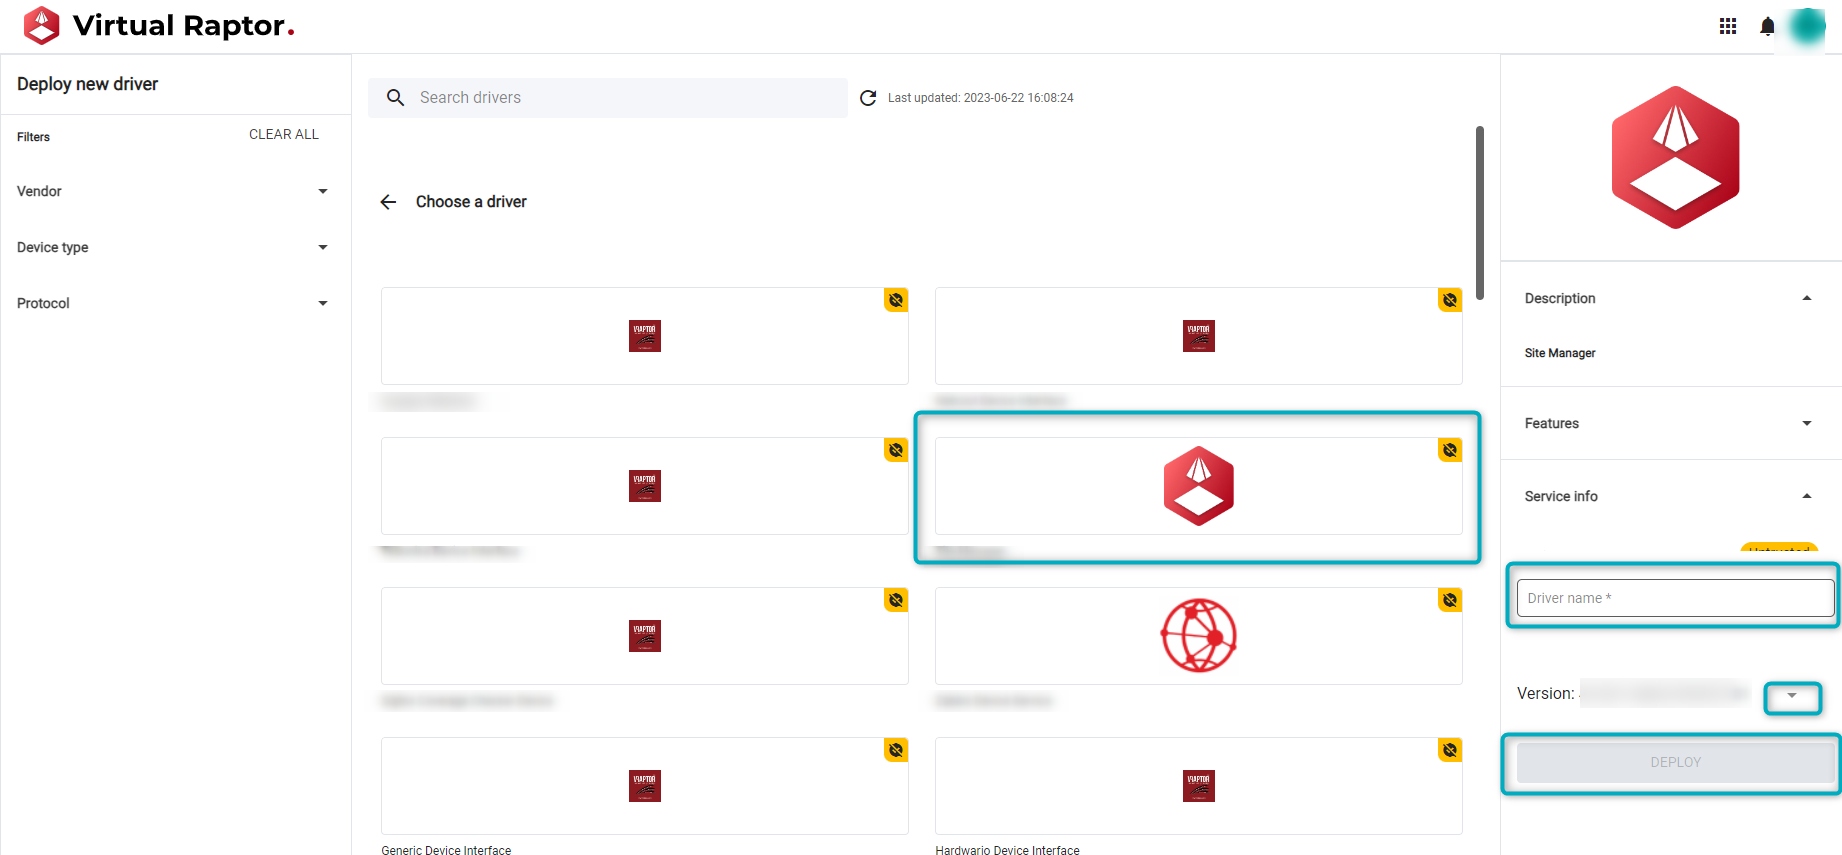
Figure 6 - Deploy Driver in V-Raptor
Information such as versions (click on the expand button next to the version number) will be available. Other information provided in the Driver UI Package will also be available here, such as the Driver Description, Features, and Service Information.
Once the “Deploy” button has been clicked, the Driver has been deployed.