
Connecting to the V-Raptor
Dec 7 2023 at 12:00 AM
Certificates need to be configured/added to the Driver (the SDK package template) before telemetry can be sent to the V-Raptor and Commander.
The SDK contains placeholder certificates (and other authentication files) necessary to connect to the V-Raptor. These need to be replaced with application-specific files (certificates, etc) that have been generated to connect devices to the V-Raptor.
Where to find the files
The applicable folders and files for this step can be found here:
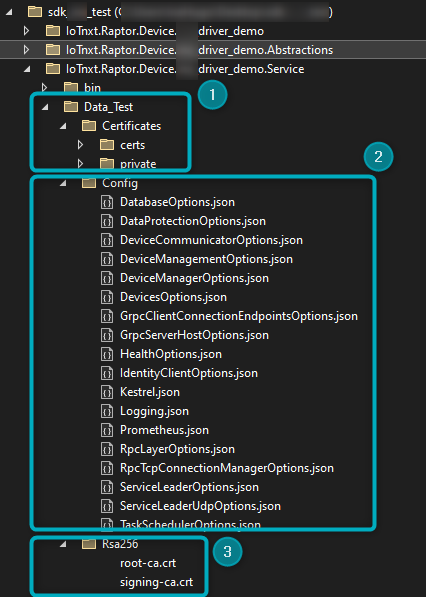
Figure 1 - Certificates and other authentication files
- Data_Test -> Certificates - The certs and private files in this folder need to be replaced with generated certificates/files.
- Config - The following files need to be configured:
- DataProtectionOptions.json
- IdentityClientOptions.json
- RpcLayerOptions.json
- Rsa256 - The Root and Signing CA certificates to place here can be found in the V-Raptor portal.
Certificate
Go to the V-Raptor portal to issue a certificate:
| To issue a certificate, ensure the V-Raptor is open for development. |
- Open the V-Raptor portal.
- Navigate to Credential Manager.
- Click on the “Generate Certificate” button found in the top-right hand of the page:
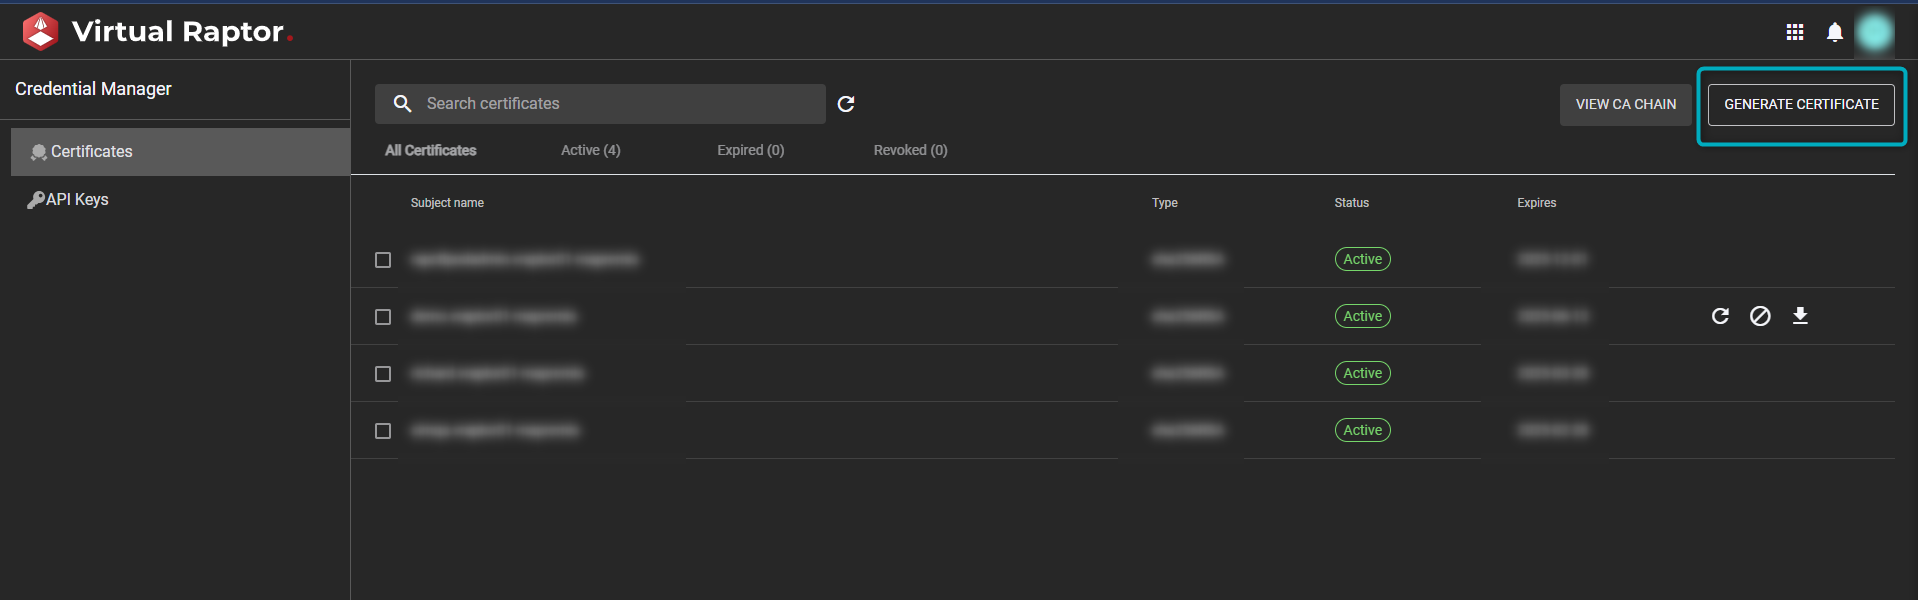
Figure 2 - Generate Certificates in V-Raptor Portal
In the window that opens, generate a certificate and a key for the certificate, and replace the placeholder files with the newly generated files here:
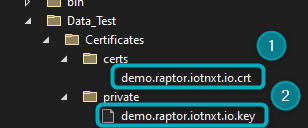
Figure 3 - Replace certificates in the SDK
Navigate to the DataProtectionOptions.json file in the Config folder:

Figure 4 - DataProtectionOptions file
In the file, change the CertificateSubjectName to the name of the certificate added to the certs file in the Certificates folder:
 {
   "DataProtectionOptions": {
     "CertificateSubjectName": "[add new certificate subject name here]",
     "AllowInvalidCRL": true,
     "VerifyUsingSigningCertificates": true,
     "SigningCertificates": [
       "$data$/Rsa256/root-ca.crt",
       "$data$/Rsa256/signing-ca.crt"
     ]
   }
 }
| Ensure all replaced files are copied to the output directory. |
Identity Client Options
Navigate to the IdentityClientOptions.json file found in the Config folder:
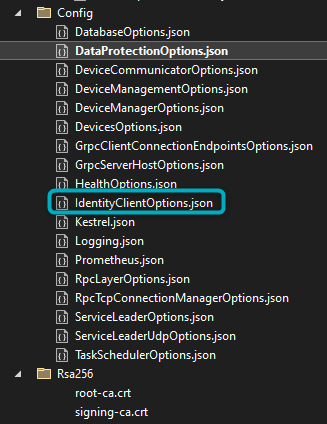
Figure 5 - IdentityClientOptions file
In the file, change the placeholder URL to the URL that will allow the devices to talk to V-Raptor:
 {
   "IdentityClientOptions": {
     "IdentityServiceURL": "https://...", //Add URL that will allow devices to talk to V-Raptor here
     "APIName": "RaptorRPC",
     "EnableAspAuthentication": false
   }
 }
RPC Options
Navigate to the RpcLayerOptions.json file in the Config folder:

Figure 6 - RpcLayerOptions file
In the file, ensure that the RpcLayer (either grpc or signalr) is correct:
{
 "RpcLayerOptions": {
   "RpcLayer": "grpc"
 }
}
Rsa256
To get the Root and Signing CA, go to the V-Raptor portal and navigate to Credential Manager:
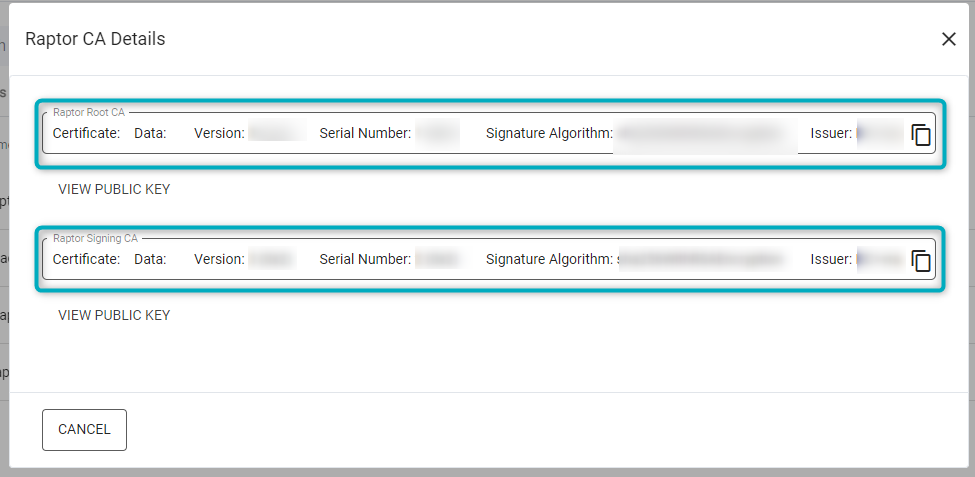
Figure 7 - Root and Signing CA
- Click on “View CA Chain”.
- In the window that opens, copy the Root and Signing CA.
Replace the data in the current root-ca-crt and signing-ca-cert files in the Rsa256 folder with the copied information:
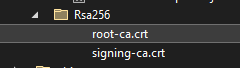
Figure 8 - Root and Signing CA files