
Xovis Telemetry Interface
Jan 30 2023 at 12:00 AM
Introduction
Xovis is an international provider for intelligent people flow solutions across airports, retail, transportation and smart buildings.
![]()
Figure 1 - Xovis
For more information on Xovis, visit their website by clicking on this link.
Aim
The aim is to inspire organisations to digitalise and optimise people flow, as well as to translate accurate, real-time data into optimised people flow. In addition, it is to improve mobility, security and facility management to enhance customer experiences.
Xovis has build people flow solutions for various industries like the following sectors:
Building - Get more efficient by knowing how people move in high-demand areas such as meeting rooms and restaurants.
Transportation - Automatic passenger counting to keep track of all passengers accurately and improve operations.
Airport - Optimise passenger flow and make real-time queue management in airports controllable and predictable.
Retail - Understand customers by analysing flow. Improve store performance and enhance customer journey.
Approach
People counting sensors
The Xovis 3D sensors master every people counting and people flow measurement challenge with high precision. This technology enables people counting and tracking in real-time.
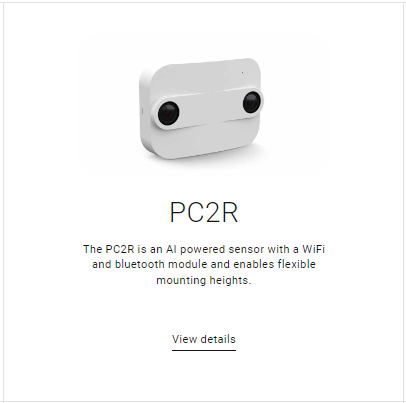
Figure 2 - Certified People Counting Sensor
For more details on PC2R sensor, follow this link.
The sensor will be configured to push data via HTTPs using two separate endpoints:
- Xovis Events - Data push event will be triggered, every time the line is crossed, the sensor will them send the telemetry data of the line crossing event to the driver.
- Xovis Line count data - Data push will be triggered on a pre-configured interval so send a total count of the line count events up to that point in time.
Device functionality overview
A high level flow diagram of the Xovis V-Raptor Driver is shown in Figure 3.
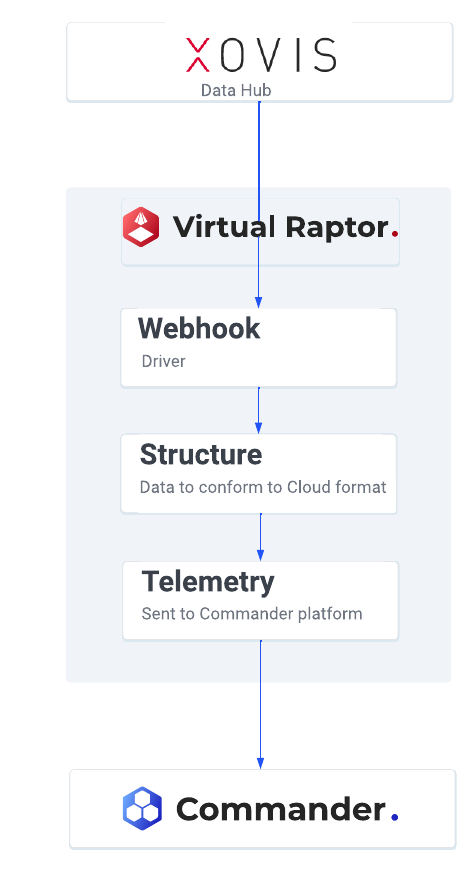
Figure 3 – Xovis V-Raptor Driver
Capability
The Xovis driver receives data from Xovis sensor devices that can relay information such as:
- Line crossing events when a person enters or exit the door/building where the sensor is installed.
- Total counts of people who entered and exited the door/building where the sensor is installed.
Protocol Information
The Line count and line crossing invents telemetry data will be send from the Xovis sensor device via HTTP(s) to the driver. When using Xovis sensor, the following raw packets can be expected from the sensor:
- Xovis Events payload example
[ {
  "timestamp" : 1610714071535,
  "type" : "LineCrossing",
  "serial" : "00:1E:**:**:**:*3",
  "direction" : "backward",
  "object" : {
    "id" : 5,
    "x" : 308,
    "y" : 217,
    "height" : 1877,
    "gender" : "MALE",
    "viewDirection" : {
      "x" : 0.972629,
      "y" : -0.232364
    },
    "hasTag" : false,
    "faceMask" : "MASK"
  },
  "countItem" : {
    "id" : 0,
    "name" : "Line 0"
  },
  "objectType" : "PERSON"
}, {
  "timestamp" : 1610714071535,
  "type" : "LineCount",
  "serial" : "11:**:**:**:**:*6",
  "direction" : "backward",
  "object" : {
    "id" : 5,
    "x" : 308,
    "y" : 217,
    "height" : 1777,
    "gender" : null,
    "viewDirection" : null,
    "hasTag" : false,
    "faceMask" : null
  },
  "countItem" : {
    "id" : 0,
    "name" : "Line 1"
  },
  "objectType" : "PERSON"
} ]
- Line count data example payload
{
  "sensor-time": {
    "timezone": "Africa/Johannesburg",
    "time": "2022-07-05T13:21:06+02:00"
  },
  "status": { "code": "OK" },
  "content": {
    "element": [
      {
        "element-id": 0,
        "element-name": "Line 0",
        "sensor-type": "SINGLE_SENSOR",
        "data-type": "LINE",
        "from": "2022-07-05T02:00:00+02:00",
        "to": "2022-07-06T02:00:00+02:00",
        "resolution": "ONE_DAY",
        "measurement": [
          {
            "from": "2022-07-05T02:00:00+02:00",
            "to": "2022-07-06T02:00:00+02:00",
            "value": [
              { "value": 51, "label": "fw" },
              { "value": 46, "label": "bw" }
            ]
          }
        ]
      }
    ]
  },
  "sensor-info": {
    "serial-number": "80:**:**:**:**:*F",
    "ip-address": "19*.***.**.**2",
    "name": "Tesla",
    "group": "Office",
    "device-type": "PC2R"
  }
}
Integration Plan
Design Specifications
This specific driver only focuses on the HTTP(s) method of obtaining telemetry data. This implies that this driver will expose two API endpoints, which the sensor devices will be configured to push the telemetry data through to the driver. Then the driver will transform the data then pass it to Commander.
Here is a run down of the drivers device configuration:
Device configuration options
{
  "Devices": {
    "XovisEventsDeviceName": {
      "Enabled": true,
      "DeviceType": "XovisEvents",
      "Debug": true,
      "GatewayId": "Xovis-*******",
      "GroupName": "********.XOVIS",
      "SendDeviceIdAsGatewayId": true
    },
    "XovisLineCountDataDeviceName": {
      "Enabled": true,
      "DeviceType": "XovisLineCountData",
      "Debug": true,
      "GatewayId": "Xovis-*****************",
      "GroupName": "*******.XOVIS",
      "SendDeviceIdAsGatewayId": true
    }
  }
}
Device configuration definitions
| Property | Description | Type | Defaults |
| XovisEventsDeviceName | The device name for this device. This has to be specified. | string | - |
| Enabled | Gets or sets whether this device is enabled. | bool | false???? |
| DeviceType | Gets or sets the type of this device. To use the moovement device, this has to be ‘MoovementClient’. Otherwise if defining a default device, it must be ‘DefaultProperties’. | string | - |
| Debug | Gets or sets whether debug information is written to console/log file for this specific device. | bool | false??? |
| GatewayId | Gets or sets the gateway identifier. | string | Leave this blank or null to use to the collector’s service identifier. |
| GroupName | Gets or sets the group name, if required. | string | - |
| SendDeviceIdAsGatewayId | Dictates if the device Id is used as the GatewayId or not. This overides ‘GatewayId’ if specified. | bool | true |
Usage
Steps on how to deploy and configure the driver
The link below demonstrates the steps to follow when a user deploys and configures a V-Raptor driver:
Deployment Manager Application
Device Configuration Example and walkthrough
Device configuration options
{
  "Devices": {
    "XovisEventsDeviceName": {
      "Enabled": true,
      "DeviceType": "XovisEvents",
      "Debug": true,
      "GatewayId": "Xovis-********",
      "GroupName": "*********.XOVIS",
      "SendDeviceIdAsGatewayId": true
    },
    "XovisLineCountDataDeviceName": {
      "Enabled": true,
      "DeviceType": "XovisLineCountData",
      "Debug": true,
      "GatewayId": "Xovis-***********",
      "GroupName": "*********.XOVIS",
      "SendDeviceIdAsGatewayId": true
    }
  }
}
- We Create a device called: XovisEventsDeviceName.
- We want the device to run when deployed, so we must make sure that the Enabled tag is set to true.
- Ideally logging should initially be enabled to ensure that everything is running correctly so Debug should be set to true.
- Depending on the gateway requirements, a gateway must be manually defined or driver defined. If the tag “SendDeviceIdAsGatewayId” is set to true, it will use the serial number of the Xovis sensor device that was attached to the payload, otherwise it will use the GatewayId tag’s value. In the example above, we set it to false, so the GatewayId property will be used.
- We set The “GroupName” for telemetry routing. In the sample above, it is set to VFCARDIFF.XOVIS.
- The gateway path is constructed as follows: GatewayID.GroupName:DeviceType/DeviceName. This means that at this point with our config, our telemetry will be sent as ‘Xovis-EventsDev.VFCARDIFF.XOVIS:XovisEvents/XovisEventsDeviceName’.
Xovis sensor device configuration
The following configurations are done by the Hardware Support team
- Events endpoint configuration
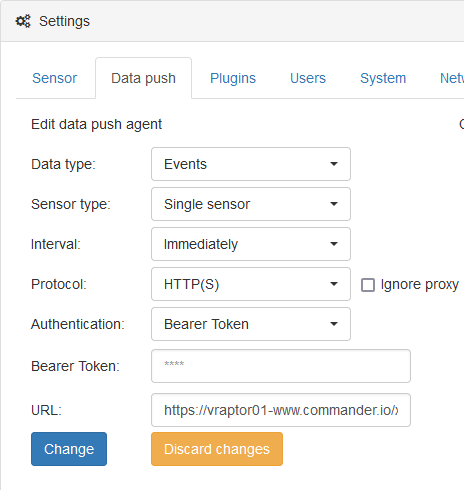
Figure 4 - Events Endpoint Configuration
- Line count data endpoint configuration
Figure 5 - Line Count Data Endpoint Configuration
GUI Example
None
External References
Release Notes
| Version | Description | Release Date |
| Latest | Driver Certification | 2022-11-08 (QA approved) |