
HTTPS Telemetry Interface
Jan 1 2022 at 12:00 AM
- Overview
- Authentication
- Device Registration
- Device Telemetry
- Device Commands
- Tracking Telemetry Throughput
Overview
The V-Raptor™ HTTPS driver is a service that makes use of a RESTful API to ingest telemetry into the IoT.nxt® Commander™ platform. The service can also be used to receive data from Commander by configuring an appropriate REST endpoint. This document outlines the basic process of using the HTTPS driver.
Additional information can be located on the Swagger documentation page of the HTTPS driver. The Swagger page is located at https://<hostURL>/<driverURL>/swagger.
The hostURL is the name (URL) of the V-Raptor and tenant where the relevant V-Raptor is hosted. The driverURL is the URL configured when setting up credentials and routes of the relevant V-Raptor’s driver. |
Authentication
The HTTPS driver makes use of bearer token authentication. To request a bearer token, clients need to be issued with a public and private key. These keys are then used to generate a digital signature that is used by the Raptor to authenticate the client and issue a bearer token. The V-Raptor determines the length of time before the bearer token expires, by default this is around 15 minutes.
| API Key authentication is also supported if the HTTP driver has been configured to allow it. |
Credentials can be issued through the V-Raptor’s management interface.
A client can request a bearer token by doing an HTTP POST to the following URL:
https://<hostURL>/<driverURL>/api/Authorize/RequestAccessToken
The following payload must be supplied
{
  "ServiceId": "weatherstation.raptor.iotnxt.io",
  "Scope": "RaptorRPC",
  "Signature":"WSjIXxDOM7u1KGx... KcopV+kD5ZqAyotshQ=="
}
The ServiceId is the subject name of the public key issued to the client. The digital signature is calculated using the public and private key and is generated by the IoT.nxt team at this stage. If the credentials are correctly supplied, a bearer token will be returned.
{
    "isError": false,
    "token": "eyJynnEVa4n7...b64hwPBEpfIzFw",
    "tokenType": "Bearer"
}
The bearer token can now be added as a Bearer authentication header in future HTTP requests. If the information is incorrectly supplied, the following response will be returned. This response indicates that a certificate has expired, or that the service Id and/or digital signature is incorrect.
{
   "isError": true,
   "error": "invalid_client",
   "token": null,
   "tokenType": null
}
Device Registration
Before sending telemetry for the endpoints you require, you need to register one or more devices with the required properties. As part of this process can you can also specify a custom gatewayID for your devices. If using a custom gateway, the gateway will first need to be associated in Commander as follows:
| The gateway ID can be left empty if you wish to register your devices under the V-Raptor’s gateway ID. If you are registering devices for test purposes, it is recommended to use a custom gateway ID to make it easier to delete the devices once testing has been conducted. |
1. Login on https://<tenant>.commander.io/ and go to Portal.
2. On the left hand side go to Entity Management.

3. Select the Gateways tab.
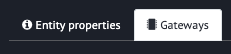
4. Then on the top right hand side enter the new GatewayId name and click Associate.
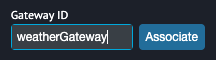
| The gatewayID may not contain any special characters other than an underscore or dash. For example MY_GATEWAY and MY_GATEWAY are both valid, but MY.GATEWAY is not valid. |
5. Registrations for a device needs to only be sent once, or when the device properties have changed. Registrations are done by sending an HTTP POST to the following URL:
https://<hostURL>/<driverURL>/api/Device/RegisterDevice
6. The body should contain the details of the device in the following format:
{
    "deviceName": "WeatherStation",
    "gatewayId": "weatherGateway",
    "displayName": "Weather Station",
    "deviceType": "Weather",
    "groupName": "Environment",
    "make": "IoT.nxt",
    "model": "Weather Device A",
    "properties": {
        "Pressure": {
            "PropertyDescription": "Current pressure",
            "DataType": "Int"
        },
        "IsRaining": {
            "PropertyDisplayName": "Is Raining?",
            "PropertyDescription": "Is currently raining",
            "DataType": "Bool"
        }
    }
}
| Registration requires a valid bearer token. |
7. The DeviceName, DeviceType and GroupName are compulsory. At least one property must also be provided. DisplayName can be used to adjust the name of the device as it appears in the Commander. The Make and Model fields may be omitted.
8. The payload above will generate the following device in the Commander. The device can be viewed under the Gateway ID of the V-Raptor:

Figure 1 - Registered device as it would appear in Commander
9. With the payload above, the device should also have the following two properties.

Figure 2 - Registered device properties as seen in Commander
Device Telemetry
10. Once a device has been registered, telemetry can be sent in a similar way. Make use of the following URL with an HTTP POST to send telemetry for each device. As with a registration request a valid bearer token is required.
https://<hostURL>/<driverURL>/api/Device/Telemetry
11. The telemetry payload is structured as follows:
{
    "DeviceName": "WeatherStation",
    "DeviceType": "Weather",
    "GroupName": "Environment",
    "Properties": {
        "Pressure": {
            "CurrentValue": 1030,
            "LastUpdateSuccessUTC": "2020-07-27T16:24:05.3567574Z",
            "DataType": "Int"
        },
        "IsRaining": {
            "CurrentValue": false,
            "LastUpdateSuccessUTC": "2020-07-27T16:24:05.3567579Z",
            "DataType": "Bool"
        }
    }
}
12. The current value of the property is supplied using the CurrentValue field and may be null if no value was recorded. You can use a null value if you would like a graph to skip a data point. The actual time the value was observed (not the time sent) should be provided in the LastUpdateSuccessUTC field. This is the field that will be used when plotting the data on graphs. Time stamps should always be sent in UTC time.
| The property keys must match what was used during registration. |
13. The corresponding telemetry in the Commander will be displayed as follow; Note the time stamp that is displayed matches the timestamp provided in LastUpdateSuccessUTC.

Figure 2 - HTTPs device live telemetry in Commander
Device Commands
The HTTPS service can also be configured to send gateway communications received from the IoT.nxt Commander back to a configured REST endpoint. A POST request can be made to the following URL to register a command callback endpoint:
https://<hostURL>/<driverURL>/api/Device/SetCallback
The following payload should be provided:
{
    "DeviceName": "WeatherStation",
    "DeviceType": "WeatherDevice",
    "GroupName": "WeatherGroup",
    "Url": "https://weatherstation.raptor.iotnxt.io:12345/api/DeviceCommand/PostCommand",
    "Format": "json",
    "Authorization": "ApiKey",
    "ApiKey": "C7A98133-DCD6-4FBE-817E-EFA17649DB88"
}
The payload above will instruct the HTTPS driver to send any incoming message for the WeatherStation device to the Url specified. The HTTPS driver will include an ApiKey authentication header with the specified API key so that the callback endpoint can verify the origin of the command.
Tracking Telemetry Throughput
The HTTP driver also exposes telemetry transmission statistics through Prometheus and in a series of graphs.
To access the Prometheus statistics, the following URL can be used:
https://<hostURL>/<driverURL>/metrics
To see a graphed version of these stats, use the following URL:
https://<hostURL>/<driverURL>/metricsGraphs