
Calendar Entity
Oct 12 2022 at 12:00 AM
Description
This entity provides the ability to set up scheduling for specific events.
Configuration
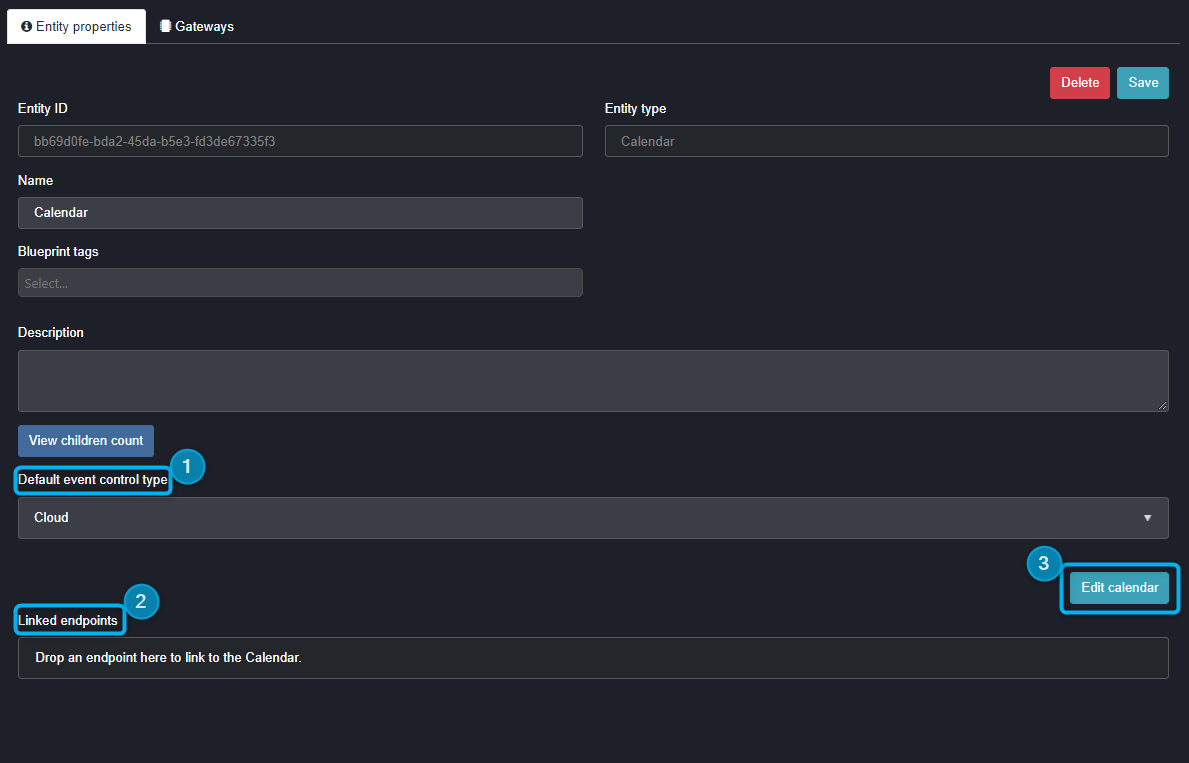
Figure 1 - Calendar properties
- Default event control type: The user needs to choose whether it is a physical device on the edge or virtual device in the cloud.
- Linked endpoints: This provides the user the option to drag and link endpoints to the calendar entity.
- Edit calendar: This is where you can set up your scheduling. A configuration window will pop up allowing you to do this.
Once you click on edit calendar, you will be able to choose which day to set up your event. The video below shows you how to do that:
Clip 1 - Edit calendar
Once selecting the day you would like to schedule your event, you will be presented with the following inputs: On the left is the location of entity functions, actions, variables and constants. See more about Entity Function. From this list you can pull from a list of functions, actions, variables, or constants to build your calendar event. On the right, you can pull entities from your entity tree, your users from your user list, or services from your services created for the tenant.
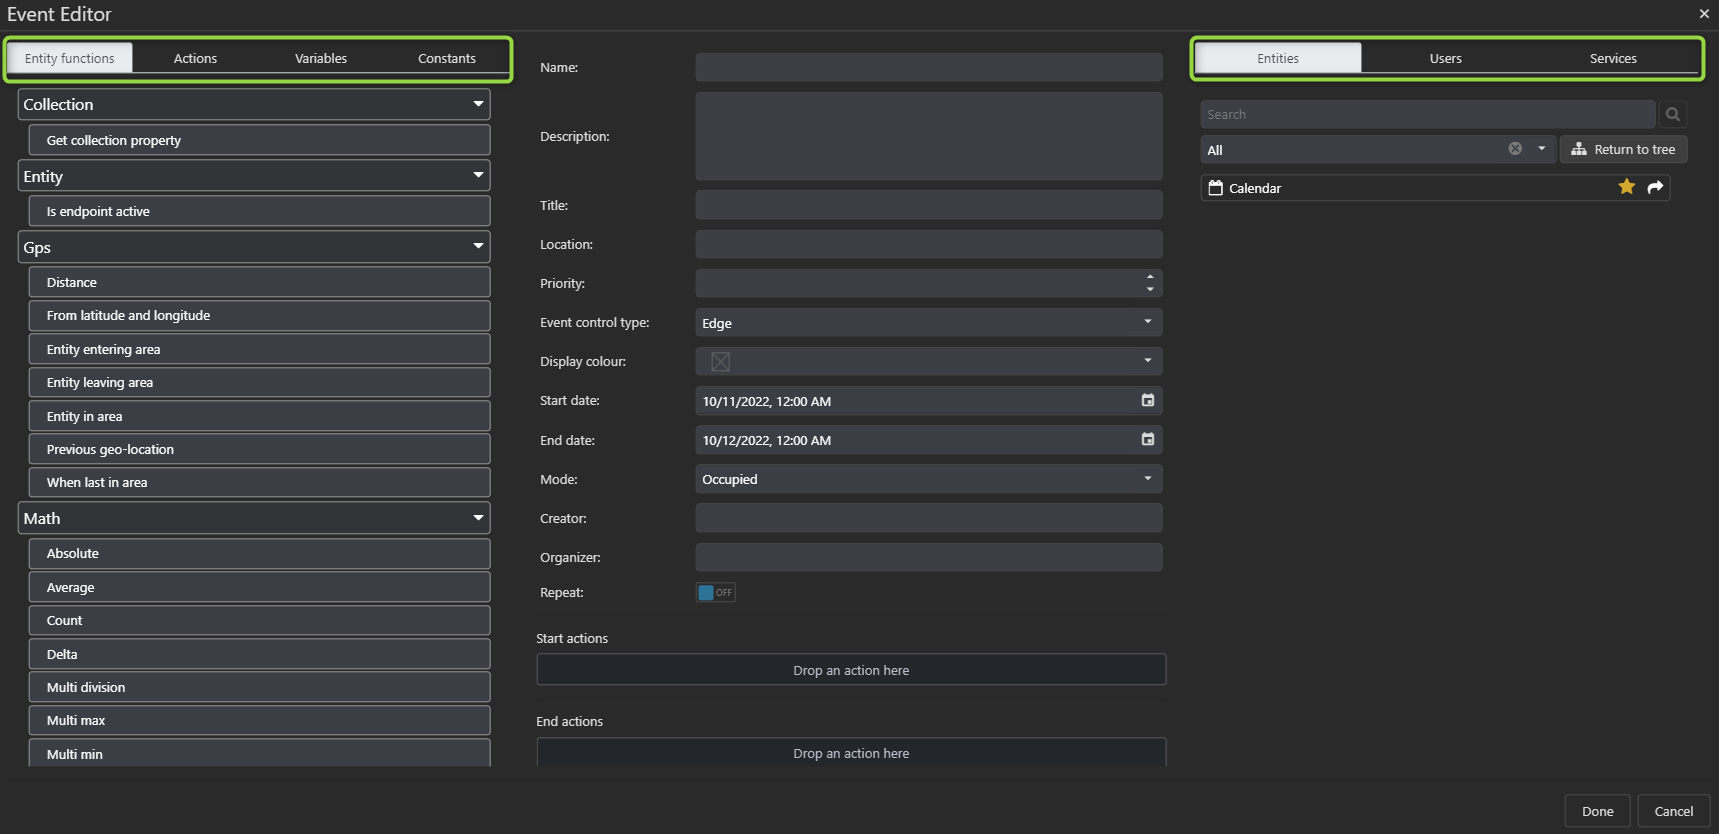
Figure 2 - Event editor
The middle section is the calendar function build zone where the configuration will be done.
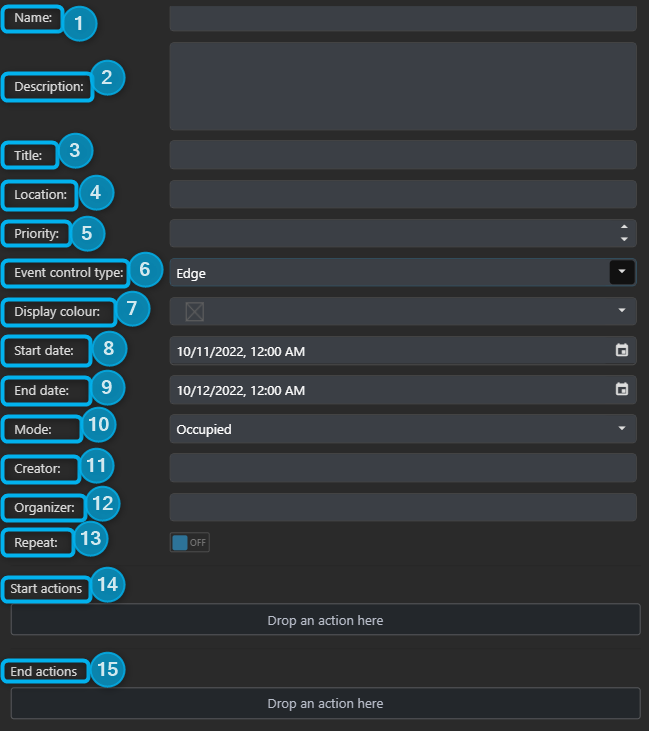
Figure 3 - Input calendar details
- Name: Provide the calendar event with a friendly name.
- Description: You can provide an explanation for the event.
- Title: Here you can give the calendar event a subject.
- Location: You add the address of the event.
- Priority: Here you would configure the importance based on the solution. It also allows higher priority events to override lower priorities.
- Event control type: Choose between whether it is edge or cloud.
- Display colour: This is the colour you choose to show your calendar event.
- Start date: This is where you input when you want your event to begin.
- End date: This is where you input when you want your event to stop.
- Mode: This is where you mark whether the mode is unoccupied, occupied or stand by.
- Creator: You can add the name of the person who started the event.
- Organizer: You can add the name of the person who is arranging the event.
- Repeat: Here you can select if the event should be daily, weekly, monthly or yearly and how often.
- Start actions: This is where you would pull an action from the list on the left to trigger the event to start.
- End actions: This is where you would pull an action from the list on the left to trigger the event to stop.
Use Case Example(s)
In order for the calendar entity to function properly, you will need to create items such as endpoints, triggers, etc. See more about Endpoints and Triggers.
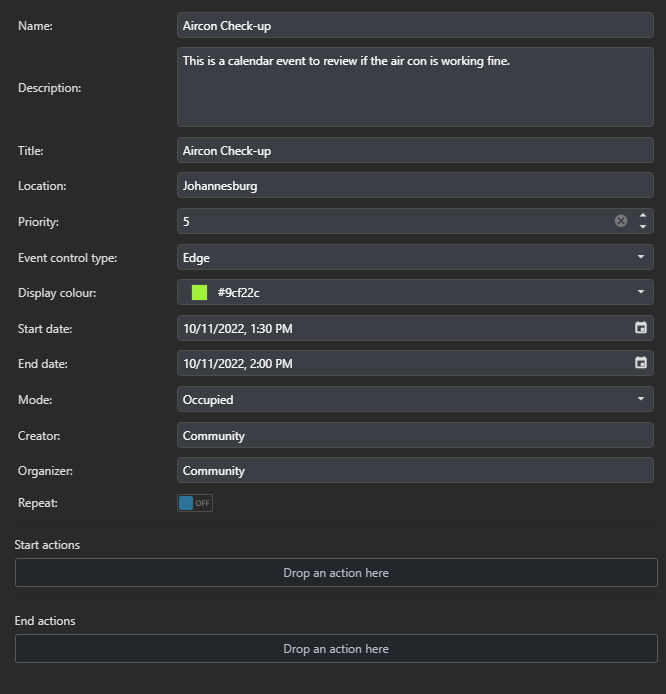
Figure 4 - Configured calendar details
After you have input all your scheduling details as can be seen above. You will then be able to view your calendar on Commander dashboard.

Figure 5 - Calendar widget