
Alarm Entity
Oct 12 2022 at 12:00 AM
Description
The alarm entity is used to define and configure a specific alert or alarm that would be raised with a trigger entity. The trigger entity will be used to configure the actions necessary to raise the pre-configured alarm. An alarm entity will never be used stand-alone and will always require a trigger entity in order to raise the alarm. See more about Triggers.
Configuration
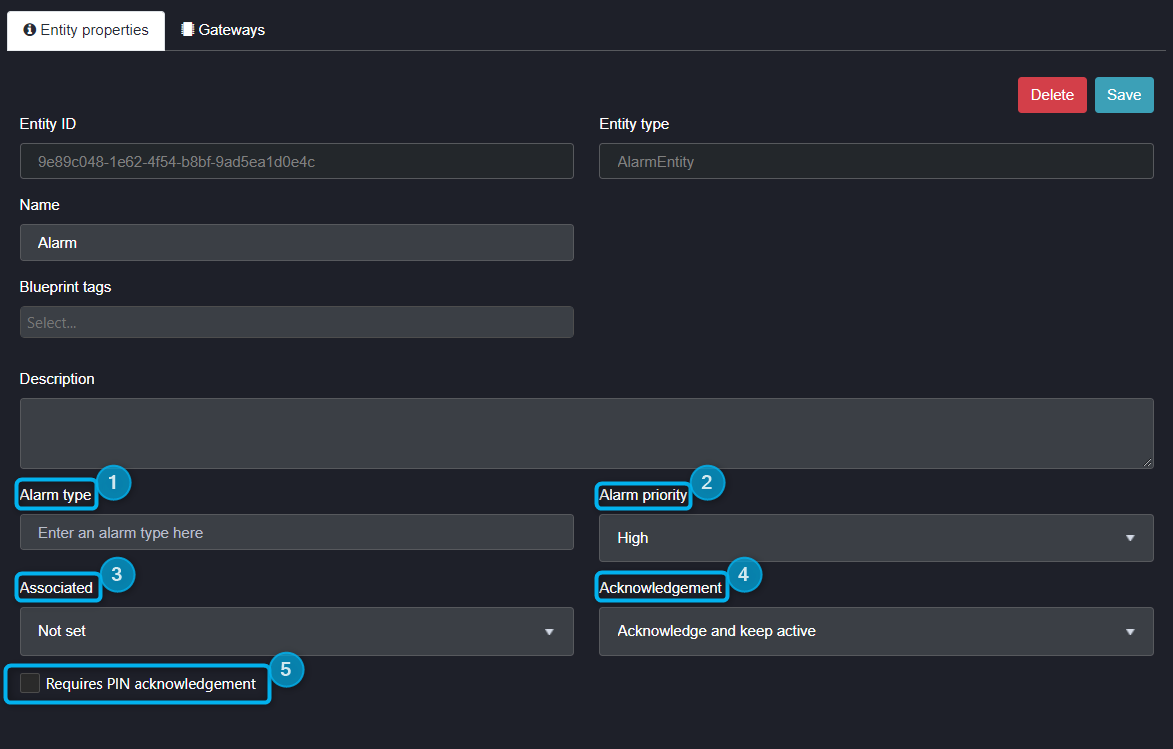
Figure 1 - Alarm Entity Properties
- Alarm type: This is where a descriptive word can be added to categorise and group the alarm, and other alarms being created within the solution of a similar nature. For example, any alarms tagged with “Security” will be grouped as such and dashboard visuals can then be filtered accordingly.
- Alarm priority: You have the option of three different settings: high, medium and low. The default colour for high alarms is red, yellow for medium alarms, and blue for low alarms. Note: These default settings can always be configured to the client’s requirement in the Portal Environmental settings.
- Associated: This property allows the user to select which of the parent entities the alarm entity is created under to which it should be associated. This means that the alarm will be linked to the selected entity and will only be visible on the dashboard views for alarm lists subscribed to the selected associated entity.
- Acknowledgement: Acknowledgement is the ability to keep a history of an alarm. It provides the user with the ability to confirm that the alarm has been seen with the option to add an acknowledged message. There are three different configurations:
- No acknowledgement: If the alarm is in active state, the alert will show as active. If the trigger resets and the alarm becomes inactive, it will disappear from the views, or be shown as inactive (depending on the alarm list widget’s configuration).
- Acknowledge and keep active: This option gives the user the ability to acknowledge if they have seen that the alarm is active, with the option to add a message. Then when the user clicks acknowledge, the alarm will remain visible as active until that alarm is cleared.
- Acknowledge and clear: This option gives the user the ability to acknowledge if they have seen that the alarm is active, with the option to add a message. Once they click acknowledge, the alarm will be removed from the display even if it is still active.
- Pin check box: If the user decides to check this box an OTP will be required before an operator can acknowledge the alarm.
Use Case Example(s)
Once the alarm entity has been created, a trigger should be created and edited to provide the logic for when the alarm should raise and clear. Shown below are the properties needed to configure a trigger for the alarm entity. See more about Triggers. You will be able to choose from the list of entity functions, actions, variables and constants on the left pane to create your IF and THEN statements in order to activate and reset the trigger. Additionally, you will be able to choose which entities, users and services to link within your trigger on the right pane.
Clip 1 - Trigger used for alarm entity
Once the trigger is configured and enabled, the actions to be performed by the trigger will occur as soon as the IF portion of the trigger is satisfied. Only once the trigger has been activated will the results of the trigger be visible. For example, if the trigger is to raise an alarm, the alarm will only appear on the dashboard views after it has been raised at least once. Thereafter, the alarm will either disappear from the alarm list, or display as inactive, depending on the alarm list widget’s configuration.
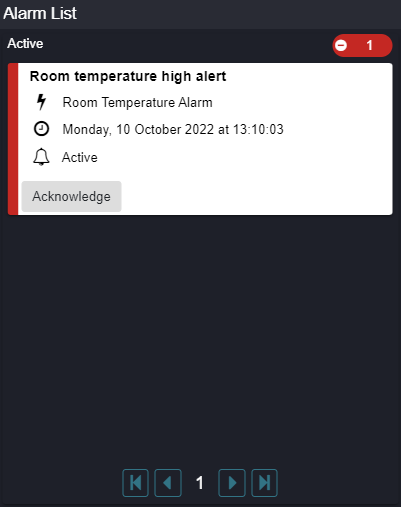
Figure 2 - Alarm list