
Deployment Manager Application
Jan 1 2022 at 12:00 AM
This article provides a walk-through of commonly performed tasks within the V-Raptor using the Deployment Manager for simple driver and service deployments. This application can be found on a Raptor specific landing page.
Overview
There are primarily 2 deployments that need to occur for users to make full use of the Raptors bouquet. These deployments are for:
- Driver Services &
- Core Services
Driver services handle communication with devices, and core services provide the required functionality to transmit telemetry to Commander and manage the gateway.
The above-mentioned enhancements regarding management of services of internal and external drivers are found under a new main section of the User Interface referred to as ‘Manage Deployments’.
What To Expect
This guide explains and takes users through the steps to follow when a user deploys and configures a V-Raptor driver (see a summary of the steps outlined below). At the end of this guide, they will know:
How to deploy the driver
- Logon to a V-Raptor.
- Go to the Deployment Manager.
- Select ‘Driver Services’.
- Select ‘Deploy New Driver’.
- Search for ‘driver name’ e.g. Xovis - If no result is found, it means that this driver does not exist on that device store. Contact support.
- Assuming its available, select it.
- The user must make sure they select the latest release version (see release notes below).
- Give the driver a name.
- Select ‘Deploy’.
- The user should now have a version of this driver running on the V-Raptor.
How to configure the driver
- Logon to a V-Raptor.
- Go to the Deployment Manager.
- Select ‘Driver Services’.
- Locate the driver, and select it.
- Select ‘Configuration’.
- Select and open the ‘DeviceOptions.json’ configuration.
- Create a driver configuration.
- Once created/modified, select ‘Update’.
- Go back to the ‘Driver Services’ section.
- Locate the driver, and restart it for changes to take effect.
Manage Deployments
The Raptor has numerous applications that can be used to perform management tasks in a simple, straightforward manner. To make the management of Driver and Core service deployments easier, a new app called the “Deployment Manager” has been introduced.
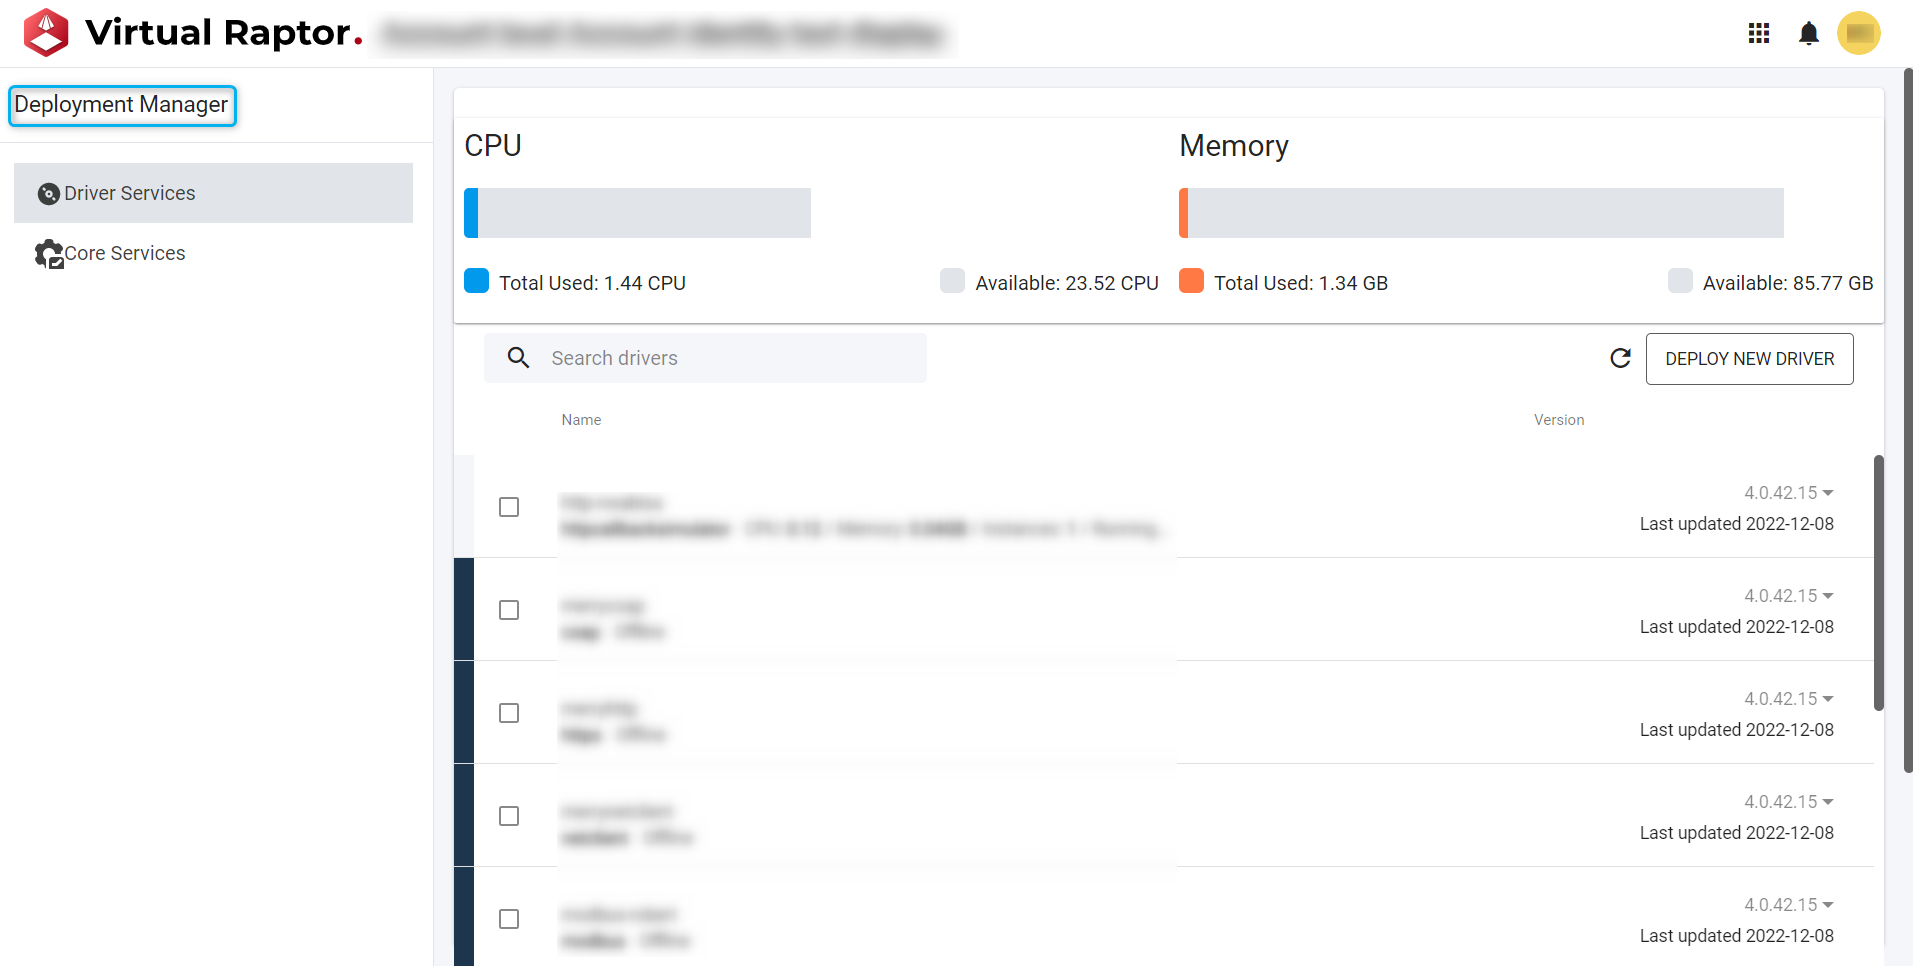
Figure 1 – Deployment Manager Overview
From the controls the user is able to stop/start/restart or delete a specific or multiple drivers.

Figure 2 – Deployment Manager Controls
Driver Services
Deploy New Driver
Users are able to deploy a new driver by simply selecting the button at the top right of their device. This will initiate the flow whereby the user will need to select their preferred device to deploy and input all the relevant details that are described below.
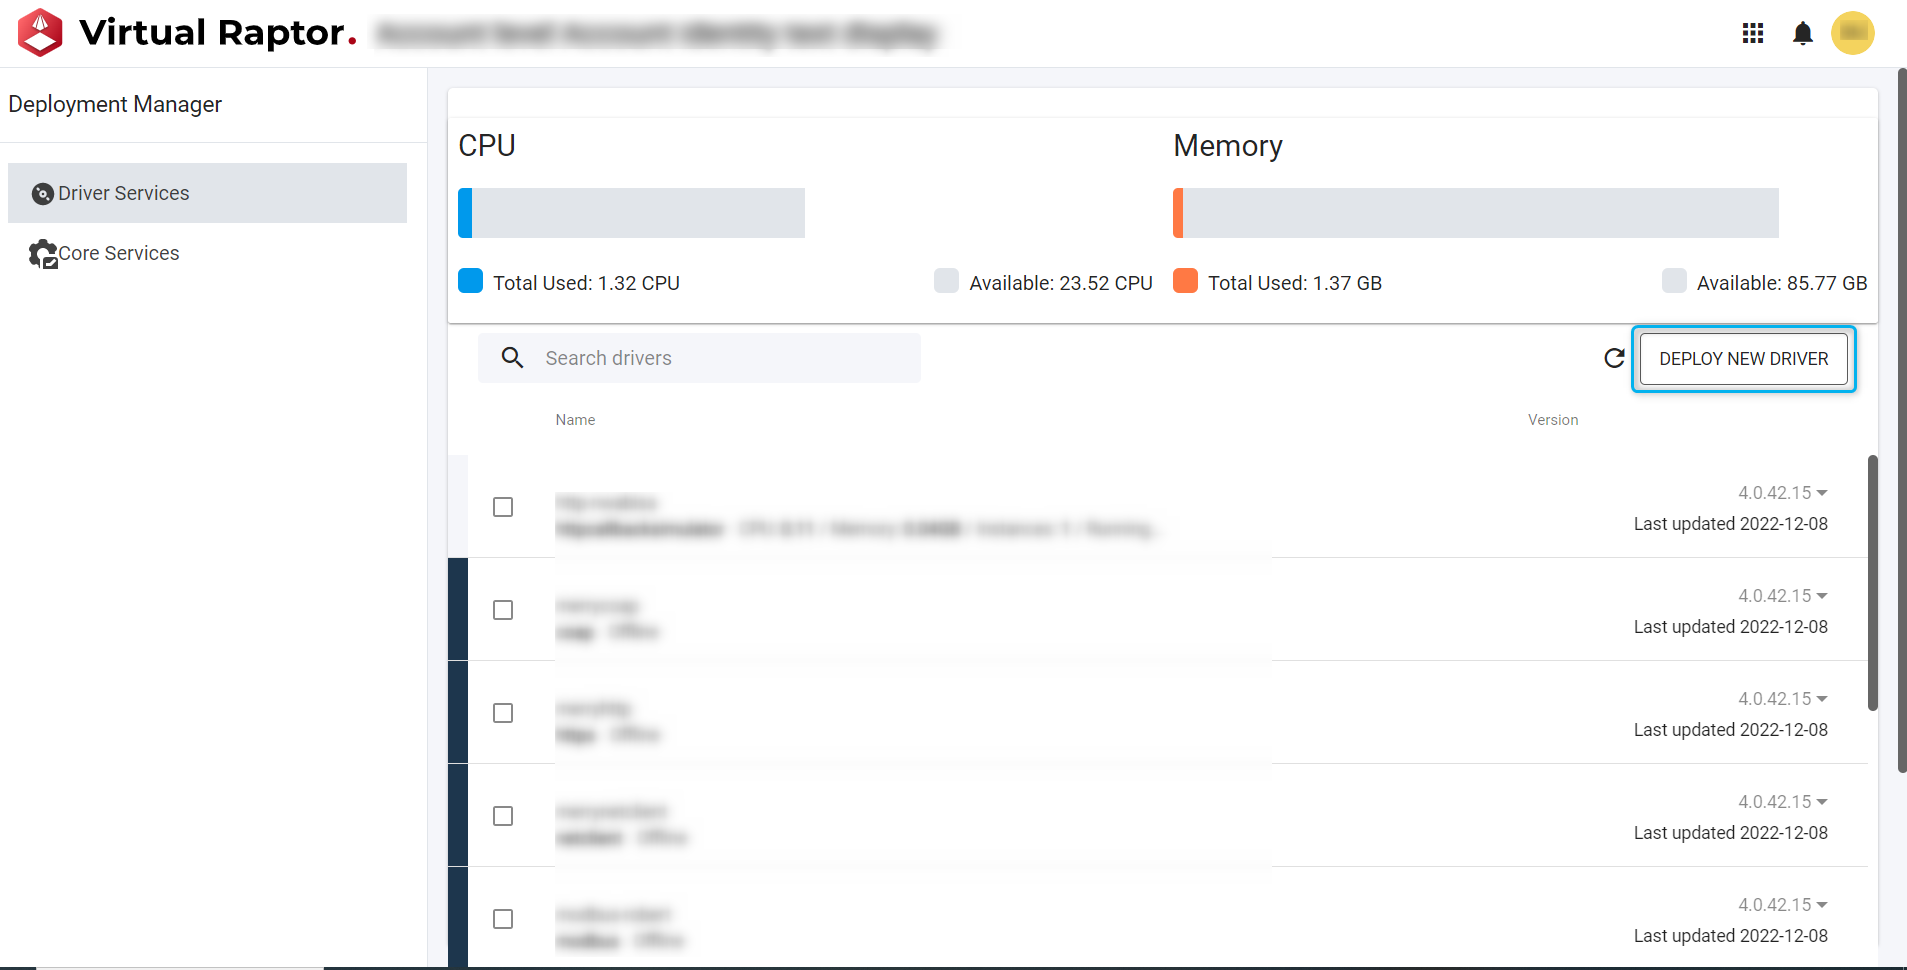
Figure 3 – Deploy New Driver
The user is presented with a list of available drivers to deploy. They are able to search for a specific driver or scroll through the presented list to find the driver they wish to setup and deploy.
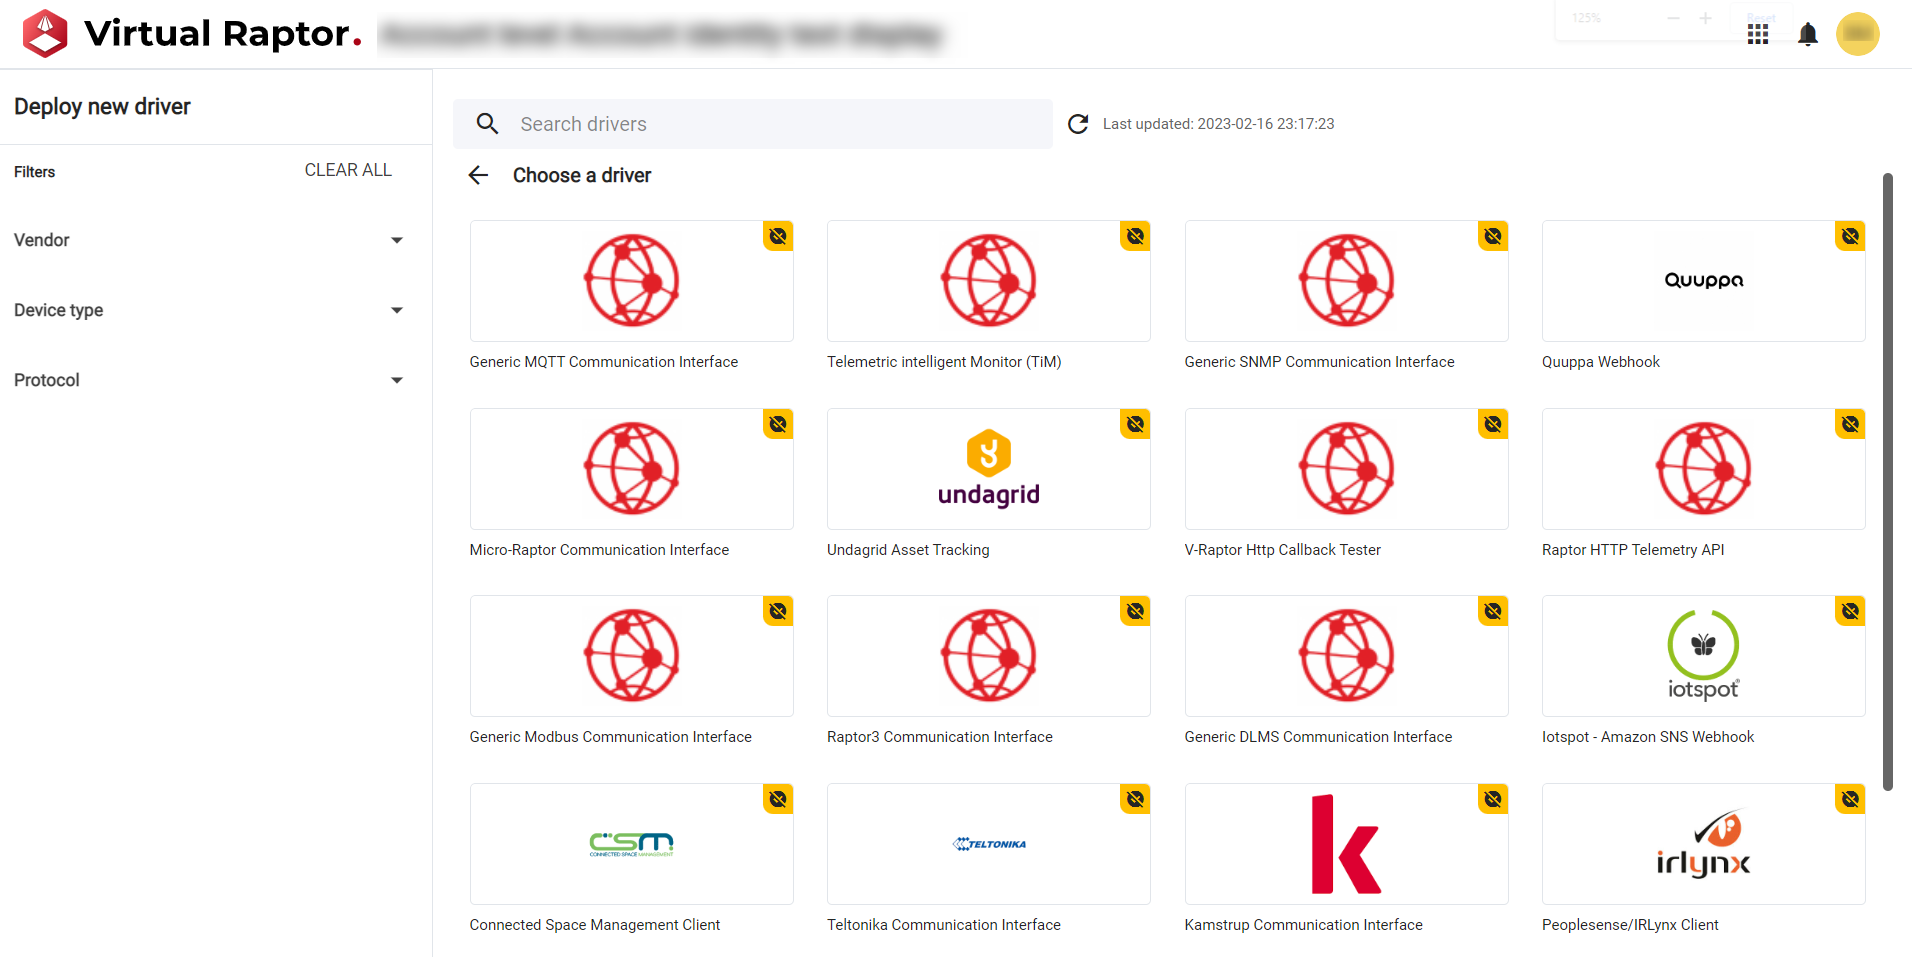
Figure 4 – Choose a Driver
The user has the option to deploy a new driver the desired driver. Driver information and features will be displayed. The user is able to select the version number of a specific driver when performing the deployment. By default this is set to the latest version.
The user is required to input driver details and the deployment is initiated a driver deployment progress screen will be displayed.
Once deployment of the driver and loading screen has been completed, the user will automatically be redirected to the ‘Deployment Manager’ overview page. A toast pop-up will appear on the screen indicating either a success/failure of the deployment. If there was a failure, a brief description will be displayed identifying the failure point. (see Clip 1)
Clip 1 – Deploy A New Driver
Configuration Manager
Driver services are built up of different configuration files. These files handle numerous unique tasks within each service. The individual configuration files that make up the service can be edited to better suit the users setup. These configurations can be accessed for both driver and core services. This can be done by selecting the driver/core service name, which will then show the user all the available config files:
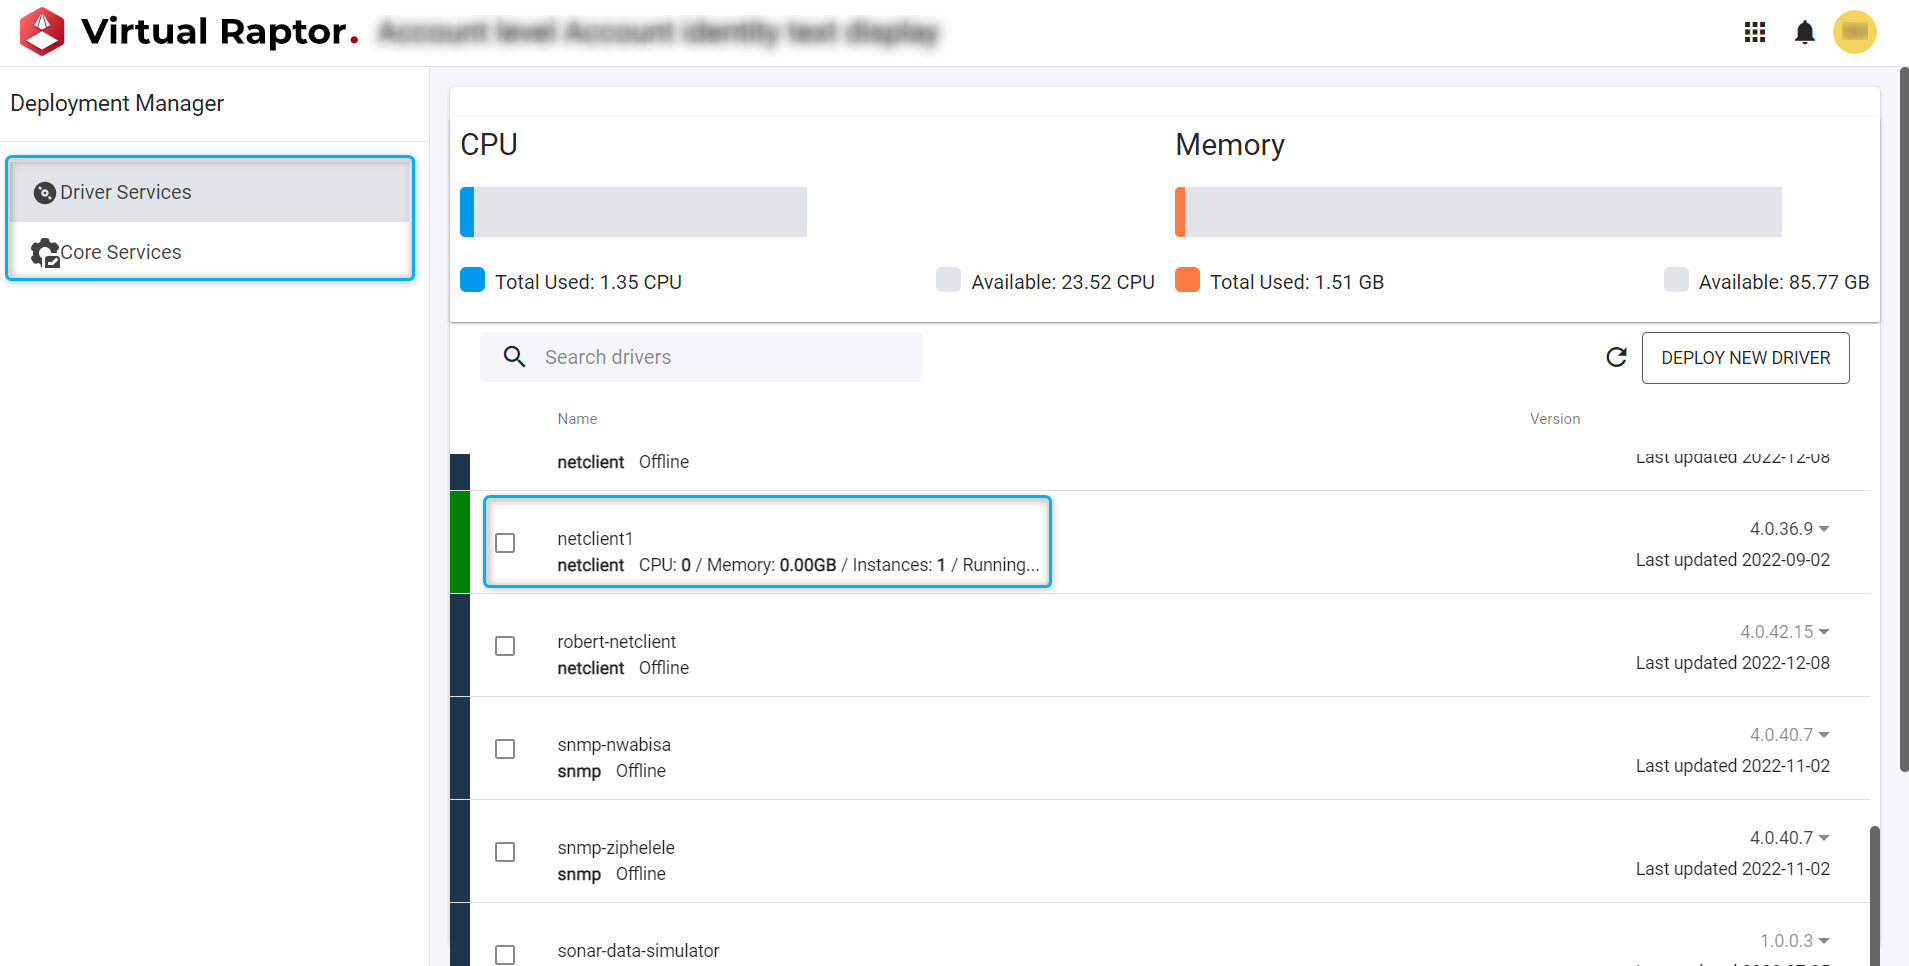
Figure 5 – Configuration Manager - Driver Service
Once the user selects an individual service name, it will load with all the configuration files that make up that specific service:
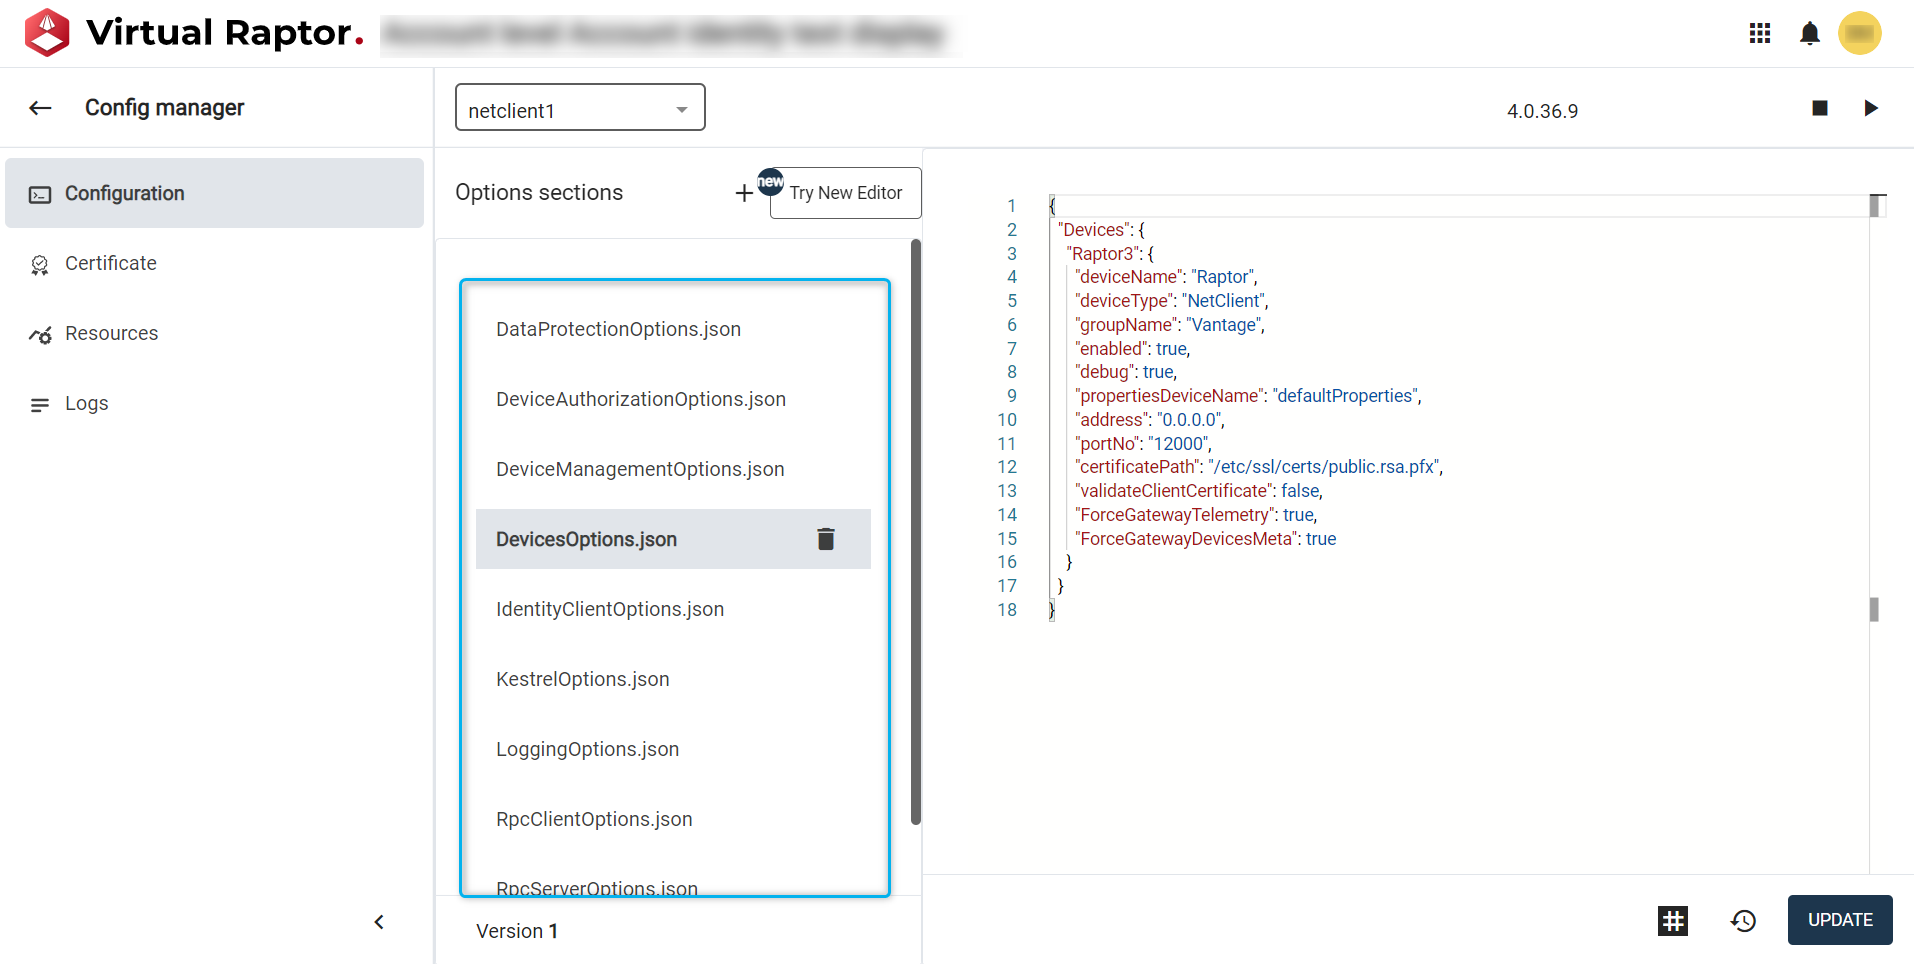
Figure 6 – Configuration Files
Users are then able to view the different configuration files by selecting them - the details will load alongside the specific file. The version number of the file will display once selected and the user can also delete a configuration file if required:
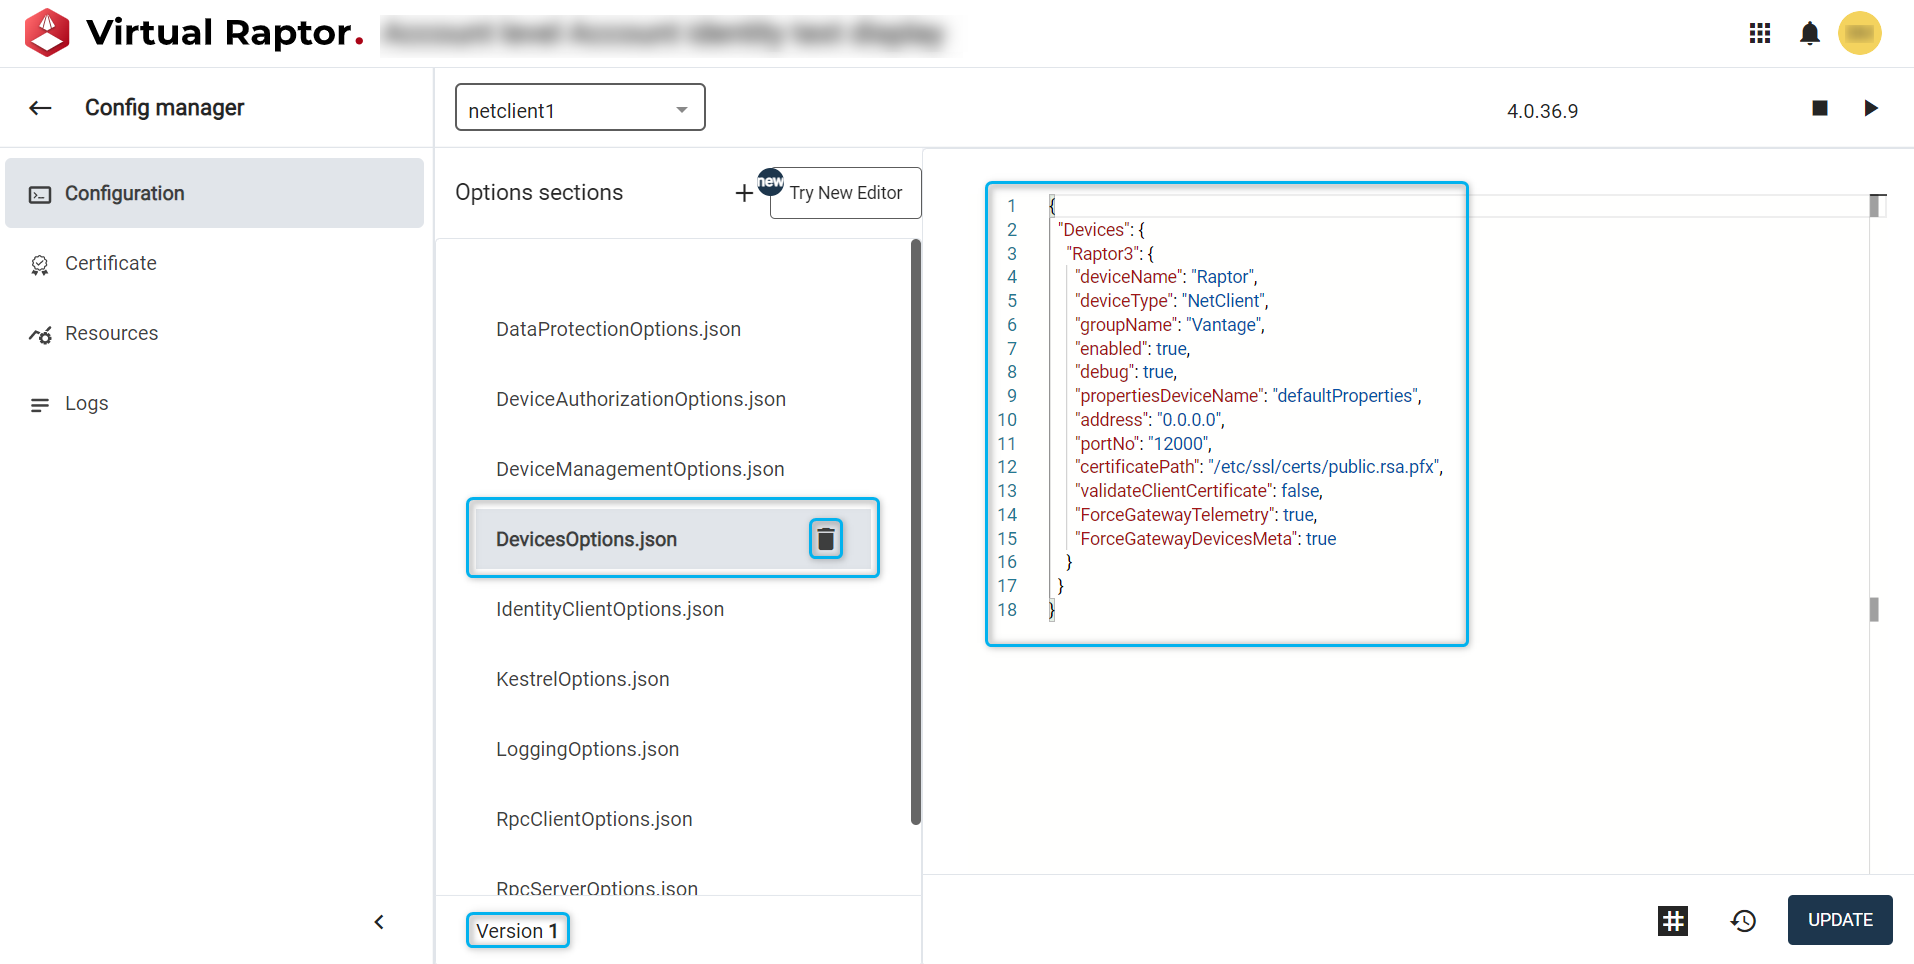
Figure 7 – View Configuration File Details
Once an individual file is selected, the content of that file will be displayed for the user to inspect, edit and update. If any changes are made the file can be updated and the version will increase. A toast will pop up on the screen to notify the user of a successful or unsuccessful update:
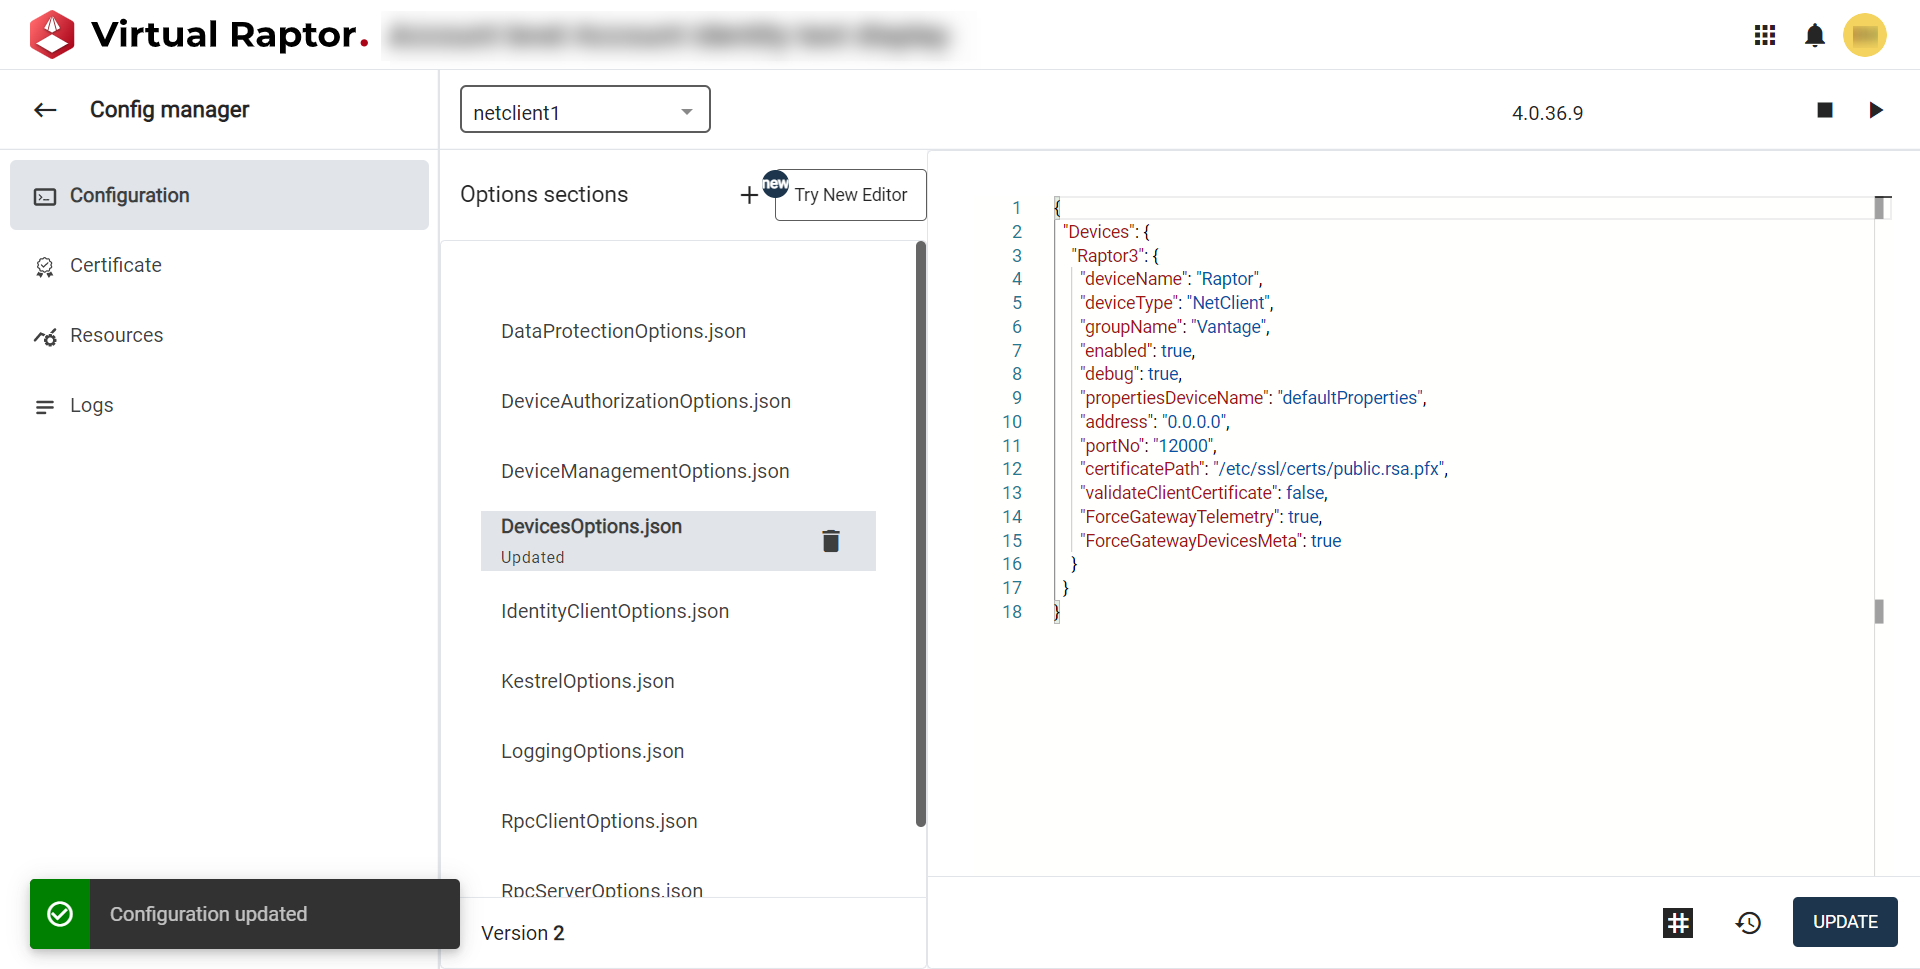
Figure 8 – Update Configuration File Version
All available config file versions will be displayed for the user to view, as well as compare. They will see the latest version compared to a previous version that they choose to select and view. The user can restore their config file to a previous version using this screen:
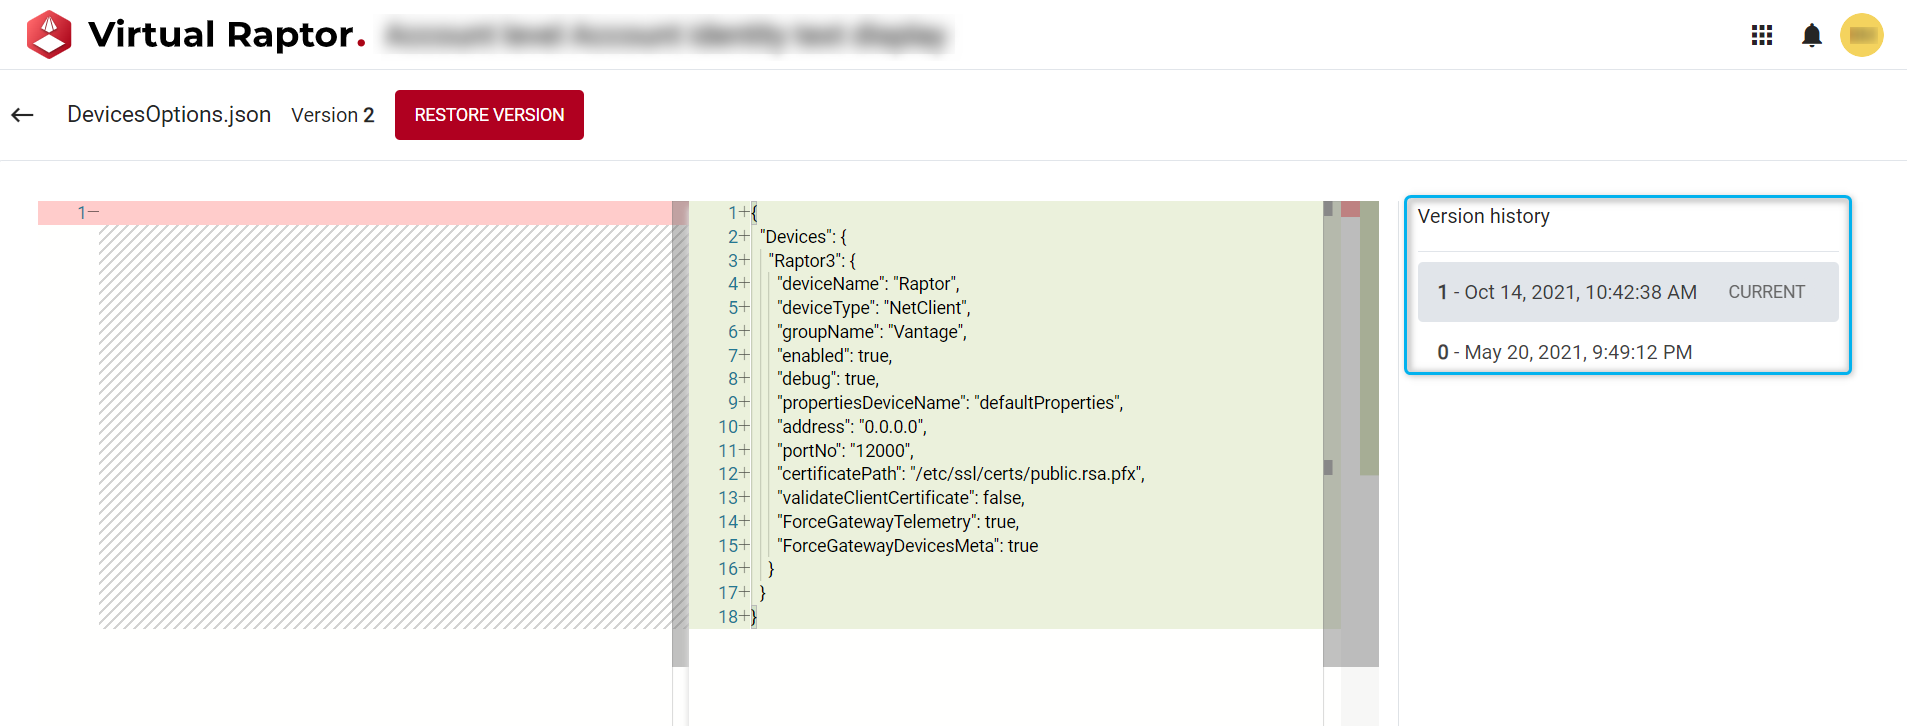
Figure 9 – Compare and Restore Configuration File Versions
Users are able to add configuration files by selecting the ‘+’ symbol as an operation:
File name will need to be input as well as the file type selected from a dropdown list. Once these details are chosen, the user can input the contents of the file within the field below and add the config section:
Clip 2 – Add Config Section
The views become spread across the screen as making use of the available features (mobile, tablet, laptop) - so if the user requires additional space they are able to hide and minimize the navigation bar:
Clip 3 – Hide Navigation
If the icon next to the ‘Version’ icon is selected, users are able to inspect, edit and utilise system tokens.
A Token, aka ‘Configuration Variable Token’ is an Identifier used to indicate what the value is determined at run-time. The Config Variable Tokens are used by the Configuration Manager to substitute all values that are set to tokens or that contain tokens, with their defined or calculated values at run-time.
Example:
Take the following Config Options Section: It has 2 properties with values starting and ending with a ‘$’, these are Config Variable Tokens.
{
    "DatabaseOptions": {
    "ConnectionString": "mongo://this.place",
        "Username": "VRaptorDatabaseUser",
    "Password": "VRaptorDatabaseUserPassword"
  }
}
When this config passed through the Configuration Manager, the token parser will search for these tokens, and if found, the tokens will be UnMasked to their proper values.
This will be the end result of the deployed Config Options Section:
{
    "DatabaseOptions": {
    "ConnectionString": "mongo://this.place",
        "Username": "VRaptorDatabaseUser",
    "Password": "qwerty@12345"
  }
}
There are two primary types of tokens:
- System Tokens
- Custom Tokens
System tokens are split into more complex types, but that is not relevant to the user interface.
User defined tokens are tokens that a RAPTOR_CONFIGURATOR user can manage per Raptor. Being able to:
- Add
- Edit
- Remove
- Update
tokens.
Benefits of Config Variable Tokens:
- Ensures private or sensitive values cannot be shown during the configuration process.
- Limits common spelling or syntax mistakes.
- Allows flexibility for the user when doing configuration by re-using existing configuration values.
- Exposes existing configuration values to unknowing configurators.
- Sets a standard for configuration management.
Users are able to Copy and Paste tokens from ‘System Tokens’ into the config files:
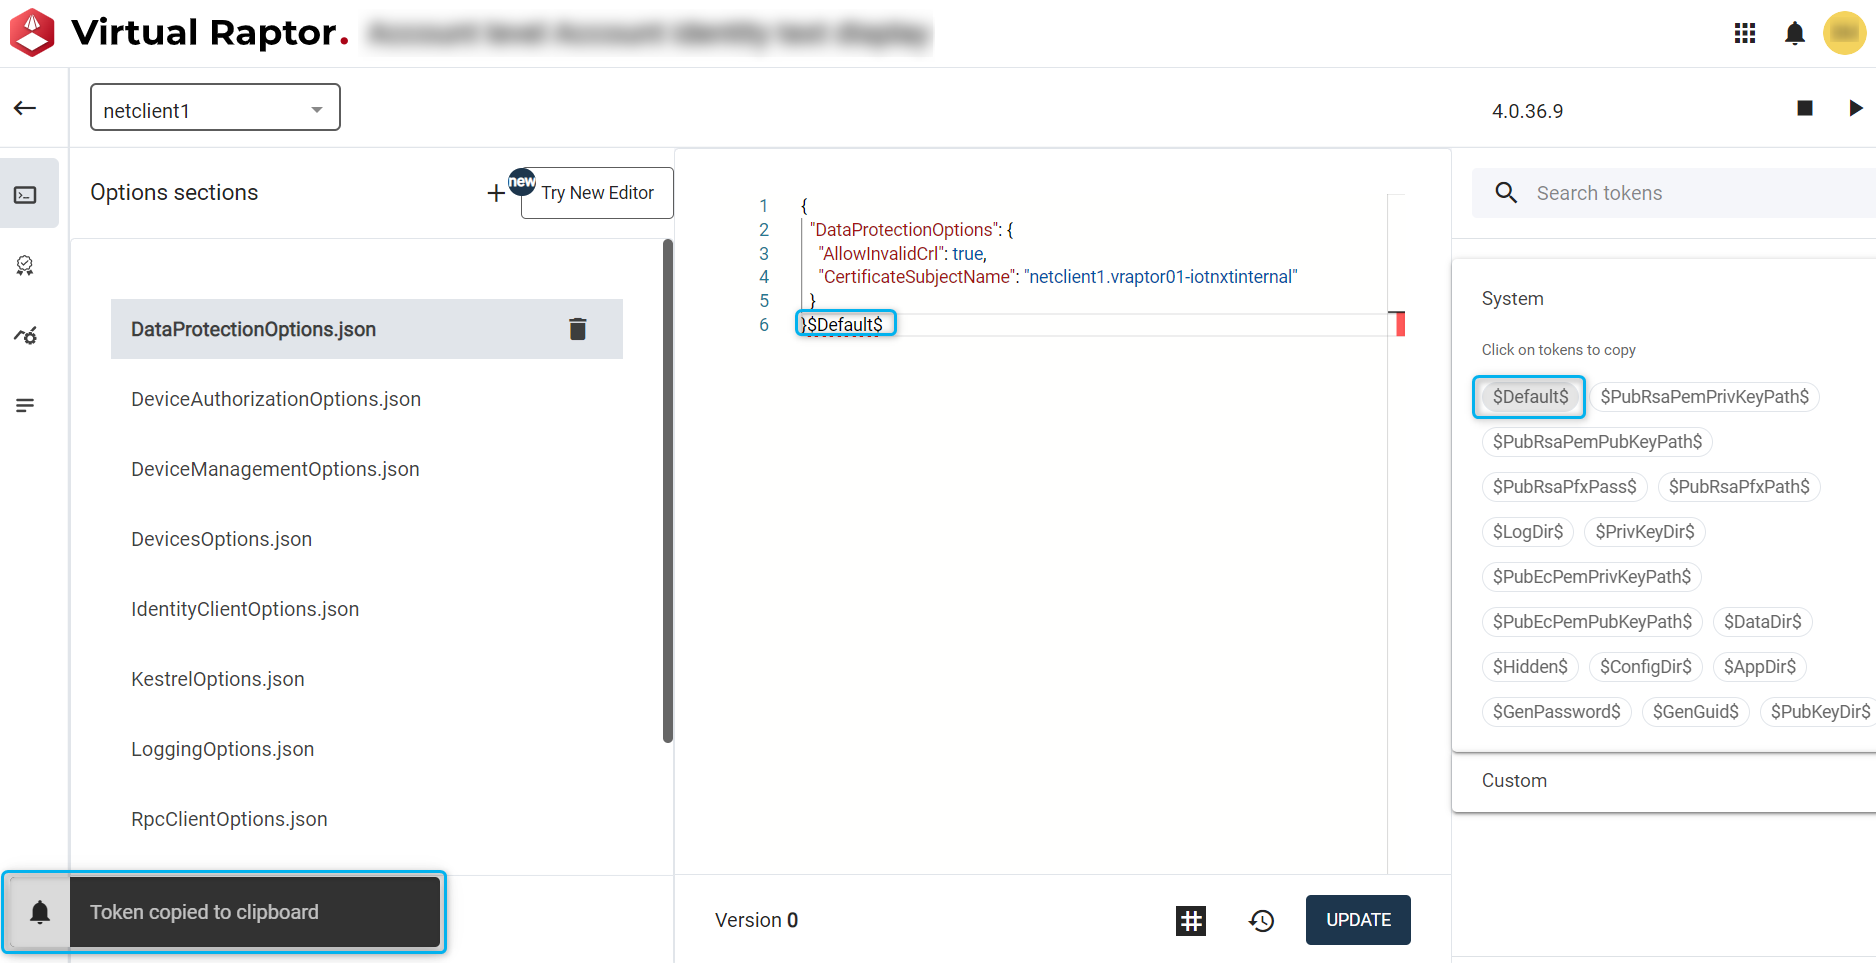
Figure 10 – Copy and Paste Token
Custom Tokens can be created and utilised. The user will need to select the ‘Add Config Token’ button and will be required to input information for ‘Token name’, ‘Value’ & ‘Description’ to be be able to create the token:
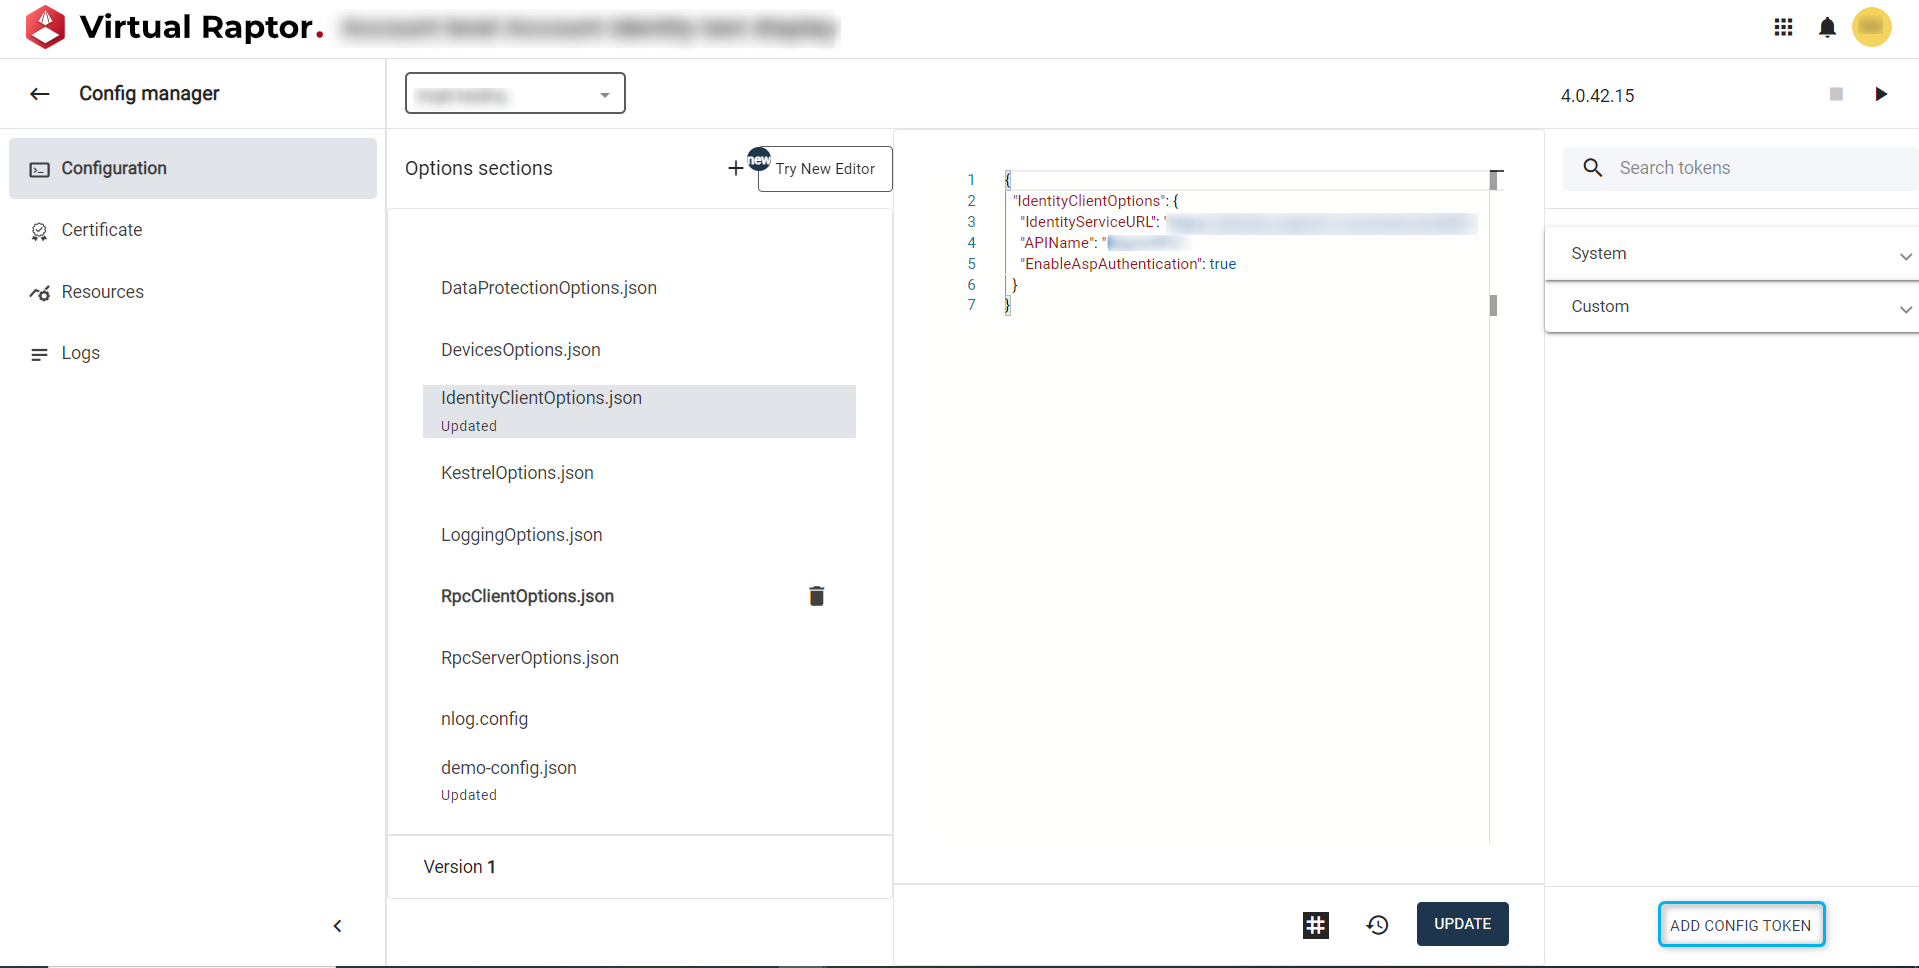
Figure 11 – Add Config Token
Existing custom tokens can also be edited as well as deleted. This can be done from the panel on the right by right clicking on a token and selecting the action. Editing a token will show the following screen for the user to interact with and make the changes required:
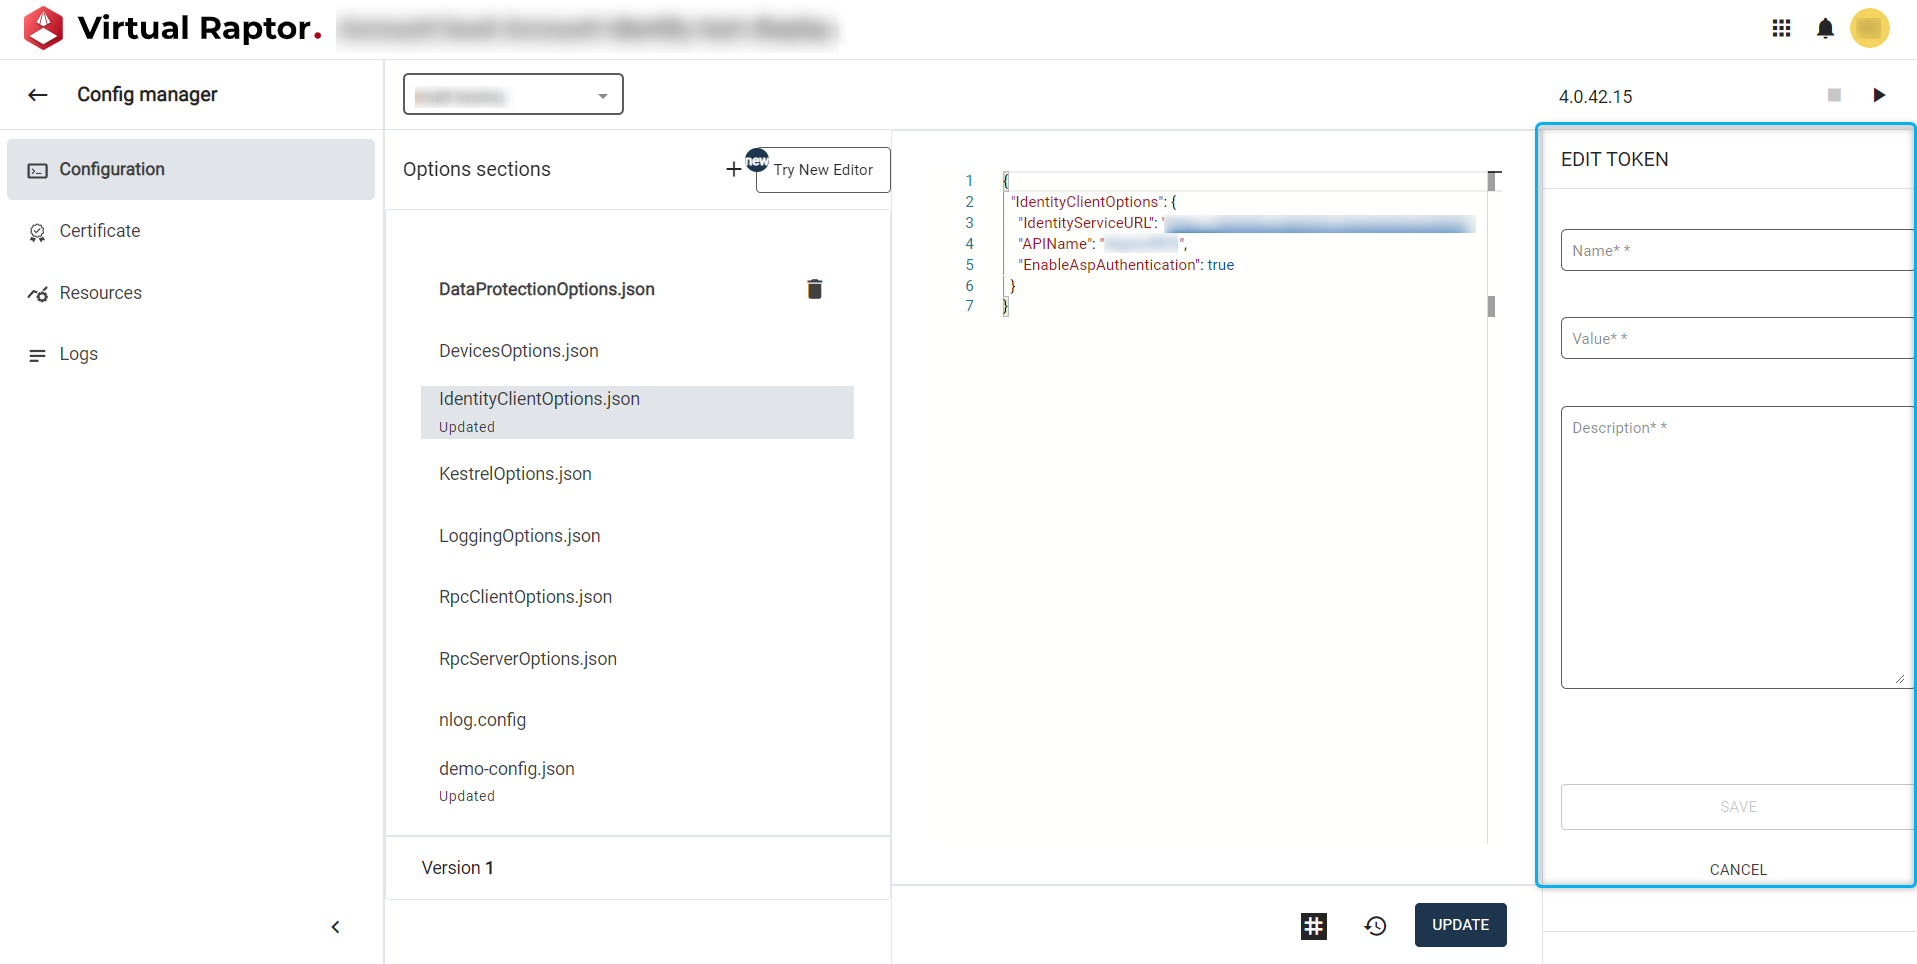
Figure 12– Edit Token Content
The new config will be added to the list of other existing config files (a green success banner will pop up). If there was an issue during the creation of a new file or delete/editing of an existing file a pop banner will show that an error occurred with the reason for the failure.
The service within a v-Raptor require certificates to be able to perform secure encrypted communication using TLS. These certificates that are specific to a service can be renewed within the deployment management application under a tab called ‘Certificate overview’:
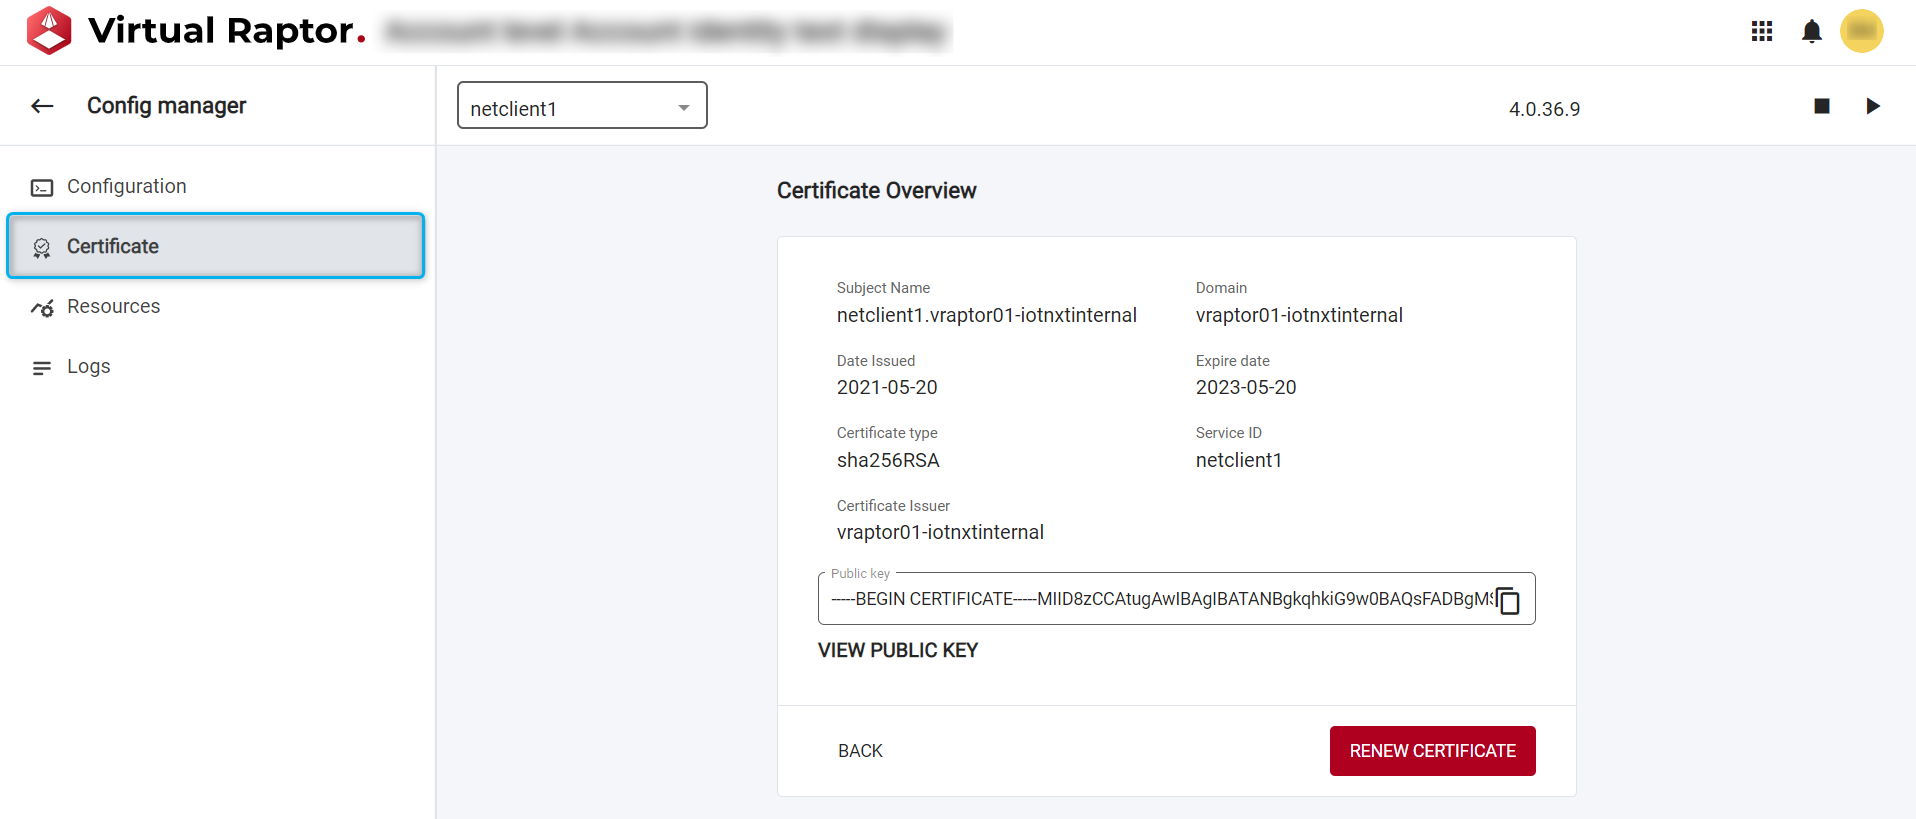
Figure 13 – Service Certificate Overview
All the details of the certificate, specific to the service being viewed, will be displayed. The user will be able to copy the content of the public key, as well as renew the certificate. By renewing the certificate, the user extends the expiration date of the cert, so that the internal details remain the same and less editing work from external integrators will be required:
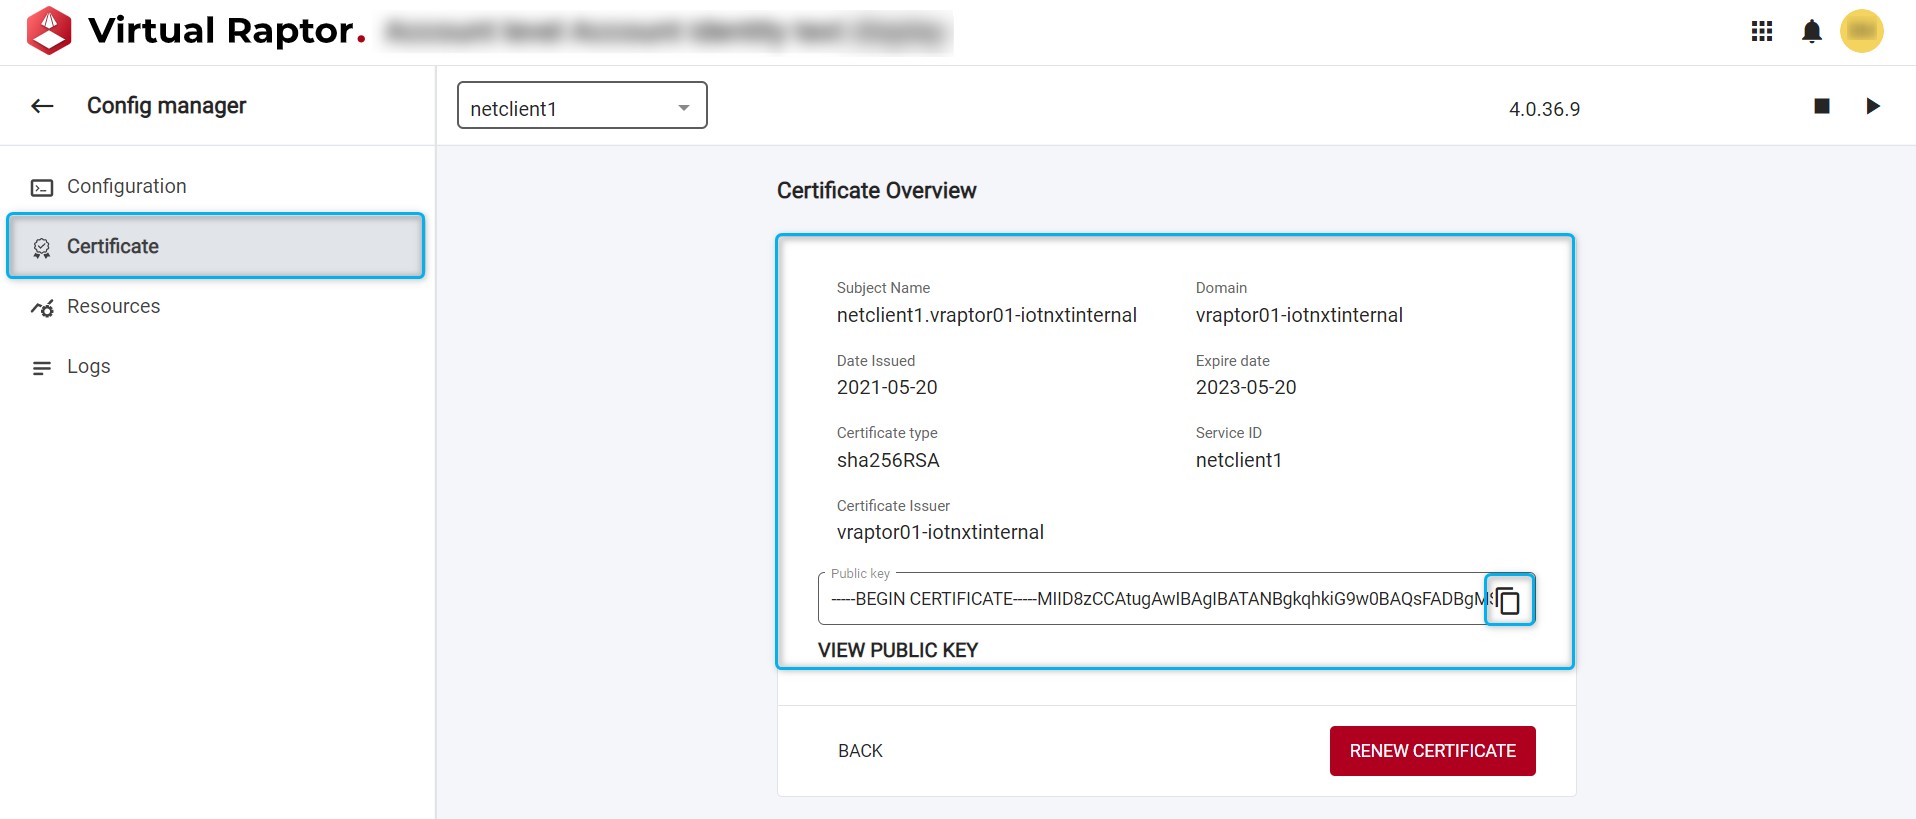
Figure 14 – Renew Service Certificate
Once the certificate has been renewed, there will be a toast (pop-up) to state whether the task was successful or not (if not - a brief description of the error will be displayed):
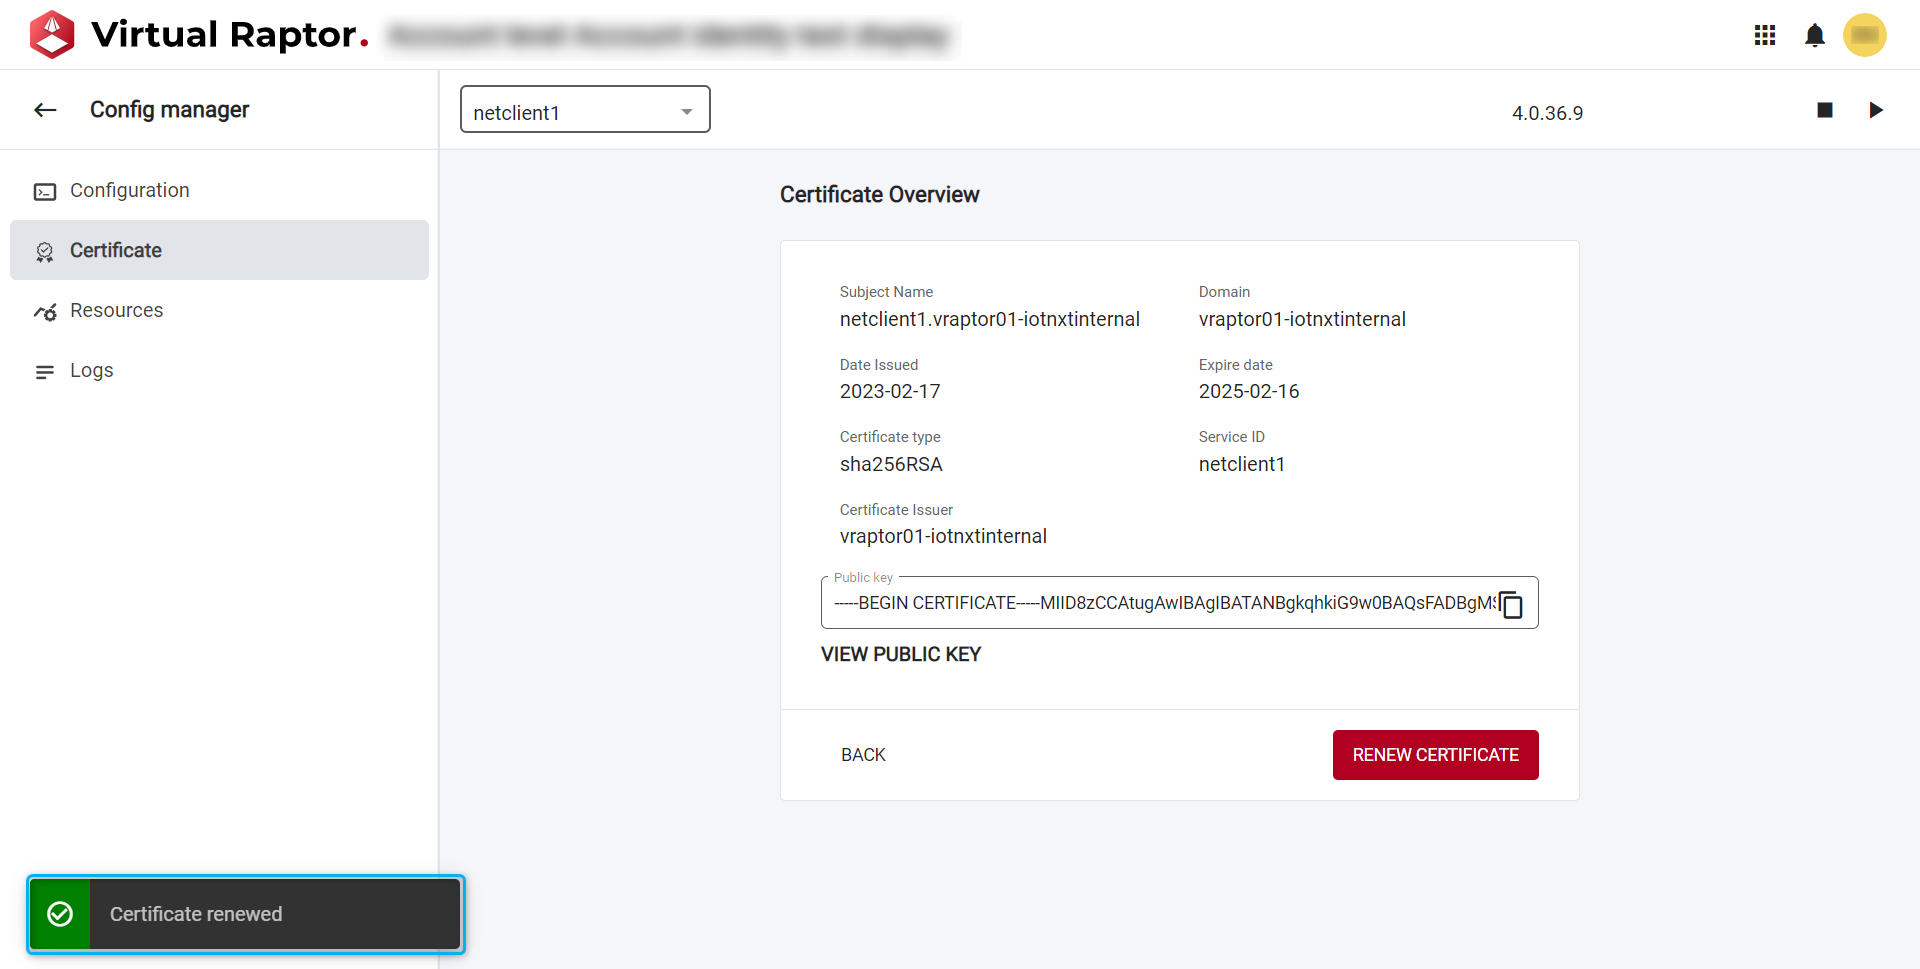
Figure 15 – Successful Cert Renewal
Core Services
Deploy New Core Service
Users will be able to navigate to ‘Core Services’ under the Manage Services tab. The user will be able to, much like Driver Services, view, stop, start and delete individual or multiple selected core services.
The versions of the services will be visible once the drop down arrow is selected and can be upgraded or downgraded. Upon successful upgrade or downgrade a toast notification will pop up to notify the user of the outcome (success/failure) – if there was a failure, a brief descriptions will be displayed to the user.
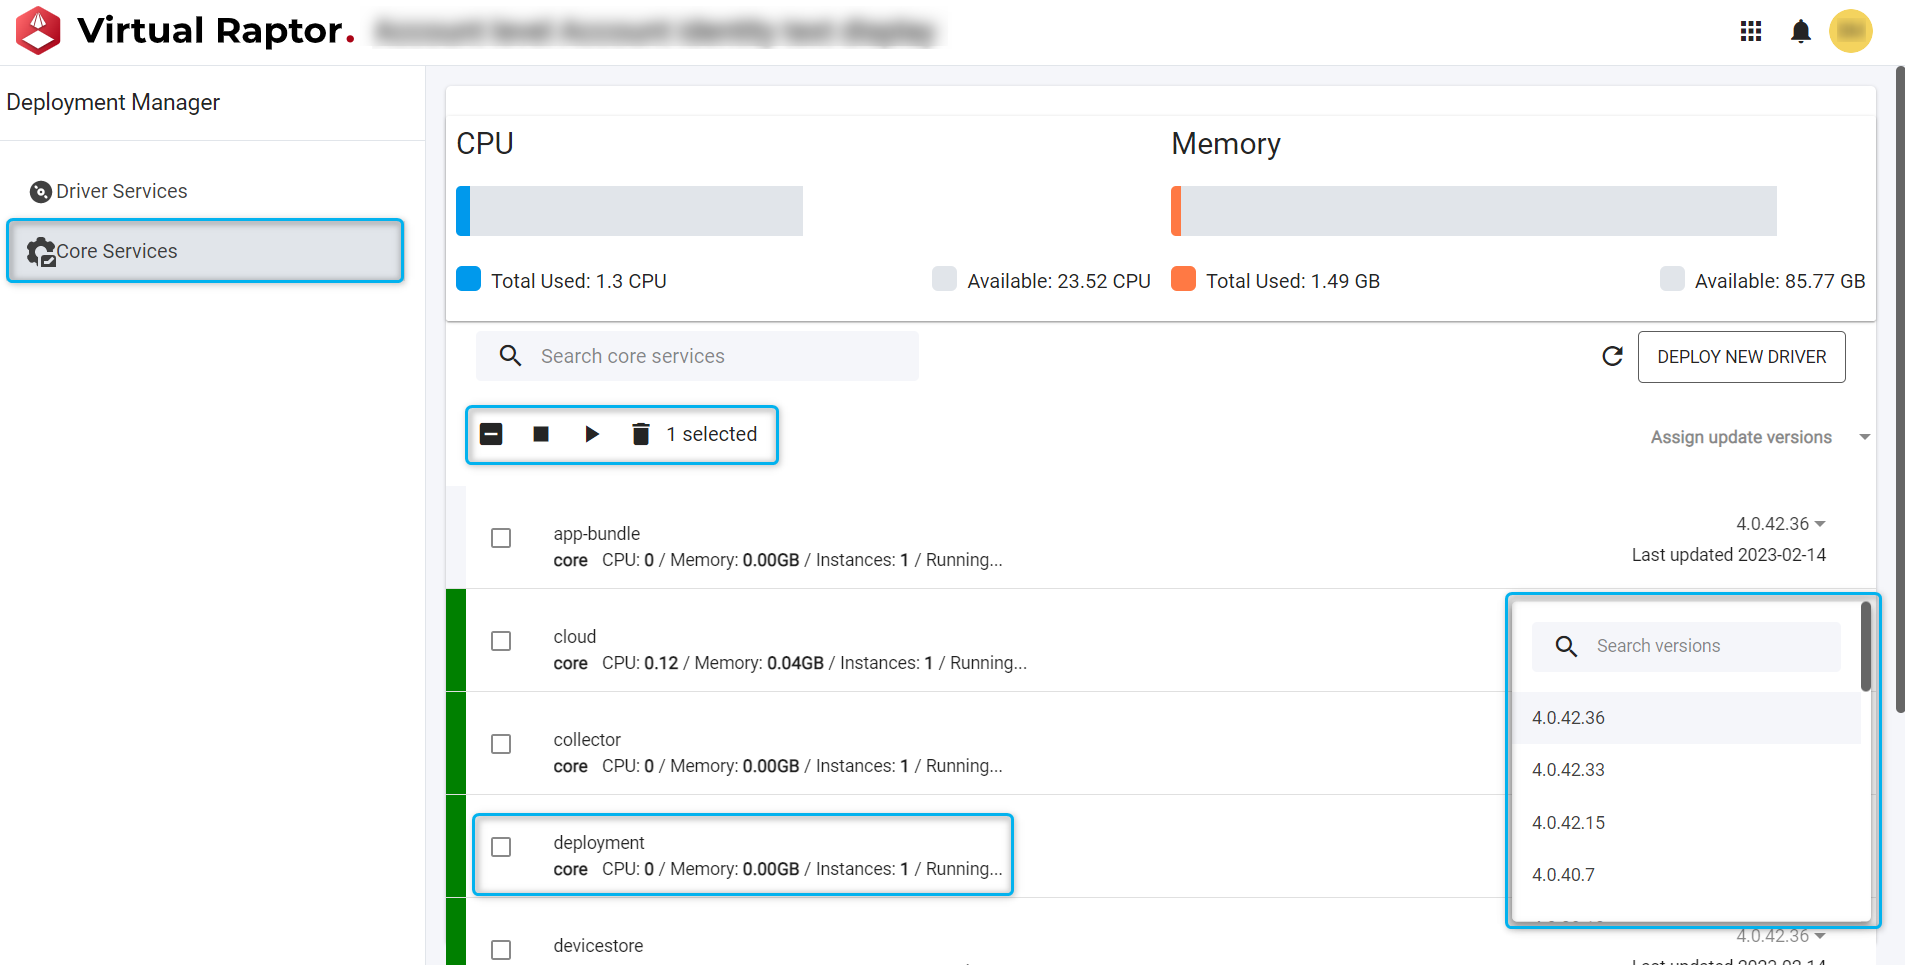
Figure 16– Manage Core Services
Bulk Updates
The user will be notified that there are multiple updates available for deployed drivers, by clicking on this notification the user will only see services that have updates available.
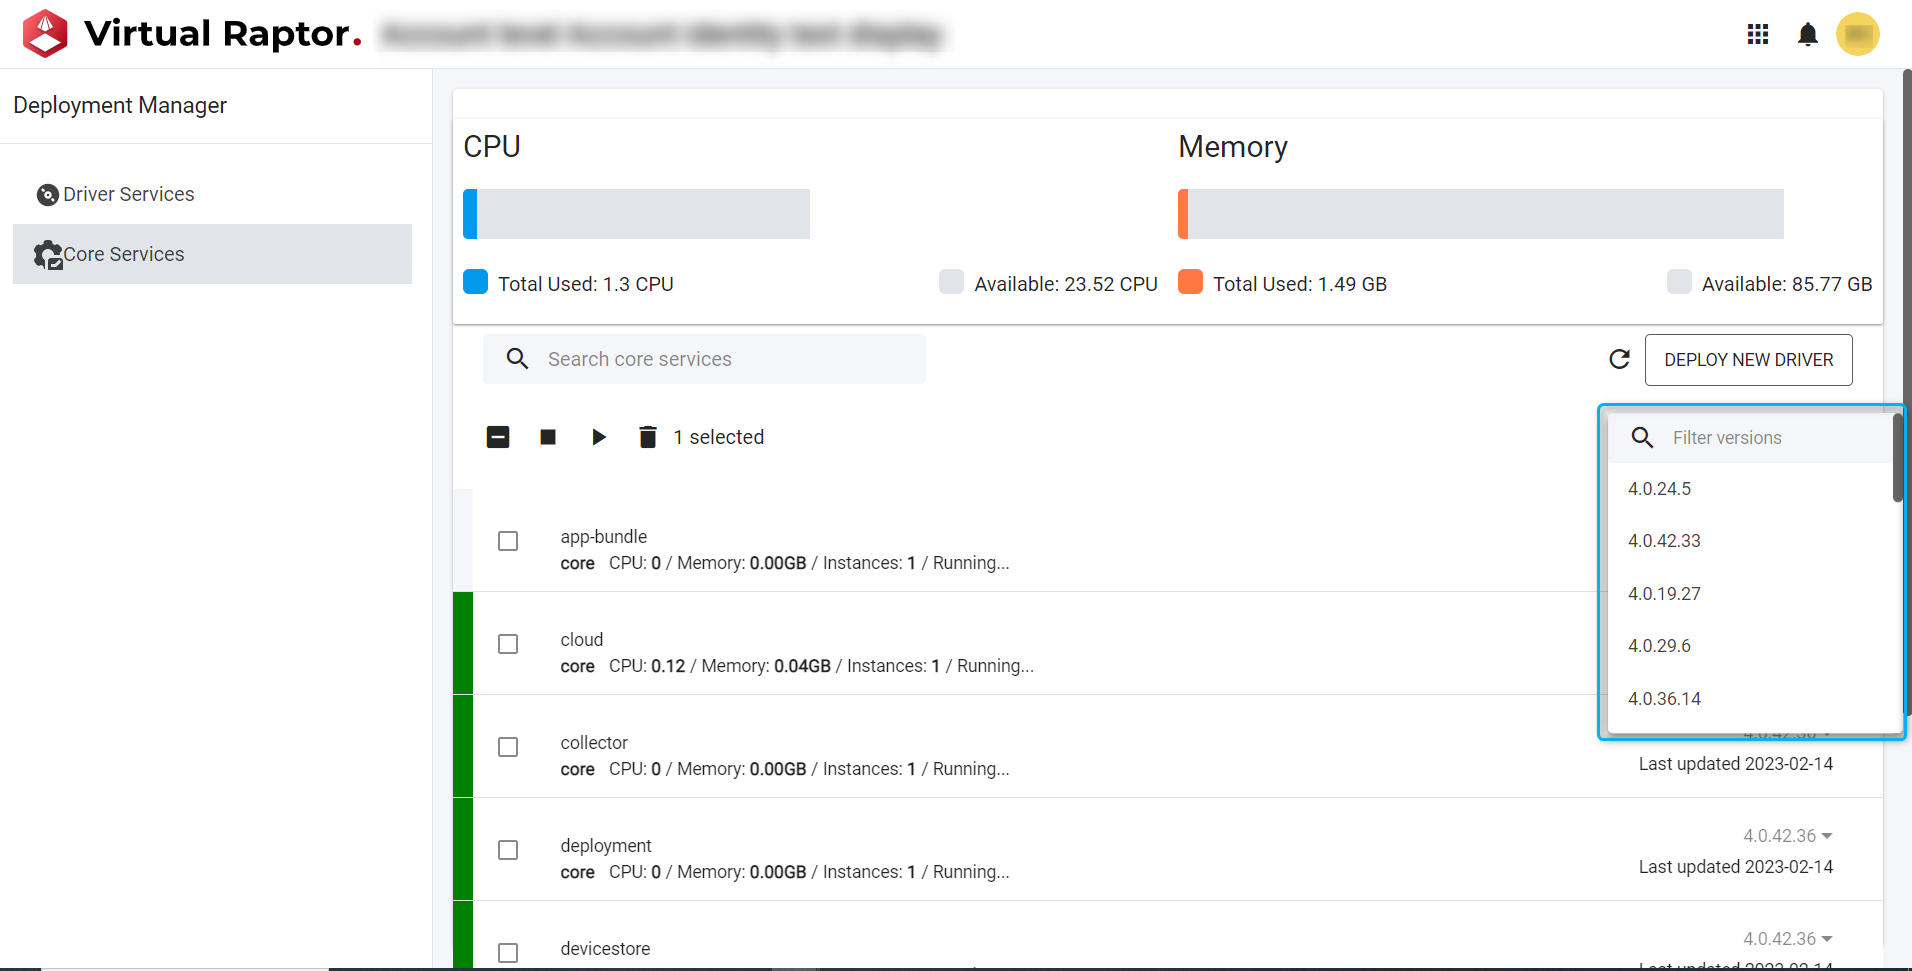
Figure 17 – Available Updates
The user now has the option to update all the driver to the latest version or update them manually one by one.
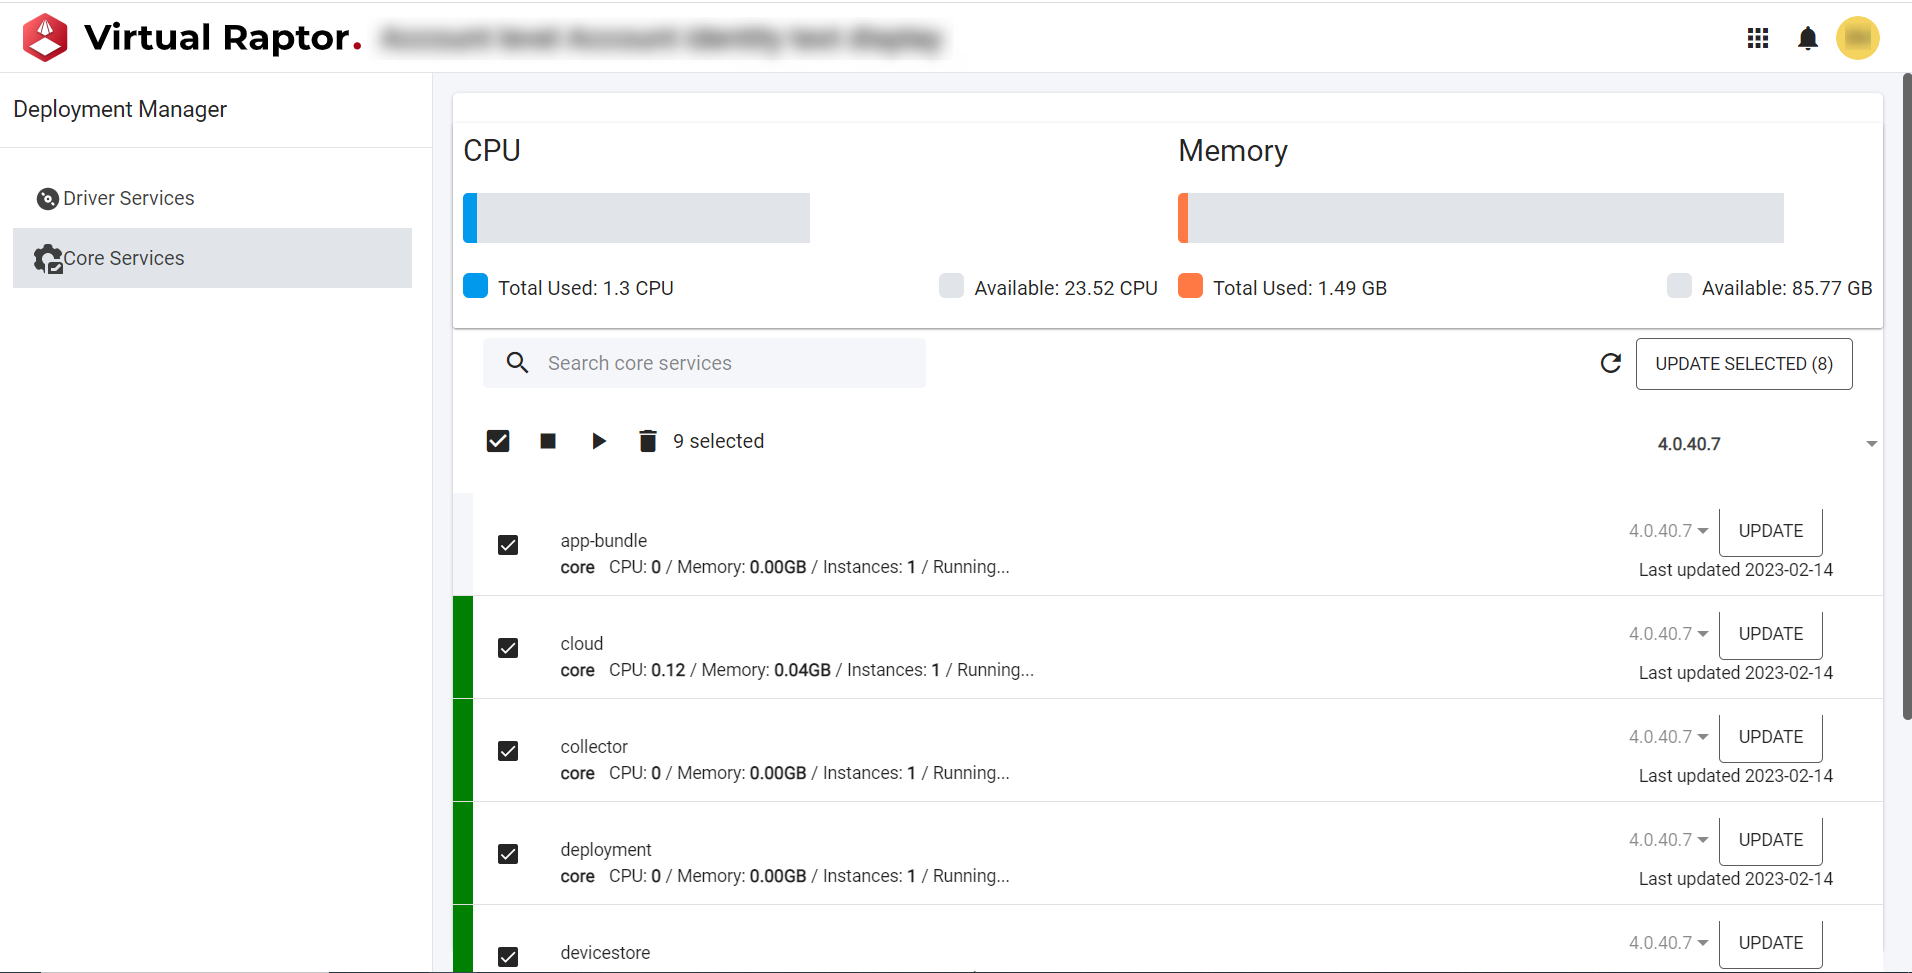
Figure 18 – Select Driver(s) to Update
The user will be shown progress on the update.
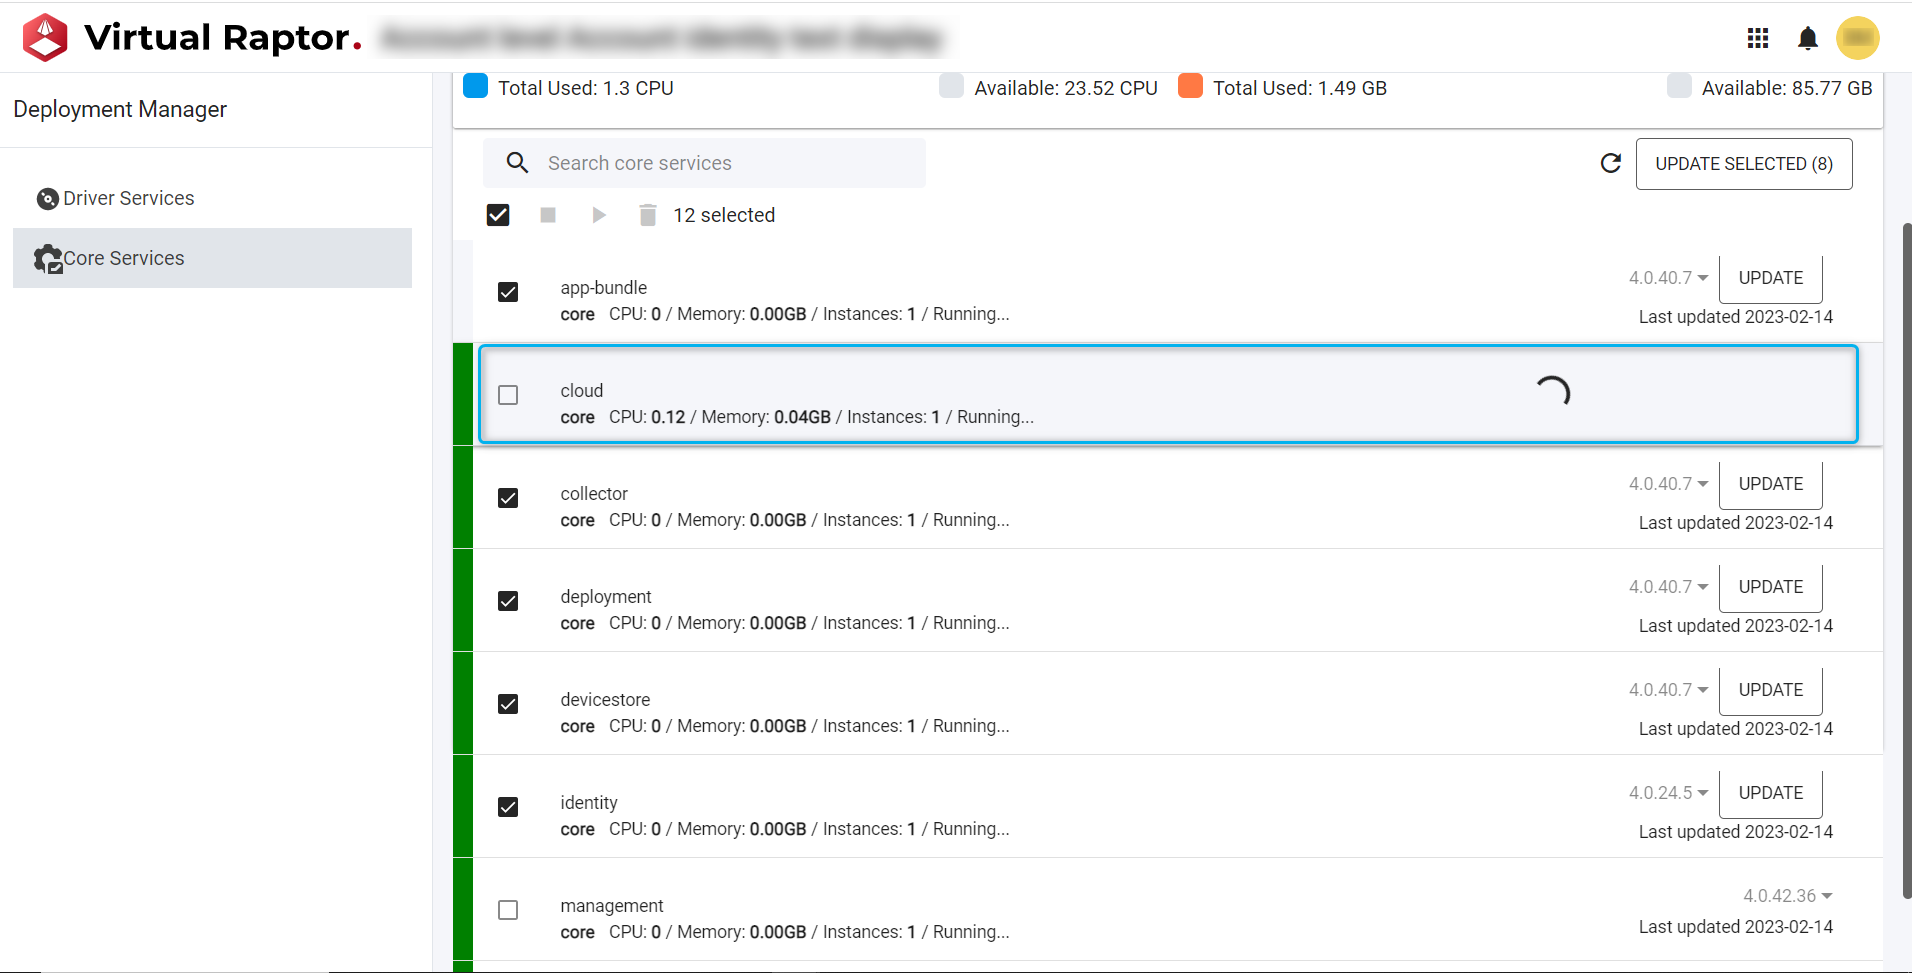
Figure 19 – Update Progress
The user will be notified once the drivers has been updated. They will also be notified of any errors that occurred during an upgrade/downgrade process. The error will contain a small description.
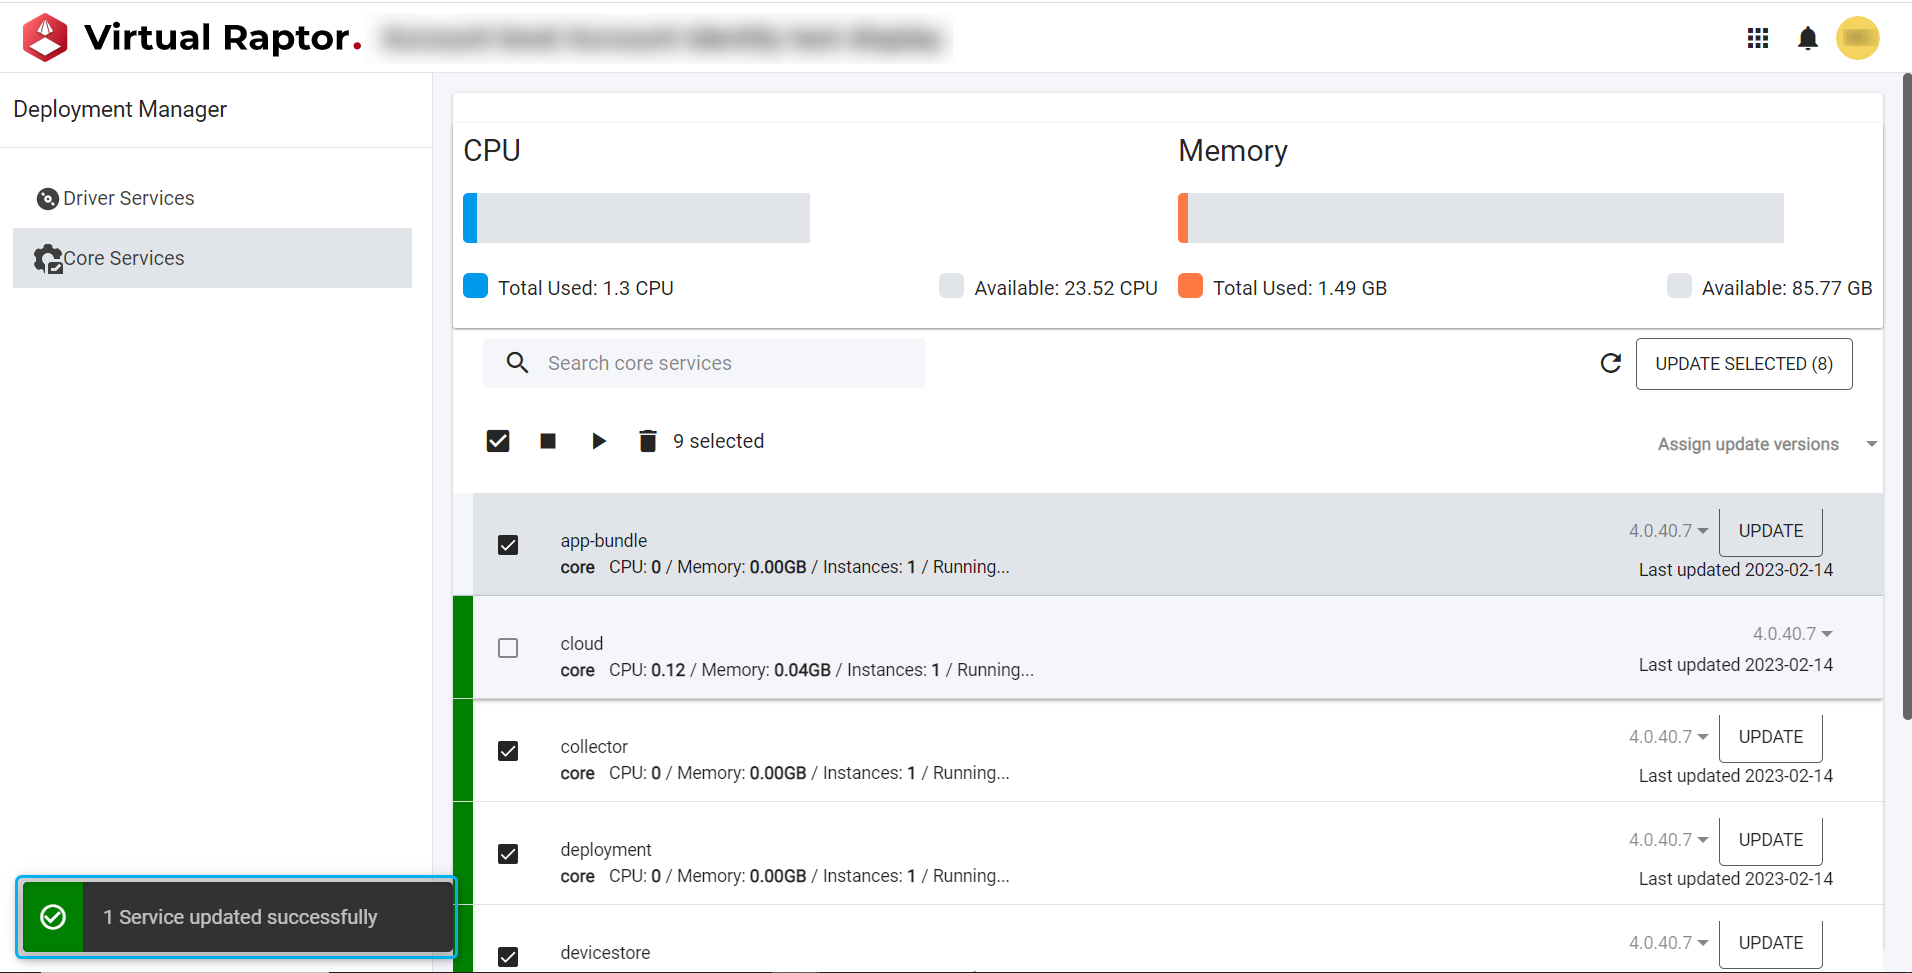
Figure 20 – Successful/Unsuccessful Driver Update
When the user selects a driver or selects multiple drivers they will have the option to upgrade or downgrade a specific driver or multiple drivers.
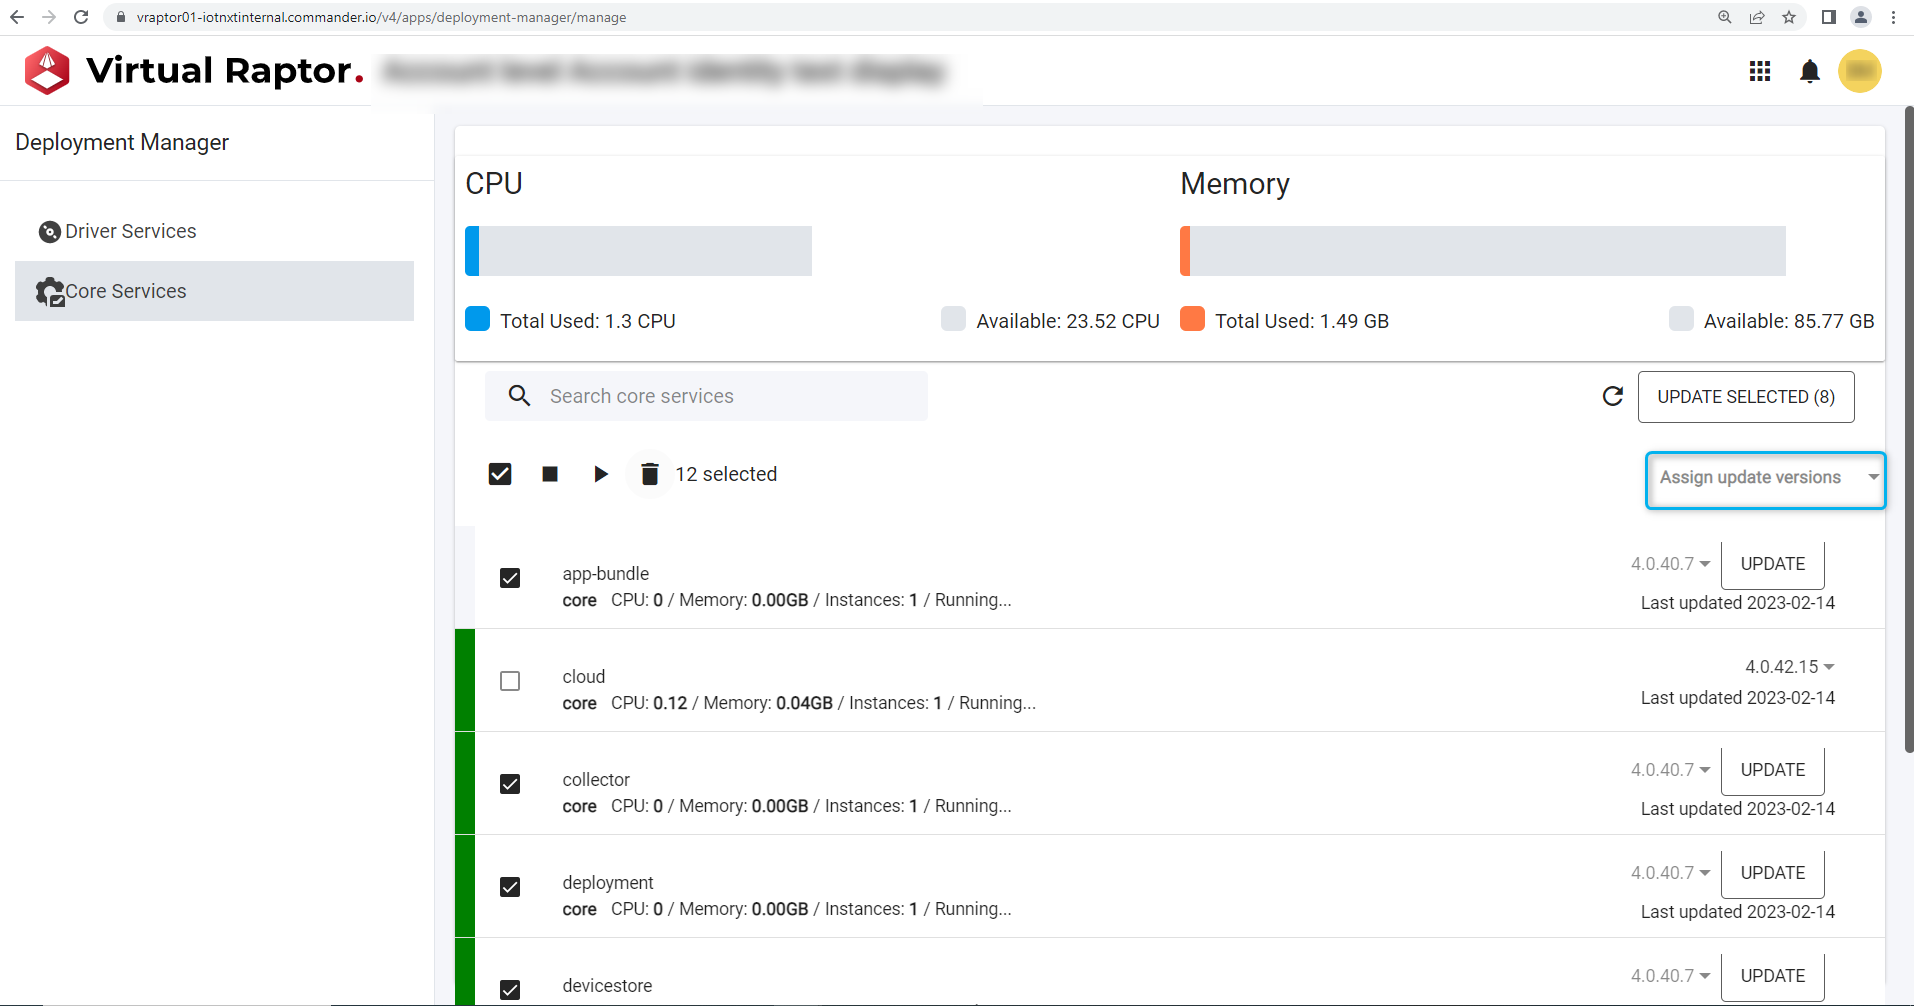
Figure 21 – Select Driver Version