
Credential Manager Application
Jan 1 2022 at 12:00 AM
This article provides a walk-through of commonly performed tasks within the V-Raptor using the Credential Manager for secure communication. This application can be found on a Raptor specific landing page.
Overview
Developers that need to integrate with the Raptor can use the management interface or API to generate a set of credentials for themselves. There are two types of credentials used in the Raptor
- Bearer tokens. These require a certificate issued by the Raptor’s certificate authority
- API Keys.
Note:
- API keys are only used to send telemetry and are enabled by default
- Certificate information depends on how the Raptor is setup. This document describes how to configure the certificates during installation Certificate Setup and how to best make us of the application.
Credential Manager
Credential Manager makes it easier for users to manage certificates and API keys. Using the application users can generate, renew, remove certificates and API keys respectively.
The user will require the following roles to utilise this application:
- Raptor Api Key Manager
- Raptor Certificate Manager
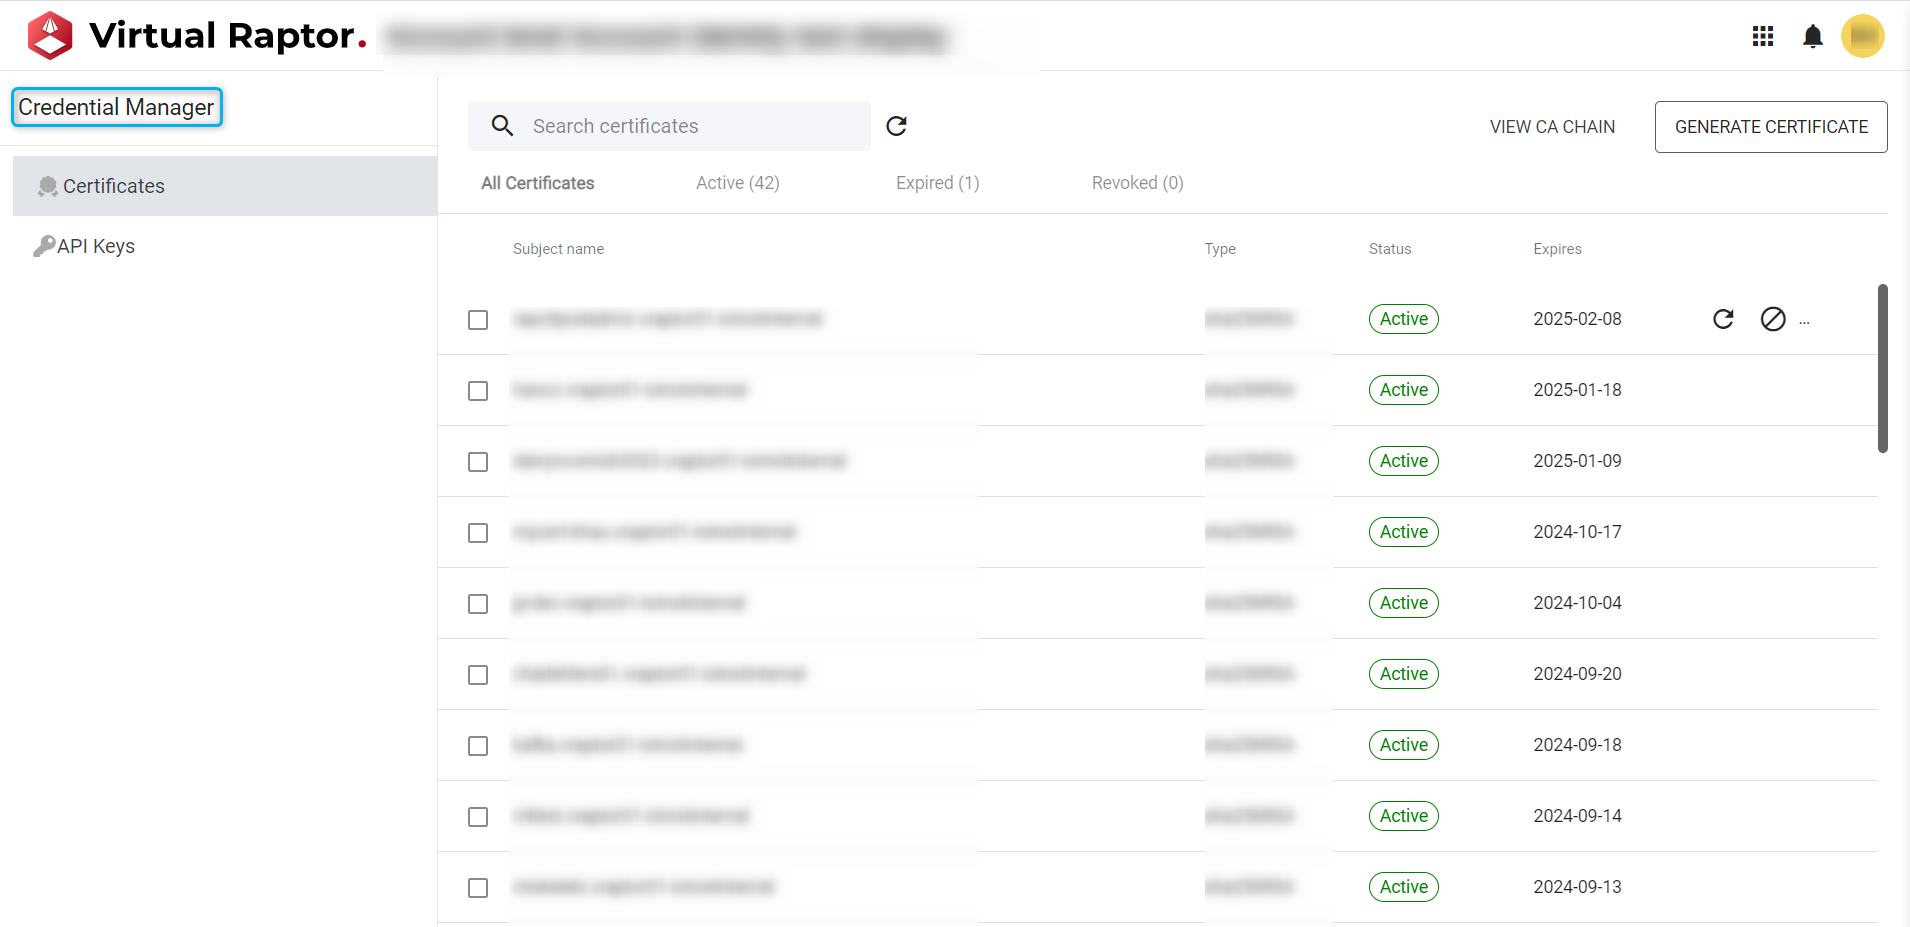
Figure 1 – Credential Manager Overview
Manage Certificates
Certificates on the Raptor are available for public connections and can be made use of if necessary/required. For secure communication from a device outside the private network this is mandatory, or the device will not be allowed access to communicate to the device driver.
The Raptor can generate its own certificates. This certificate generation is done via the Raptor Deployment agent and means these certificates can be used internally between services for validation and authorisation. Public certificates are generated by external sources and these are signed certificates. The certificates are signed by a trusted Certificate Authority (CA) such as Let’s Encrypt or Cloudflare. They can be used to create encrypted streams (SSL/TLS/DTLS) for certain device drivers that require it. As these device drivers need to be exposed outside of the Raptor, they require a certificate that has been signed by a trusted CA, since it is not feasible to install the Raptor’s CA public key on all devices.
Once the certificate for the raptor public device drivers is generated, it can be copied as plain text/pem/pfx file and then pasted within a text field. It is a globally recognised certificate that is readily available (if not expired) and the driver chooses the specific certificate when necessary. The certificate file location for internal use will need to be specified as well as the certificate password (if it is password protected).
The Raptors Identity server restarts whenever certificates are modified, during which the authentication process is temporarily offlineWhilst certificates are being modified Identity server restart
The date of the certificate’s creation and association with a device (name specific) will be visible. Certificates for devices can also be revoked – in case the device/driver is decommissioned or compromised. Certificates must be generated per driver and person utilising them, and the UI enhancements allow for easy certificate generation.
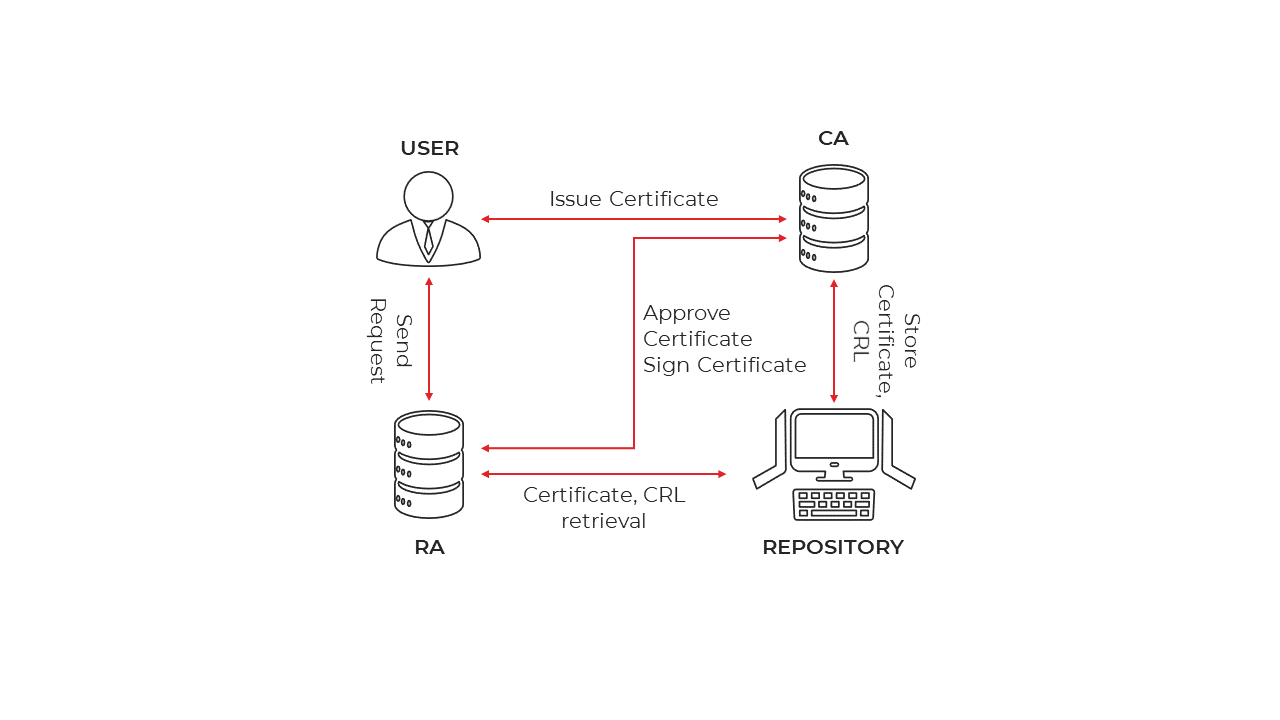
Figure 2 - CA Certificate Flow
Developers require certificates to authenticate their drivers with the Raptors services. Certificates can be generated from the Credential Manager for the purposes of integration. These certificates can be revoked or renewed as required. All that is required to generate new certificates will be a unique subject name and the Raptor will then generate a public and private key with a digital signature 1. All information will be visually displayed upon generating the certificate. This visualisation will not be repeated.
The certificate management page on the V Raptor UI will manage the above-mentioned aspects such as:
- Certificate generation
- Certificate expiration
- Certificate deletion (revoke access)
- Renew certificate
- Download certificate
Certificates
Certificates are managed by the owners of the Raptor’s domain. These certificates can be viewed, revoked, and generated from this view. Fields specific to the Certificate are: Subject name, Type, Date Issued, Expires on. The user are responsible for managing their own certificates as there is not currently a notification system in place.

Figure 3 – Certificates
Users can individually select certificates or in bulk as required. Each action will be accompanied by a success or failure toast and message. These bulk and single actions are:
Download Certificate
The user is able to download the displayed certificate(s) by selecting the icon. This will initiate a download for the user to store locally on their device and utilise as needed.
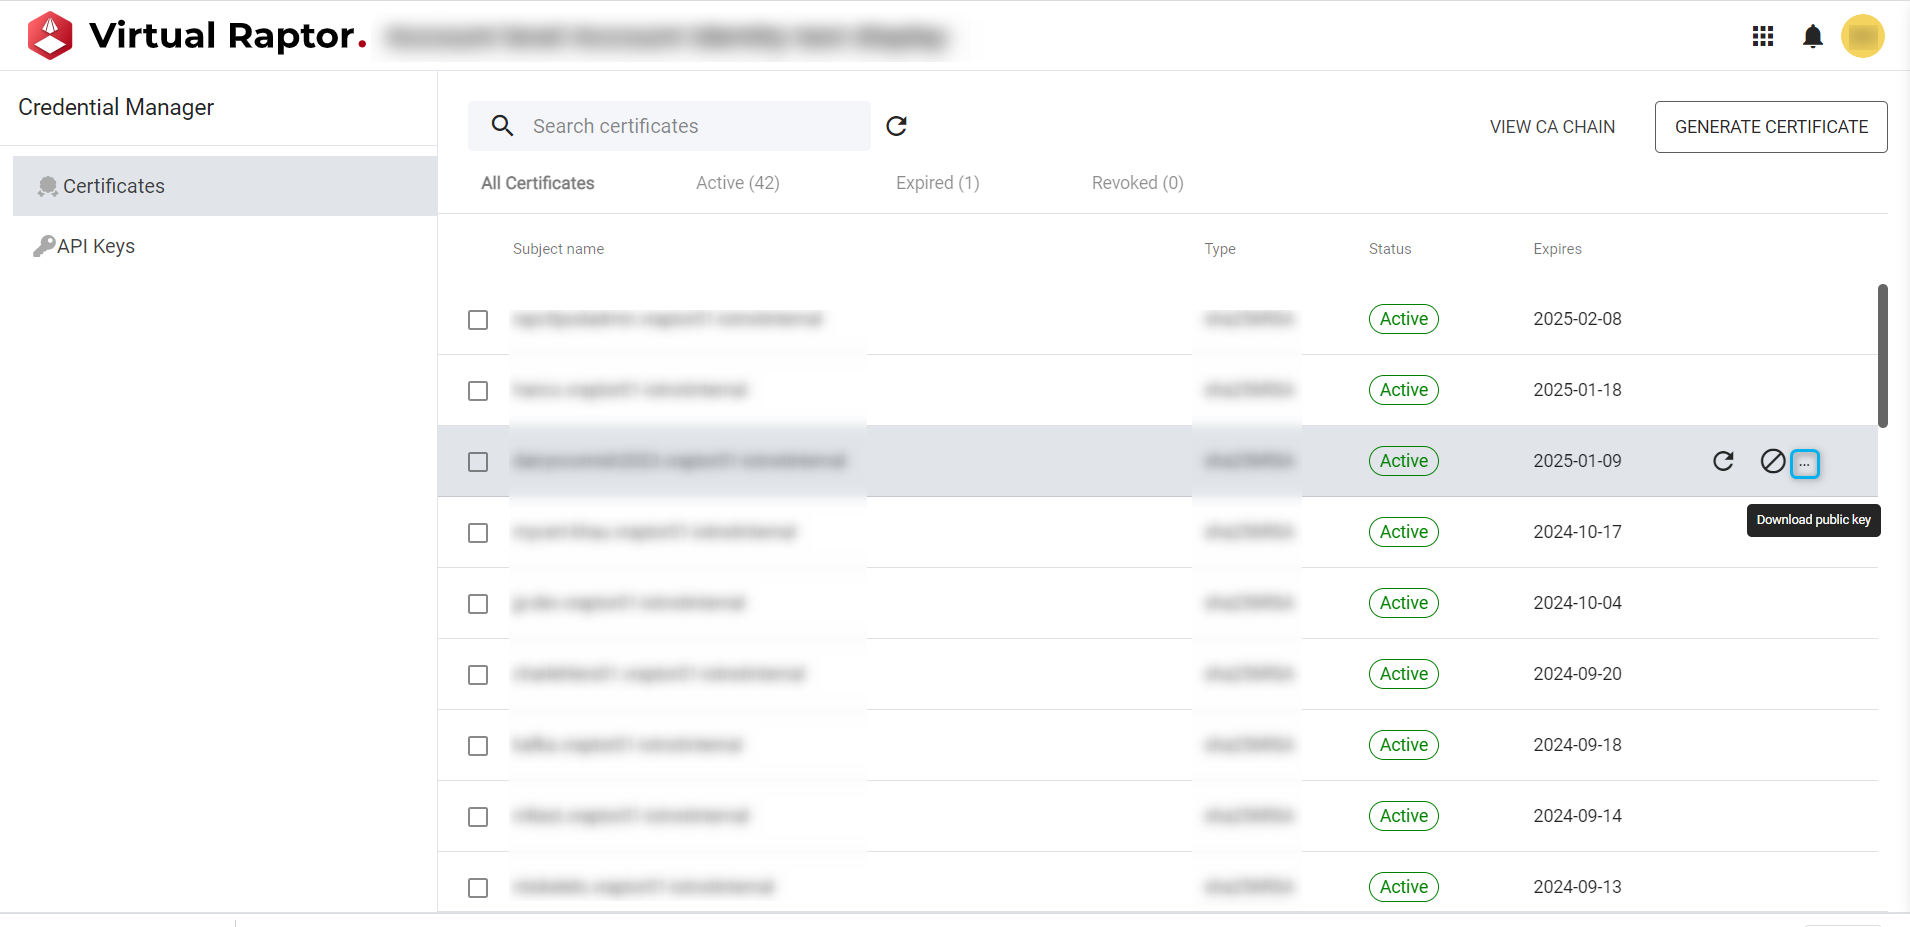
Figure 4 – Certificate Download
Revoke Certificate
A certificate can be revoked, which will render it unusable by the user or other users that intended on making use of the certificate(s).
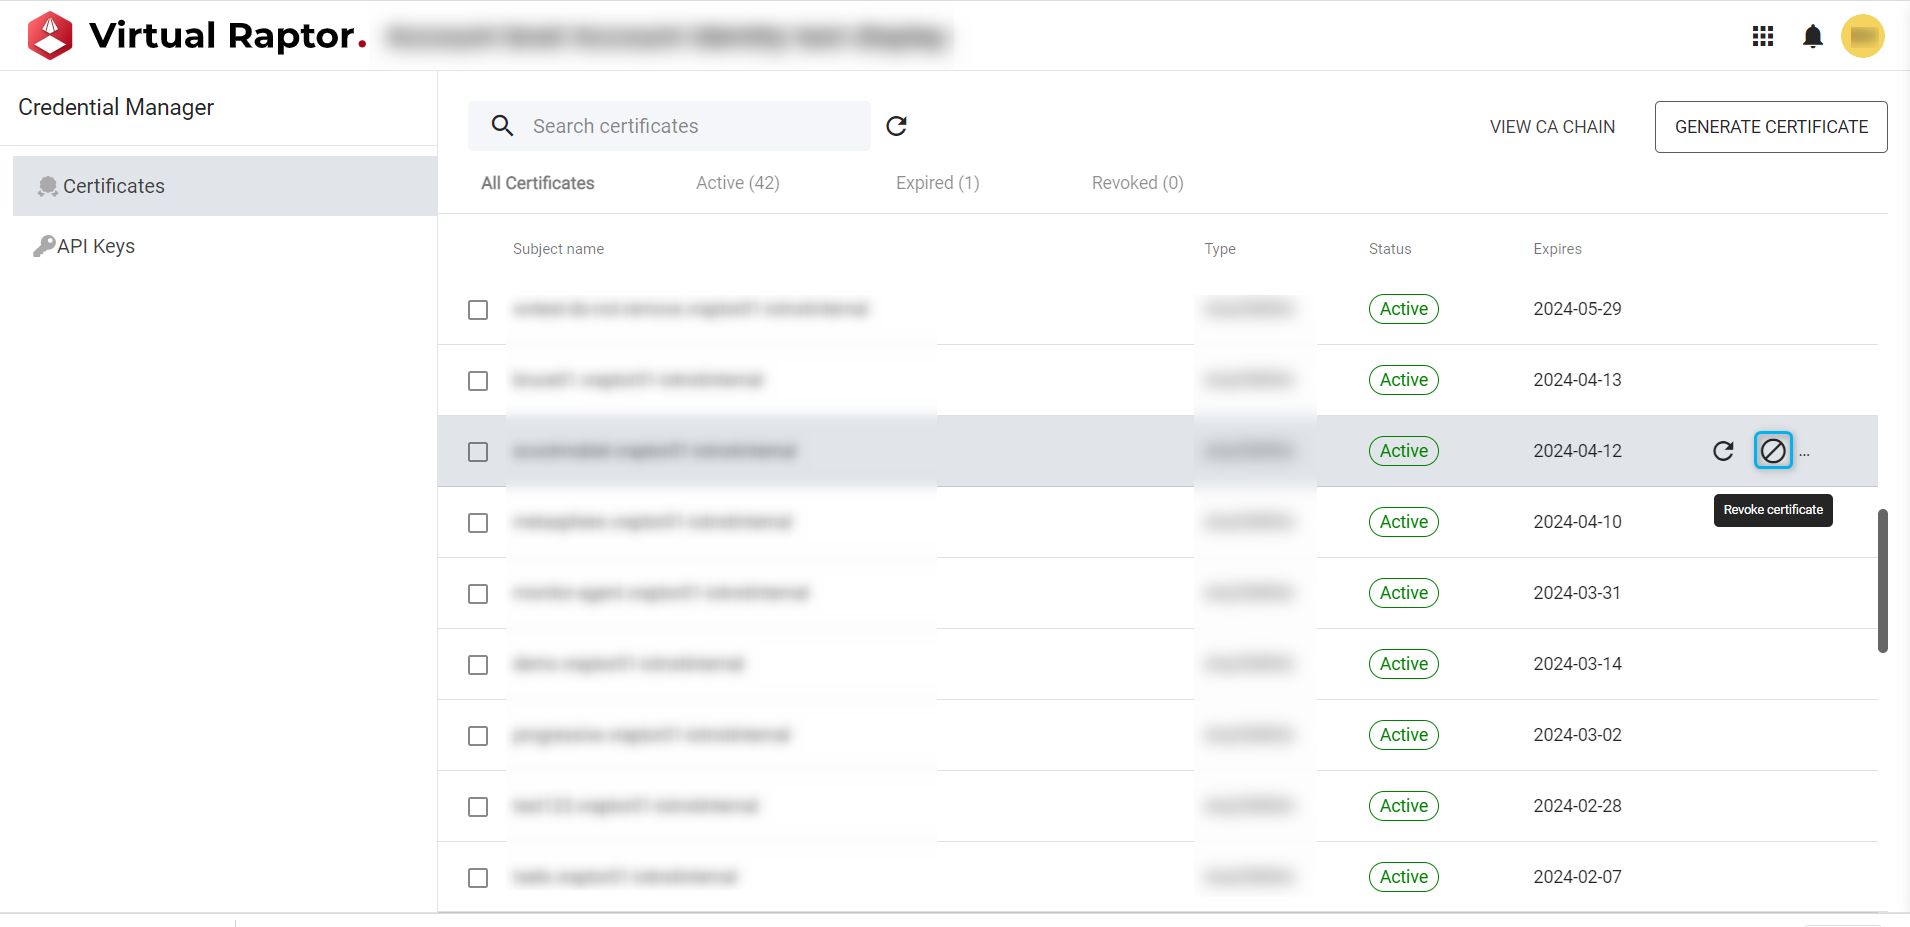
Figure 5 – Revoke Certificate
Renew Certificate
Certificates carry an expiry date. Once they expire numerous services and integrations will stop working. The ‘Renew’ functionality allows the user to renew an expired certificate which means the user can continue to use the same certificate that is already in place, instead of generating a new one and replacing the old one.
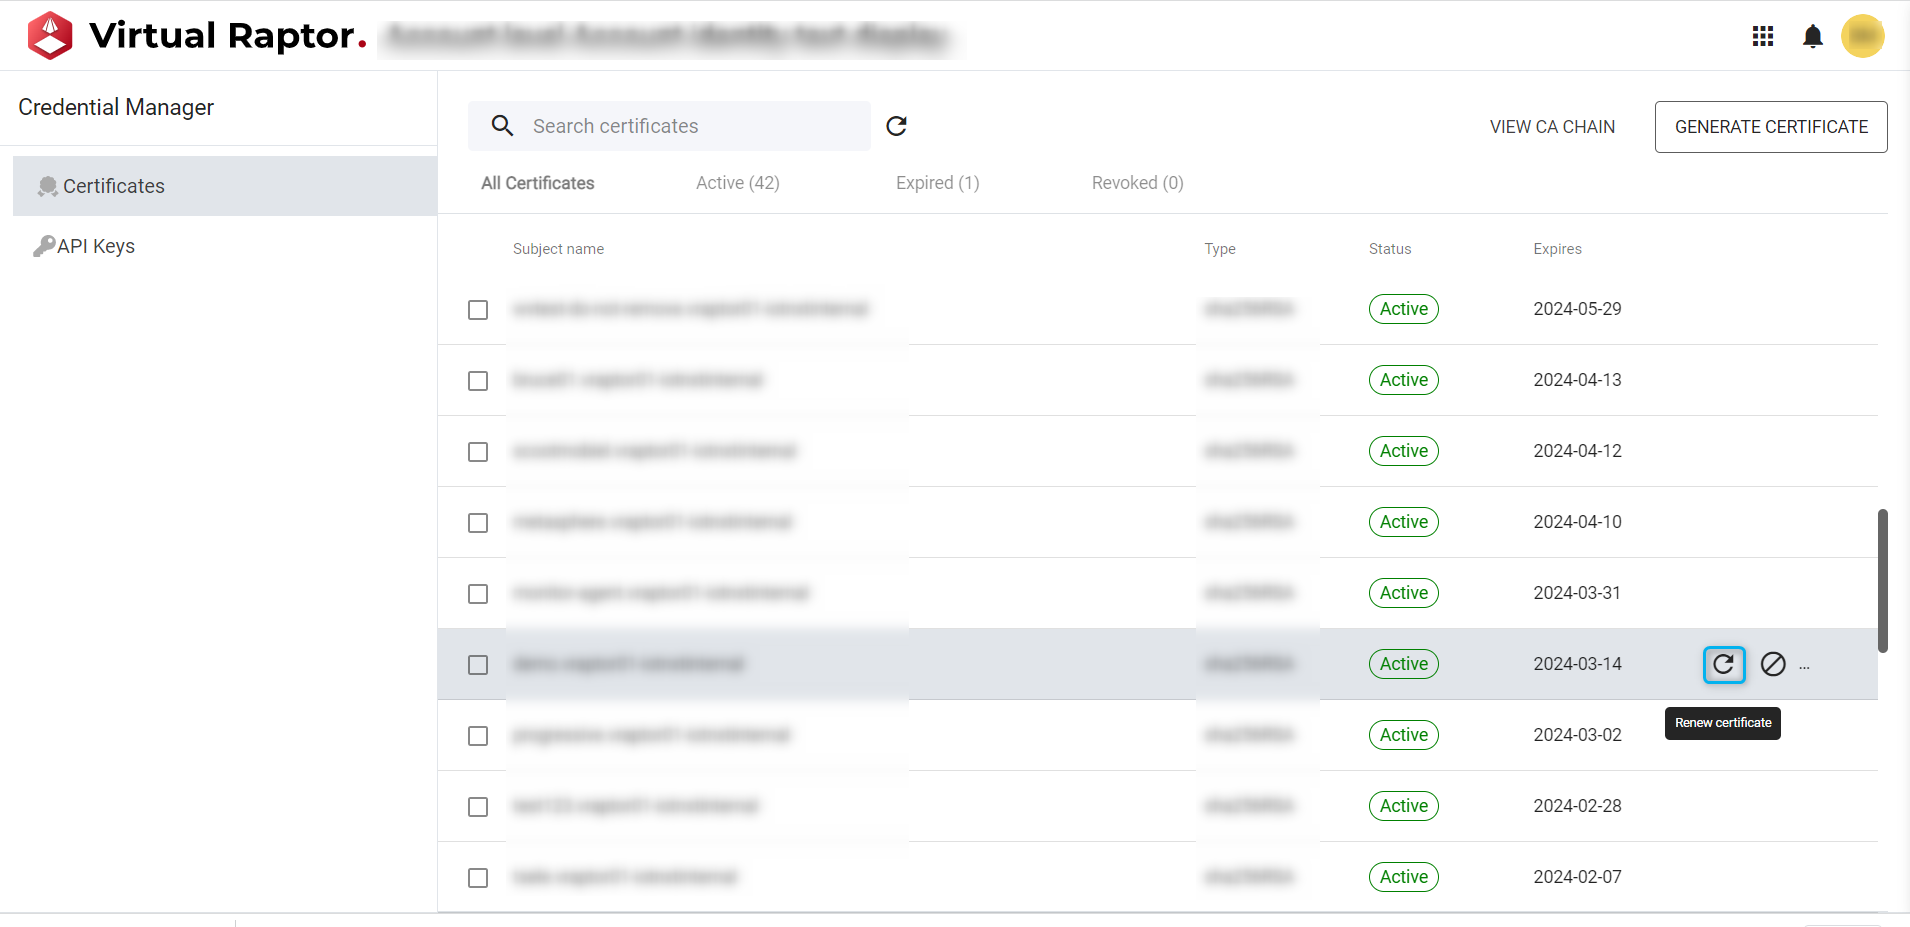
Figure 6 – Certificate Renewal
Once ‘Renew’ is selected, the user is required to confirm the Renewal action. Once confirmation is completed the certificate is renewed. The details of the certificate are displayed to the user for their own use. A toast pop-up is indicated to the user for a successful or unsuccessful action (if unsuccessful a brief message identifying why will appear):
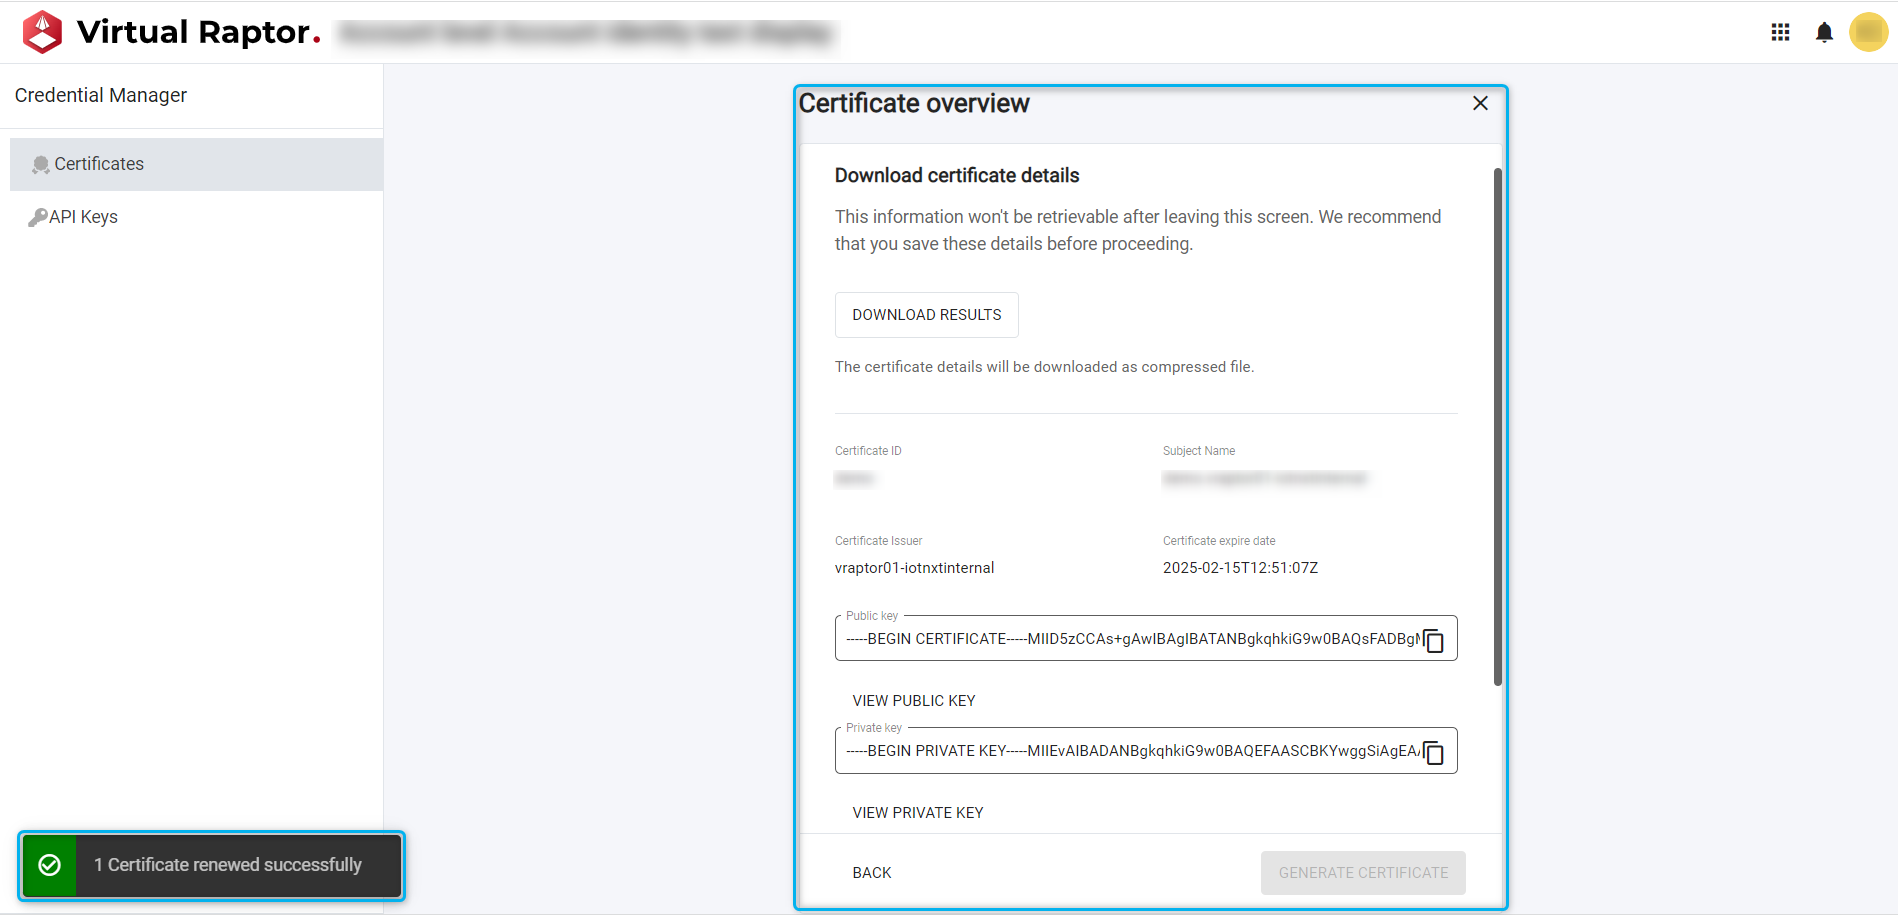
Figure 7 – Certificate Overview
Generate Certificate
A user is able to easily generate a new certificate for use within the Raptor. This process is described and visualized below.
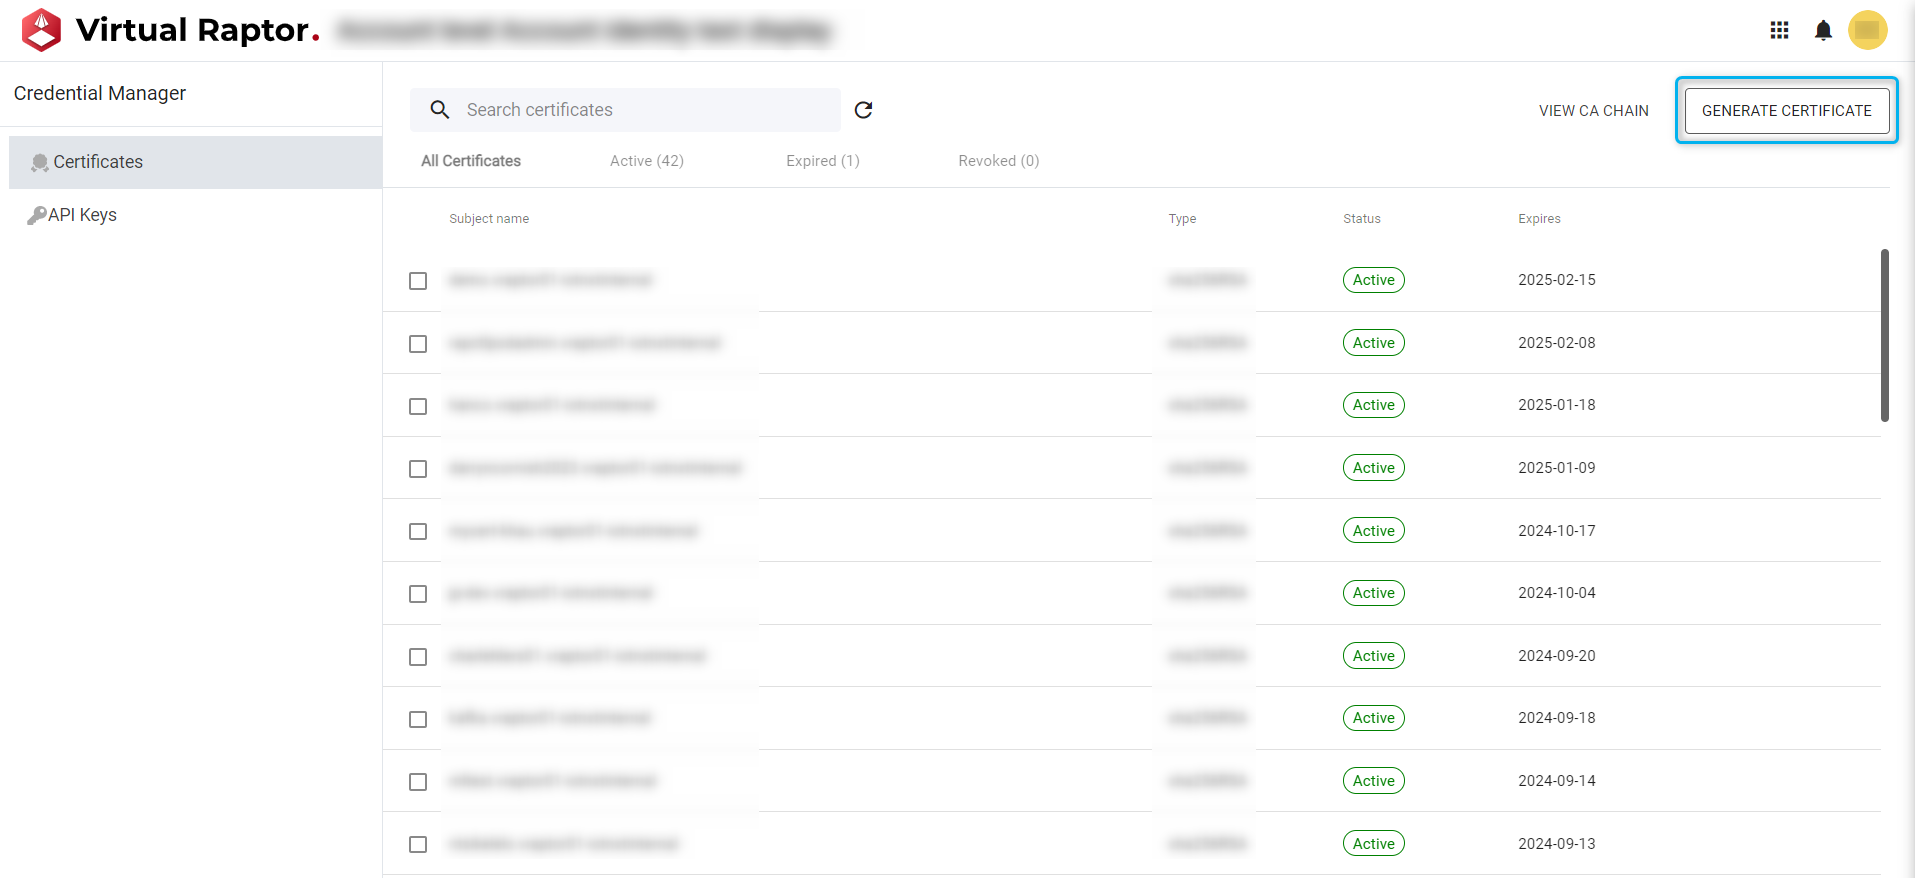
Figure 8 – Certificate Generation
User will be required to enter the certificate ID (Certificate ID may not contain any whitespace or uppercase characters. Only “-“ is allowed as a unique character). With an accepted certificate ID, the Certificate Overview screen is displayed. (see Clip 1)
Clip 1 – Generate Certificate
Users can expand on the ‘Public Key’, ‘Private Key’ and ‘Digital Signature’ fields. The user will also be able to copy each of these fields as well as download the details of the certificate.
It may take a minute or two for the credentials to be propagated through the Raptor.
A CA chain is the Certificate Authority chain for a given set of certificates.
It is a Root certificate, that is used to issue a Signing certificate and that, in turn, is used to issue all the internal Raptor certificates. The reason for this is,
The Root certificate is the main certificate used to authenticate all Raptor certificates, but if it is compromised, there are severe security risks. To mitigate the risk, a Signing certificate is used just below the Root, so that in the event that the Signing certificate is compromised, we can just revoke the Signing certificate and then issue another one. Thus, we can immediately issue other internal certificates using the new Signing Certificate.
Users can view the CA Chain as shown below (the fields details can be copied):
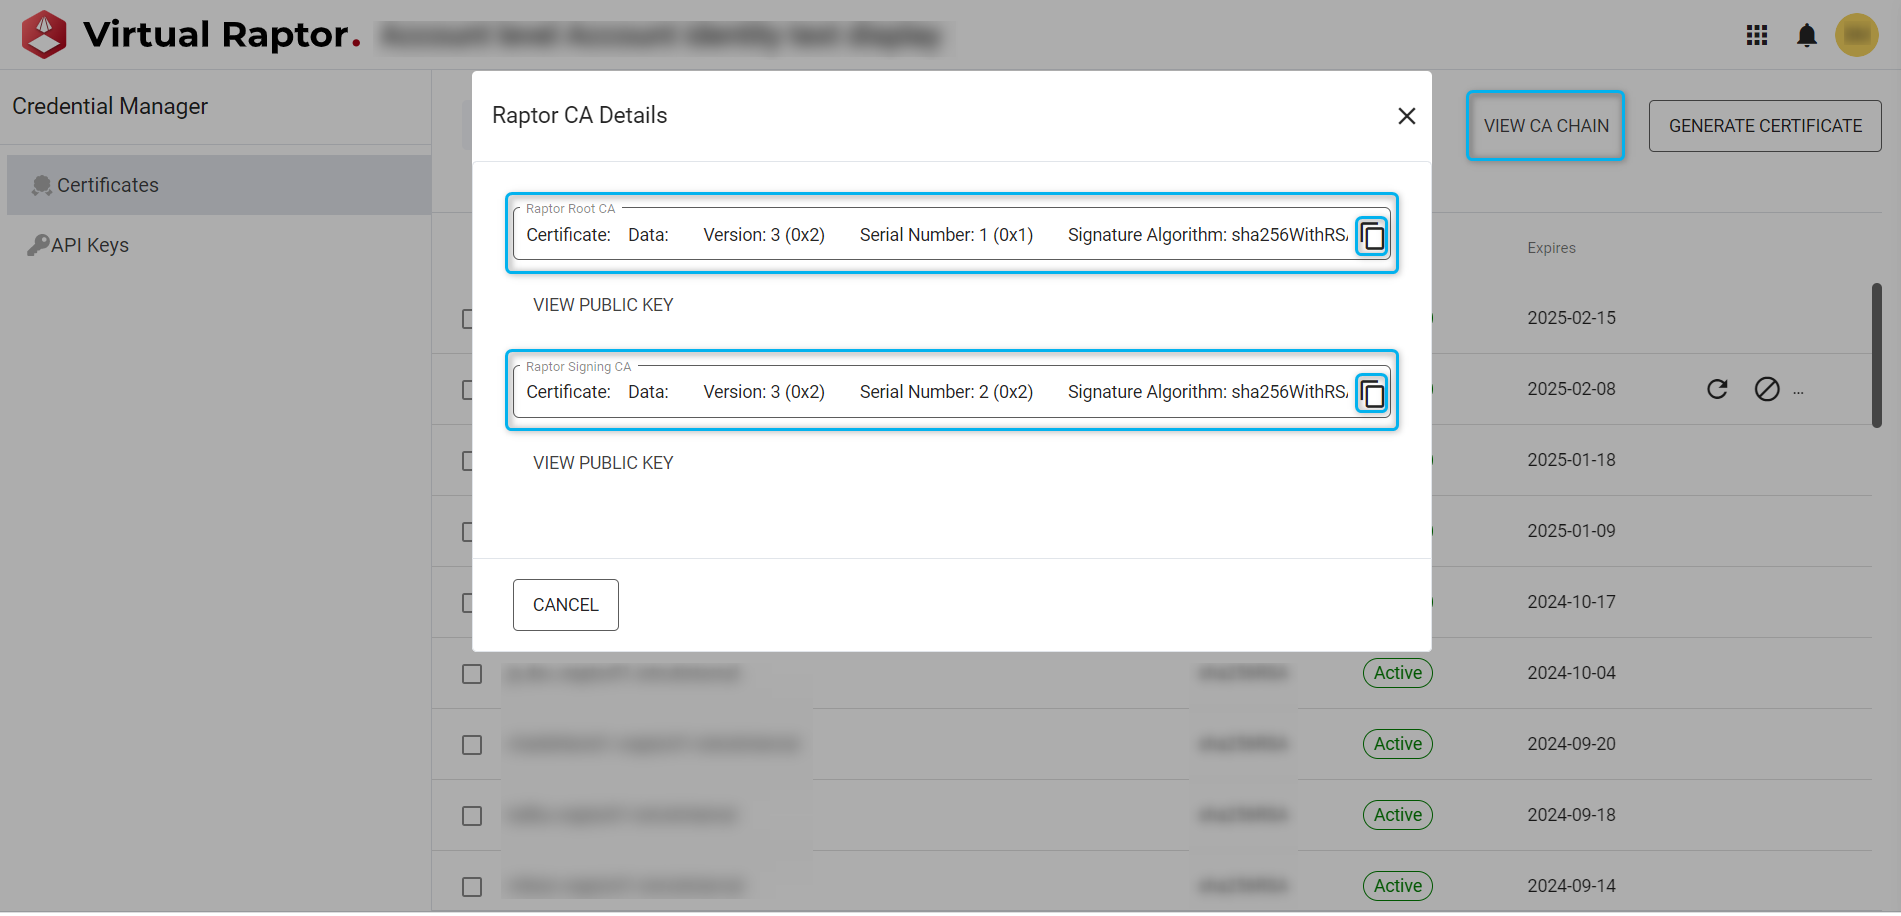
Figure 9 – CA Chain
API Keys
This is a unique key that a developer or external integrator will generate and utilise so that they can include it within their authorization when making HTTPS requests to the Raptor APIs. This means that the token will not expire whilst making API calls – the API key will automatically authorize the user once it is utilized within an API call. These API Keys can be viewed, generated, renewed, and revoked:
Navigating to API Keys:

Figure 10 – API Keys
Revoke and Renew API Keys
Users can Revoke and Renew API Keys by selecting the icons below. The user will need to follow the relevant pop-up steps to complete the desired actions:
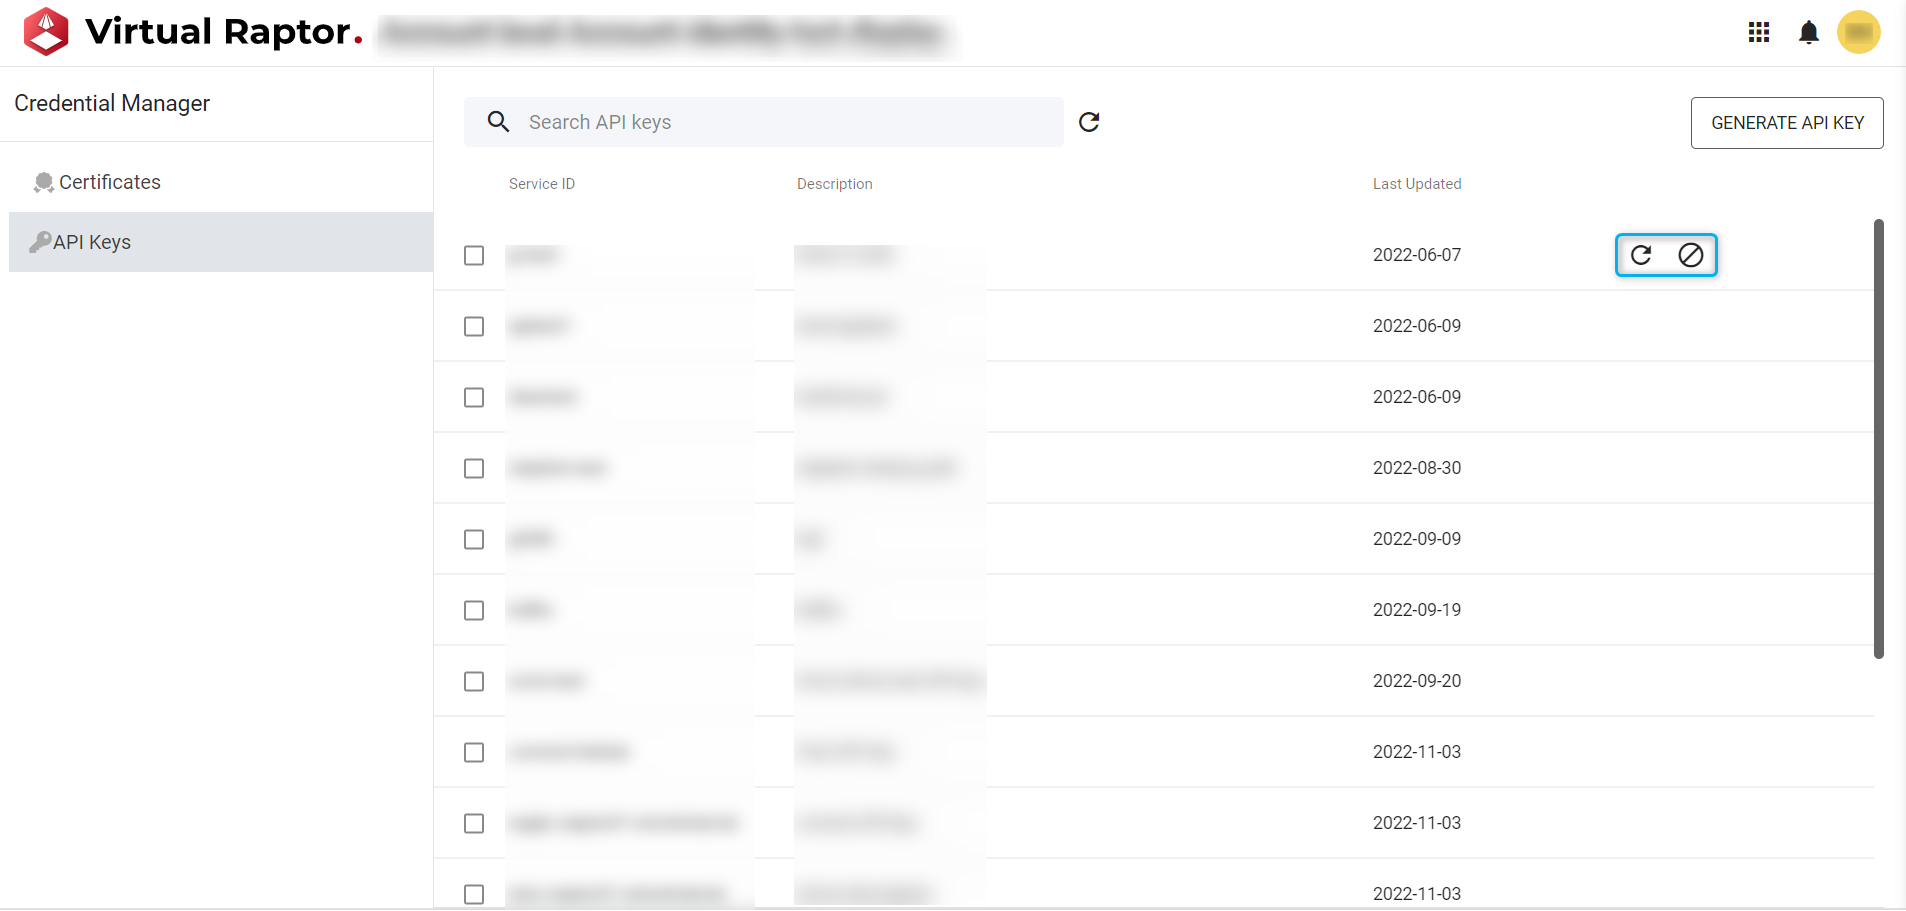
Figure 11 – API Key Revoke/Renew
Bulk Revoke and Renew API Keys
As above - users can Revoke and Renew API Keys, but by selecting multiple existing keys, they can perform the desired task at bulk.
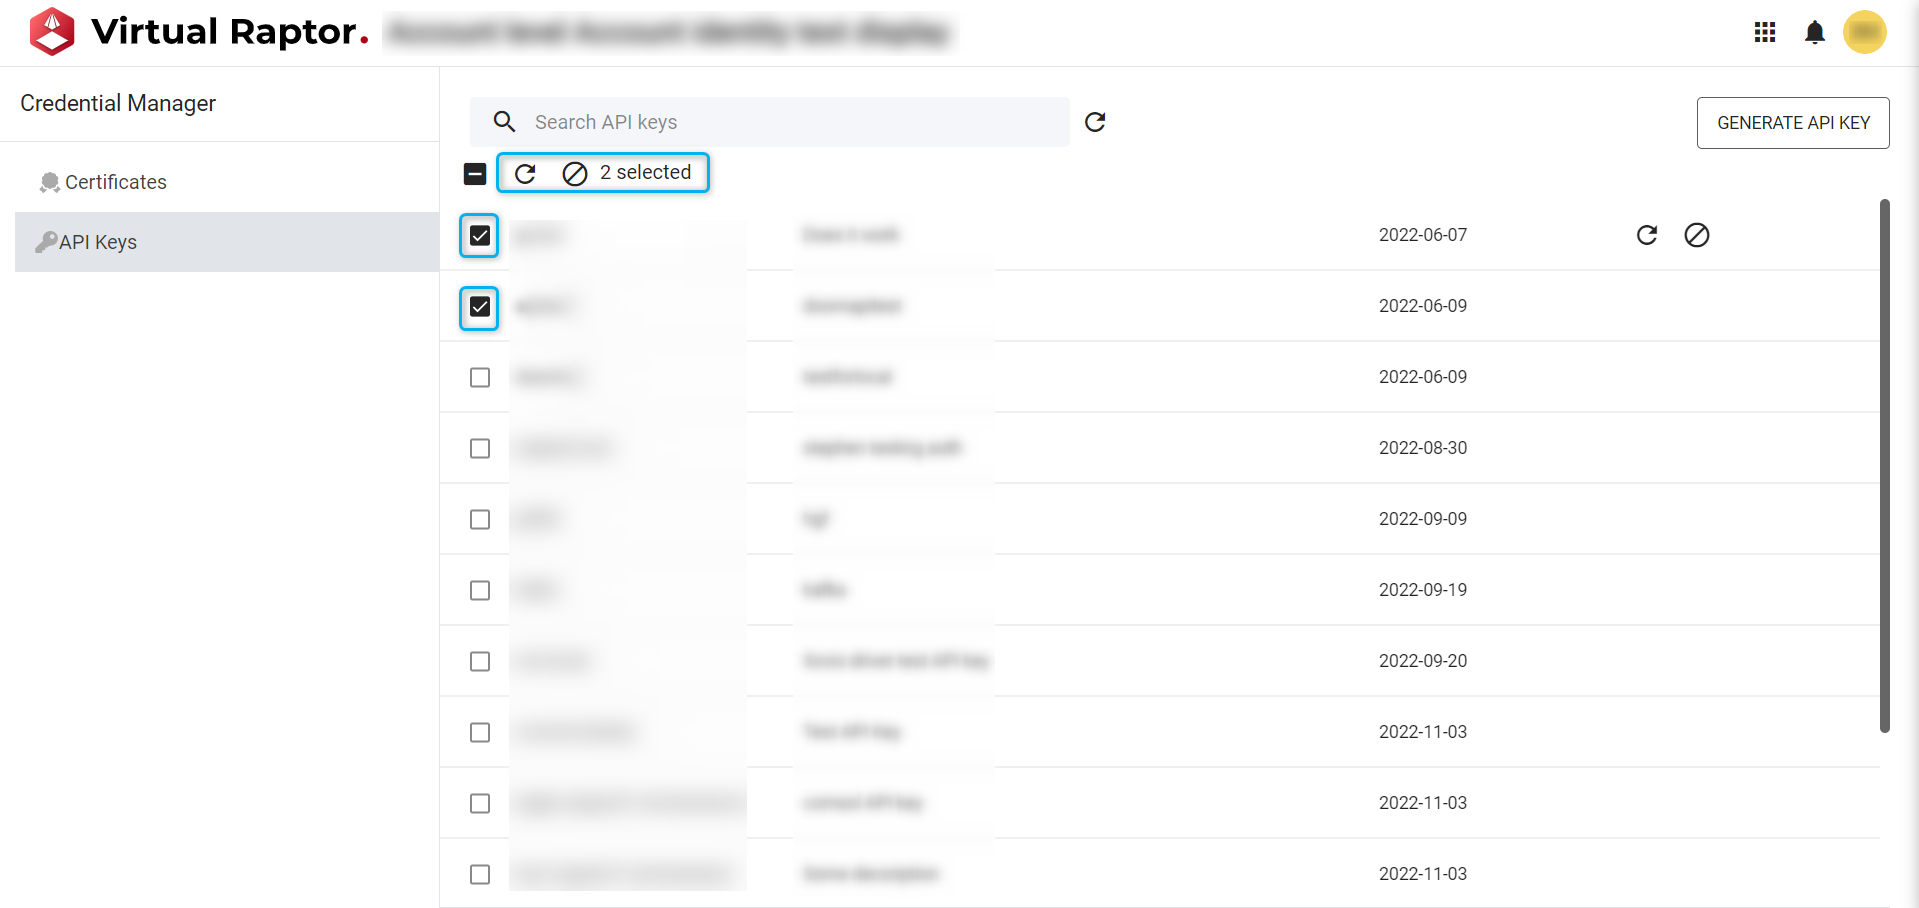
Figure 12 – API Key Bulk Revoke/Renew
Generate API Keys
A user is able to easily generate a new API key for use within the Raptor. This process is described and visualized below.
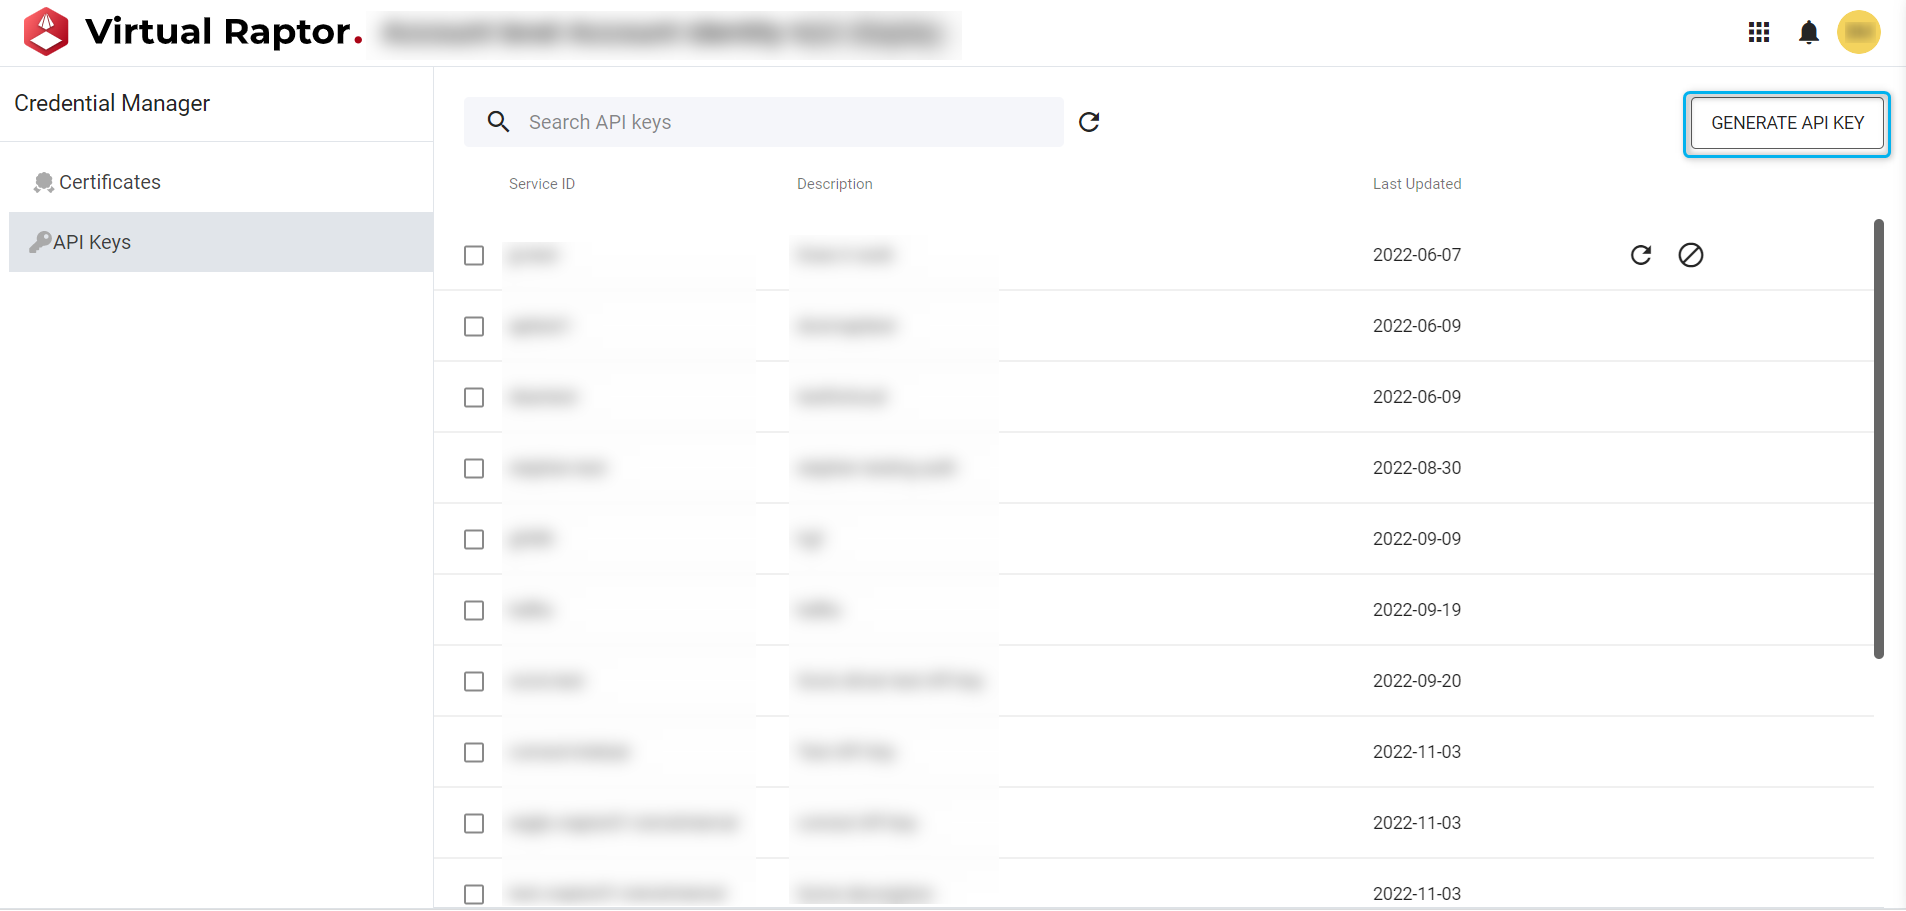
Figure 13 – API Key Generation
User will be required to fill in an API ID as well as a short description for the key. Once acceptable details have been input – an API key will be generated. The key can be copied as well as downloaded.
Clip 2 – Generate API Key
The API key will be created, and a notification pop up will appear to inform the user of successful creation. The user will later be able to view the API key to either revoke or renew it.
Digital Signature used in certain authentication flow. Eg: HTTP driver ↩