
Raptor Command Line Interface
Jan 1 2022 at 12:00 AM
This document describes the process of installing the raptor command line management tool (raptorctl) on your machine.
Prerequisites - Installation
To install make sure you have the following installed:
- DotNetCore 3.1 latest release (at least 3.1.5)
- NuGet latest release.
- Configured NuGet source(s) to point to IoT.nxt® package server.
Installation
The raptorctl tool can be installed using the following methods:
- Installing the
raptorctltool from a NuGet repository. - Installing the
raptorctltool from a nupkg file.
Installing the raptorctl tool from a NuGet repository.
- Open terminal or command prompt.
Run the command below
dotnet tool install -g raptorctl --version #.#.#.#
Installing the raptorctl tool from a nupkg file.
- Copy the nuget package to a local temp directory. Please see the following as an example.
- Open terminal or command prompt and navigate to that folder.
- Install the package using the
dotnet toolcommand as follows:
dotnet tool install --add-source . -g raptorctl --version #.#.#.#
Successful installation should something like this:
You can invoke the tool using the following command: raptorctl
Tool 'raptorctl' (version '#.#.#.#') was successfully installed.
The raptor command tool should be available globally within powershell and command prompt.
Note Linux users might need to add the tool to their $PATH variable
Verify that the tool is installed.
To verify the tool is installed, run the following from the terminal:
raptorctl -h
The following output should be available if the tool is installed correctly.
Usage:
  raptorctl [options] [command]

Options:
  Verbose, -v       Option to specify if command should be logged in detail
  --version         Show version information
  -?, -h, --help    Show help and usage information

Commands:
  service         Allows the manipulation of Raptor deployed services
  config          Allows the manipulation of Raptor deployed service configuration files
  certificates    Allows the manipulation of Raptor certificates
  context         Allows the manipulation of Raptor agent contexts
Uninstall the raptorctl cli tool
You can uninstall the tool using the following command.
dotnet tool uninstall -g raptorctl
Contexts
The CLI tool makes use of contexts to allow users to switch between V-Raptors on the fly. These contexts are stored in a configuration file located at $HOME/.raptor/Agent/RaptorContextOptions.json. When the tool starts for the first time, this option file will be created.
The file can be modified by making use of the raptorctl context commands.
Usage:
  raptorctl context [options] [command]

Options:
  Verbose, -v       Option to specify if command should be logged in detail
  -?, -h, --help    Show help and usage information

Commands:
  add <Name> <ApiServer>    Adds a new Raptor context
  get                       Gets all the available contexts
  delete <Name>             Removes a Raptor context
  set <Name>                Set the currently active context
  configure                 Configure authentication method on the context
To add a context, you will need the URL of the V-Raptor’s deployment agent. You will also need a set of credentials.
Add a context
To add a context, run
raptorctl context add vraptor01-organisation https://vraptor01-organisation.commander.io/deployment
This will add a new context to the config file. Next, you need to configure this context and add an authentication method. To have your user make use of your Commander user and password, configure the new context with Commander authentication as follows.
raptorctl context configure commander vraptor01-organisation [email protected] somepassword
This will add credentials to the context. The password will be encrypted before being stored. You can now check that the context is available by running raptorctl context get.
NAME                                                         AGENT URI
vraptor01-organisation        https://vraptor01-organisation.commander.io/deployment
Active Context: None
To make it the active context, run:
raptorctl context set vraptor01-organisation
Context is now vraptor01-organisation
Running the previous command should now show that the context is active.
NAME                                                         AGENT URI
vraptor01-organisation        https://vraptor01-organisation.commander.io/deployment
Active Context: vraptor01-organisation
You can also add context manually by editing the configuration file.
{
  "RaptorContextOptions": {
    "Contexts": {
      "vraptor01-organisation": {
        "AgentUrl": "https://vraptor01-organisation.commander.io/deployment",
        "AuthenticationType": "Commander",
        "Username": "[email protected]",
        "Password": "G1v3IOwukA0f8YohpsuGTg==",
        "Plaintext": false
      }
    },
    "DefaultContext": "vraptor01-organisation",
    "ApiTimeoutSeconds": 60
  },
  "AgentOptions": {
    "AllowSelfSignedCertificates": true
  }
}
Note It is still advisable that you run the configure command on contexts you add in order to properly generate stored credentials. It is not recommended to store passwords in plain text.
Working with services
Using the raptorctl service commands, you can add, remove, update and start/restart services deployed on the V-Raptor.
service:
  Allows the manipulation of Raptor deployed services

Usage:
  raptorctl service [options] [command]

Options:
  Verbose, -v       Option to specify if command should be logged in detail
  -?, -h, --help    Show help and usage information

Commands:
  get                         Fetch a list of services deployed on the Raptor
  deploy                      Deploy the specified driver to the Raptor
  start <ServiceNames>        Start the specified service(s) if not already running
  stop <ServiceNames>         Start the specified service(s) if not already running
  update <ServiceVersions>    Update the specified service(s) to a specific version
  delete <ServiceNames>       Delete the specified service(s)
For instance, you can fetch all the drivers deployed on a V-Raptor that use the HTTP protocol by running the following:
raptorctl service get -t 'http'
NAME                TYPE                          VERSION             HEALTH    STATUS                           UPDATED
http                http                          4.0.19.11           Healthy   Running              2021/03/10 17:15:17
Editing Configs
The raptorctl config commands allow you to add, remove and edit configs for services on the fly.
config:
  Allows the manipulation of Raptor deployed service configuration files

Usage:
  raptorctl config [options] [command]

Options:
  Verbose, -v       Option to specify if command should be logged in detail
  -?, -h, --help    Show help and usage information

Commands:
  edit <ConfigFiles>    Edits the specified config file(s)
  add                   Creates the specified config file on the target service, or overwrites it if it exists
  get <ServiceName>     Fetch the specified config file(s)
  delete <FileName>     Delete the specified config file(s)
For example, to view all the configs on the http driver from the previos section, we can execute raptorctl config get http. This will bring up a list of all the config files that the Deployment agent knows about.
File Name                                         Version             Last Modified
DataProtectionOptions.json                        0                   2021/03/10 17:16:12
DevicesOptions.json                               0                   2021/03/10 17:16:12
IdentityClientOptions.json                        0                   2021/03/10 17:16:12
KestrelOptions.json                               0                   2021/03/10 17:16:12
LoggingOptions.json                               4                   2021/03/11 11:30:04
RpcClientOptions.json                             1                   2021/03/10 21:24:31
RpcServerOptions.json                             0                   2021/03/10 17:16:12
Test.json                                         2                   2021/03/12 10:55:11
ValueOptions.json                                 2                   2021/03/11 12:55:26
nlog.config                                       0                   2021/03/10 17:16:12
We can use this to edit one of the configs. For instance, support we want to change the log level on that service. We could then run raptorctl config edit LoggingOptions.json -n http. This will bring up the default text editor with the config contents.
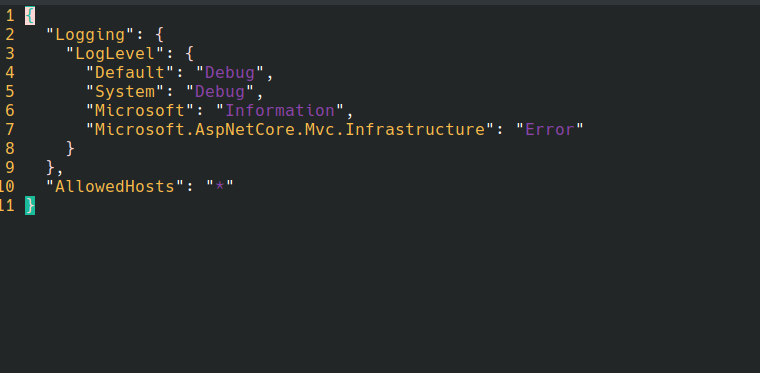
Figure 1 - Inline config editing using Vim
You can change the text editor inline by adding the -e argument. For example, to use nano as the text editor, we would do raptorctl config edit LoggingOptions.json -n http -e /bin/nano
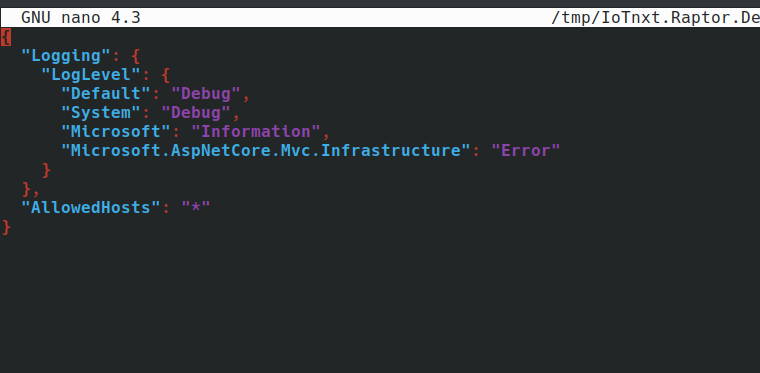
Figure 2 - Inline config editing with nano
Note Not all editor applications will necessarily work.
Managing Certificates
The raptorctl certificates commands allow users to generate certificates for integrations, upload trusted certificates and add/remove certificate chains that should be trusted by the V-Raptor.
certificates:
  Allows the manipulation of Raptor certificates

Usage:
  raptorctl certificates [options] [command]

Options:
  Verbose, -v       Option to specify if command should be logged in detail
  -?, -h, --help    Show help and usage information

Commands:
  trusted        Allows the manipulation of certificates issued from 3rd parties
  authorities    Allows the management of certificate issuers trusted by the Raptor
  clients        Allows the manipulation of certificates issued by the Raptor's PKI
Client certificates
Client certificates are used for integration purposes. They are issued by the V-Raptor’s CA and can be managed through the CLI tool by using the raptorctl certificates client commands.
clients:
  Allows the manipulation of certificates issued by the Raptor's PKI

Usage:
  raptorctl certificates clients [options] [command]

Options:
  Verbose, -v       Option to specify if command should be logged in detail
  -?, -h, --help    Show help and usage information

Commands:
  issue <Services>     Issue certificate(s) for the specified service ID(s)
  revoke <Services>    Revoke the specified certificates on the Raptor's PKI
  status               Fetch certificates issued by the Raptor and checks their status
For example, to check the status of all certificates currently issued run raptorctl certificates clients status. This will return a list of all certificates in use, as well as when they will expire.
SERVICE                                           STATUS              EXPIRY(DAYS)
test-cert                                         ACTIVE              730
snmp-gateway                                      ACTIVE              709
http-test                                         ACTIVE              709
Trusted Certificates
Trusted certificates are used for public facing APIs. They are issued by trusted authorities such as Let’s Encrypt. The raptorctl certificates trusted commands can be used to upload new certificates, or check the status of the currently active certificate.
trusted:
  Allows the manipulation of certificates issued from 3rd parties

Usage:
  raptorctl certificates trusted [options] [command]

Options:
  Verbose, -v       Option to specify if command should be logged in detail
  -?, -h, --help    Show help and usage information

Commands:
  status     Fetch the trusted certificate(s) installed on the Raptor and check the status
  install    Install the specified certificate issued by a trusted CA to the Raptor
We can check the status of the V-Raptors current trusted certificate by running raptorctl certificates trusted status.
DOMAIN                                            STATUS              EXPIRY(DAYS)
CN=vraptor01-organisation.commander.io                 ACTIVE              67
authorities:
  Allows the management of certificate issuers trusted by the Raptor

Usage:
  raptorctl certificates authorities [options] [command]

Options:
  Verbose, -v       Option to specify if command should be logged in detail
  -?, -h, --help    Show help and usage information

Commands:
  get                        Fetch the certificate authorities trusted by the Raptor
  add                        Install the specified certificate authority on the Raptor
  delete <AuthorityNames>    Fetch the certificate authorities trusted by the Raptor
To retrieve the CA chain of the V-raptor, we can run raptorctl certificates authorities get. This will produce the following output:
NAME                                              CERTIFICATE
Raptor Root CA                                    Certificate:
-----BEGIN CERTIFICATE-----
MIIDijCCAnKgAwIBAgIBATANBgkqhkiG9w0BAQsFADBWMSEwHwYKCZImiZPyLGQB
GRYRdnJhcHRvcjAyLXZhbnRhZ2UxEDAOBgNVBAoMB0lvVC5ueHQxHzAdBgNVBAsM
FlZpcnR1YWwgUmFwdG9yIFJvb3QgQ0EwHhcNMjEwMzA5MTk1OTU5WhcNMzEwMzA5
MTk1OTU5WjBWMSEwHwYKCZImiZPyLGQBGRYRdnJhcHRvcjAyLXZhbnRhZ2UxEDAO
BgNVBAoMB0lvVC5ueHQxHzAdBgNVBAsMFlZpcnR1YWwgUmFwdG9yIFJvb3QgQ0Ew
ggEiMA0GCSqGSIb3DQEBAQUAA4IBDwAwggEKAoIBAQDSqG/0mG5KV9YJbzuyx6UG
69+j4Ot2IbIzvOrQZciJloiy+xKI57M7lG3PDaKkF7FjHVhj5Tyaq0/X2wlZ2ahw
G1Wvqktige01ylEIOZviunOM7R5BcEWT300gmGCQSMYXspGx8FkLREzNZxEz4gQh
Ugp2FEoxYxSEq9z6oByEd6VfcDs1+8EiGwOcF15pfbG89VN8I3xq/uP39QZVrrST
ARde7qtwC2tA2PyETjWp+DJGONmP/qc193nYNSO3SkYDUgwy9SFFcRp/Os3ExjLw
LZd6OsRchHAgHqwOjzowML4py+LFL+5+0tNZVGgyx6g3eg5ykd/t91SfOmXGPj9H
AgMBAAGjYzBhMA4GA1UdDwEB/wQEAwIBBjAPBgNVHRMBAf8EBTADAQH/MB0GA1Ud
DgQWBBTI8D3ruOPEs5s6wi2GY9SEaqj+LTAfBgNVHSMEGDAWgBTI8D3ruOPEs5s6
wi2GY9SEaqj+LTANBgkqhkiG9w0BAQsFAAOCAQEAJ1LQlA/XNnIlihR7hhDDthfF
jfmz1Dv3V835LwH3yuVI9OqUSHq/PlsXAYXpz/LNv9rrHmyLoKmhu7lOxdyITQBm
PfvneUjWwGMs26Ko/jEcvx8pO46pT+T8Cgq/lYa6TKBW+7PFP5U1VYvhJbZmA21Q
jZZePo+XlOAuduMTT2DGnlyEZycIU7qiH0qP1qokUJmEUL+2vq08MB72Kuapu1h4
Msko4ORrqSHaEwVVVTEap0NYHzeGZ30krsjtTwYs0D3ZG8L1HEi/VCqN/7agws9s
gqGAMSlnQv+xMe7pRMFV9qQP9oVs6Yjwr7kz8NEnOGIMBnilL4kDR5Rrpny3Hg==
-----END CERTIFICATE-----
Raptor Signing CA                                 Certificate:
-----BEGIN CERTIFICATE-----
MIIDkDCCAnigAwIBAgIBAjANBgkqhkiG9w0BAQsFADBWMSEwHwYKCZImiZPyLGQB
GRYRdnJhcHRvcjAyLXZhbnRhZ2UxEDAOBgNVBAoMB0lvVC5ueHQxHzAdBgNVBAsM
FlZpcnR1YWwgUmFwdG9yIFJvb3QgQ0EwHhcNMjEwMzA5MTk1OTU5WhcNMzEwMzA5
MTk1OTU5WjBZMSEwHwYKCZImiZPyLGQBGRYRdnJhcHRvcjAyLXZhbnRhZ2UxEDAO
BgNVBAoMB0lvVC5ueHQxIjAgBgNVBAsMGVZpcnR1YWwgUmFwdG9yIFNpZ25pbmcg
Q0EwggEiMA0GCSqGSIb3DQEBAQUAA4IBDwAwggEKAoIBAQDK8yfHqzdUKUAgwMGV
pvPtj818oyI4ehWsHXX1howG1IhKZ8DunSRhhX5hCMry5VxYDG0WMIKtdOVJUJya
vQf8tLesq8TlUiKRPaRYDZ1xVU6NoYLr34Fu2rGTIDHd3dXXgaOesI+11yhjV1az
ZFs3il6X3pj+wowxrIf3zxdxzYiqj4P7QHkxDEaxHxZYmZ3FD+S2pYwCedTeurOD
BeCJRxRkN/bKfPCBZFHUaZ2skPTQLRu9FGtRkYffMB6UFKVWRYMapmD0mQtw7Mjw
s7AZhIGl6tkB02GyyV3FUwDVYxx/DhNCjPuGyrgYZ0OafVItvxvZDoae8ZZL2mxB
xqobAgMBAAGjZjBkMA4GA1UdDwEB/wQEAwIBBjASBgNVHRMBAf8ECDAGAQH/AgEA
MB0GA1UdDgQWBBTEUzhX4pguoBhSb5g520BtGFqq0TAfBgNVHSMEGDAWgBTI8D3r
uOPEs5s6wi2GY9SEaqj+LTANBgkqhkiG9w0BAQsFAAOCAQEAYMcxgY6JlntIGUEY
oCjN/lFo8BWTxMe/521IAe95uxUIVqoj3agQu5jWH/SSp56e1X1xHbiSG45gIBsO
ptu3ZAl/LK+Yk9DtS/HPzsFpQgG+DI1OREqueitSI6/ZbBByUdVj4faiiB+jm9n0
RGwsIg2dBCNxd7f9FuB17/yc6qhV8NAsHdkGpYDS5J+OovKmvvtvrINZ/8fQ2OTa
5TsNvChDH5fgQRkRI6vsMwgWCQ+8D94pIGxX8wTGaX4MBtvMtqxQ7i8laoPXVk2E
To8NiobMxgfWzaZZky6GBA5/R+XG3xjNhIqs4AEe1r5WTI5Rd07vPyQ7UTfv9zXJ
YKmPNg==
-----END CERTIFICATE-----
Note: Output will vary depending on the formatting of the certificate.