REST API
Dec 6 2023 at 12:00 AM
Introduction
The REST API data source serves as a controller within the Generic Device Service and also functions as a Receptor data source. To utilize this functionality, initiate an HTTPS POST request to the following endpoint:
https://myservice/api/telemetry/send/mydevice
Here, myservice represents the address for the Generic Device Service, and mydevice should be replaced with the configured device name that will manage the incoming payload. The payload data must be included in the request body as part of the HTTPS POST request.
Example Options File
{
  "Devices": {
    "Device1": {
      "DeviceType": "Generic",
      ...
      "DataSource": {
        "DataSourceType": "RestApi",
      }
    }
  }
}
Property Details
Here is an overview of the parameters for configuring the REST API data source:
| Property Name | Description |
|---|---|
| DataSourceType | The value for this data source is “RestApi” |
Source Information
Any query data sent with the URL request will be added to the Source Information dictionary accompanying the payload. For example, if the following request is sent:
https://myservice/api/telemetry/send/mydevice?Make=MyMake&Model=MyModel
The Source Information dictionary will contain the following values:
| Key | Value |
|---|---|
| Make | MyMake |
| Model | MyModel |
Configuration of the Rest API data source node
Every device should include the Device Information, Data Source, and Filter nodes. To create a device, click the + icon located on the top-left side of the ‘Create Device’ screen as shown in Figure 1. This action opens a configuration window for the device. Within this screen, users can select and add the necessary nodes. To add a node, access the ‘Add Node’ window, as illustrated in Figure 2.
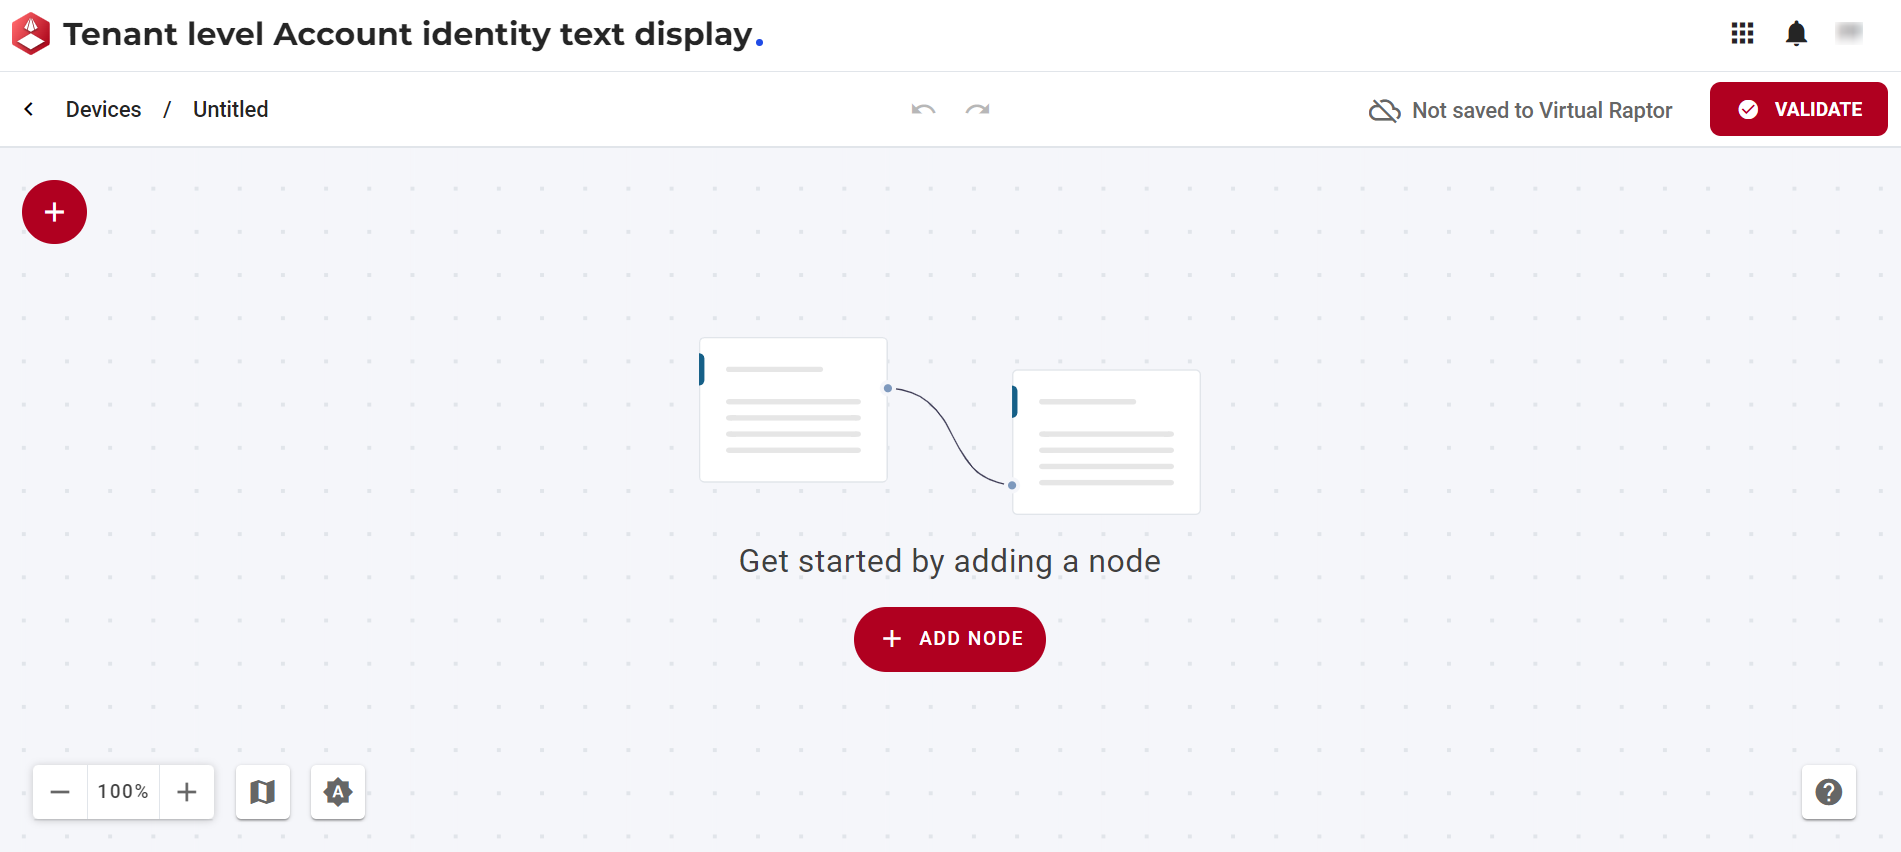
Figure 1 - Create Device
The window below enables the user to add and configure a data source node.
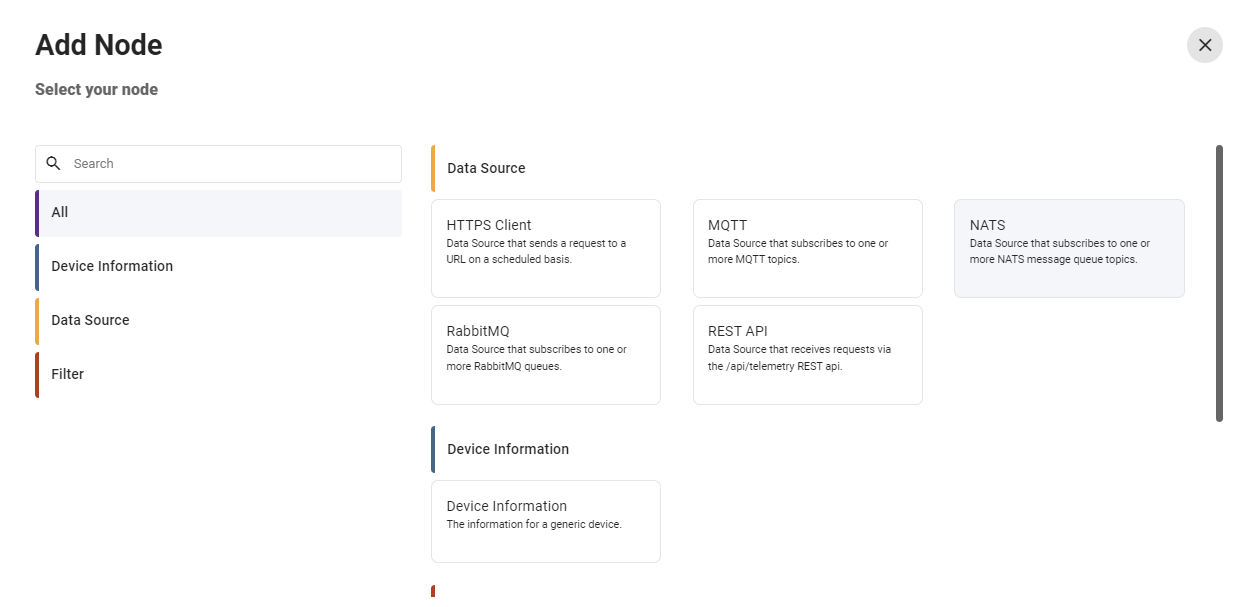
Figure 2 - Add Node
The Rest API node consists of features to:
- Configure the node: Allows users to customize and adjust the settings of the selected node according to their requirements.
- Show nodes compatible with the selected node: Displays nodes that are compatible with the selected node, providing a streamlined view of related options.
- Bring up the help centre for the node: Directs users to the help centre for the selected node, offering detailed guidance and documentation.
- Copy icon: Permits users to duplicate the selected node, facilitating efficient replication of configurations.
- Delete the node: Enables users to remove the selected node from the configuration, allowing for adjustments and refining the setup.

Figure 3 - Node Features
Upon selecting the configure button in Figure 3, the window for the REST API data source node is presented as illustrated in Figure 4. In this interface, users can input and edit relevant information to configure the REST API data source.
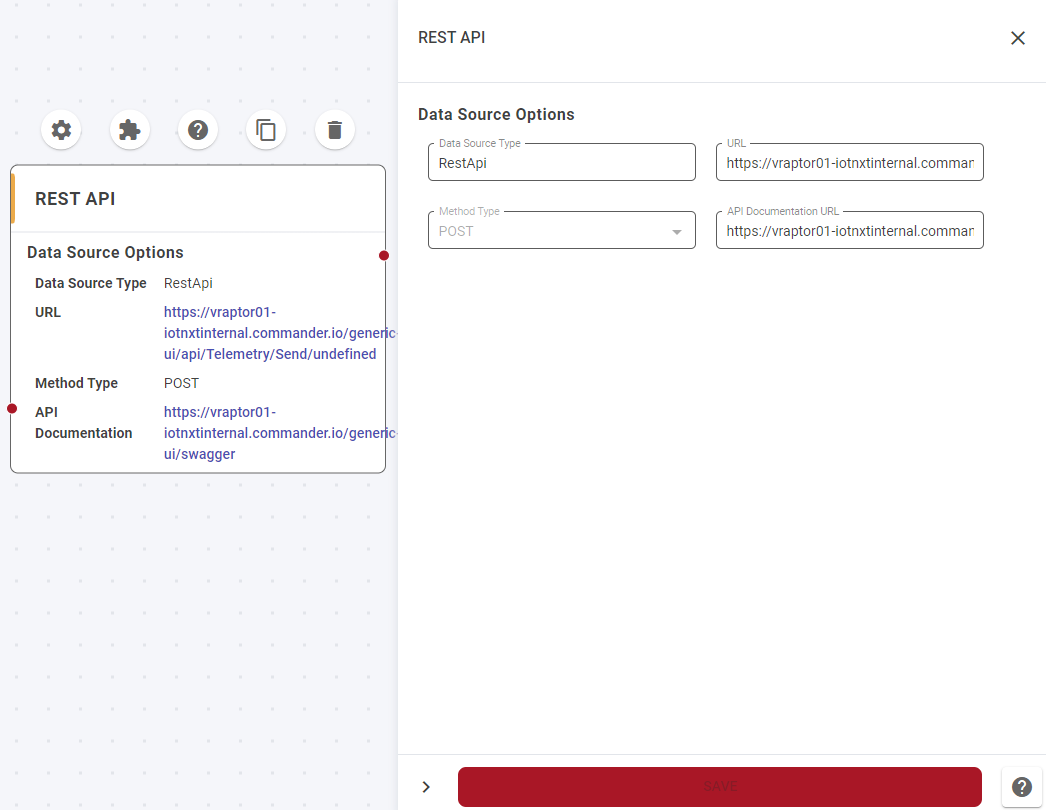
Figure 4 - REST API data source node