Azure AD Integration
Jan 1 2022 at 12:00 AM
Azure oAuth 2.0 Integration
With the IoT.nxt® Commander™ platform, customers can connect their Azure cloud platform with their IoT.nxt® tenant. This allows users who use the IoT.nxt® Commander™ platform to log in with their company’s Azure credentials, and ensures much better account management between the tenant and the company’s Azure portal.
Before Commander™ can be linked with Azure, you need to register Azure to be a login provider for Commander™. You also need to register a new app on your Azure server.
Please note: The functions can only be performed by the tenant owner or users with the relevant account access.
Configuring Azure
1.Navigate to your the Azure portal, and login. Then, click on Azure Active Directory on the right side menu, or the shortcut on the dashboard.
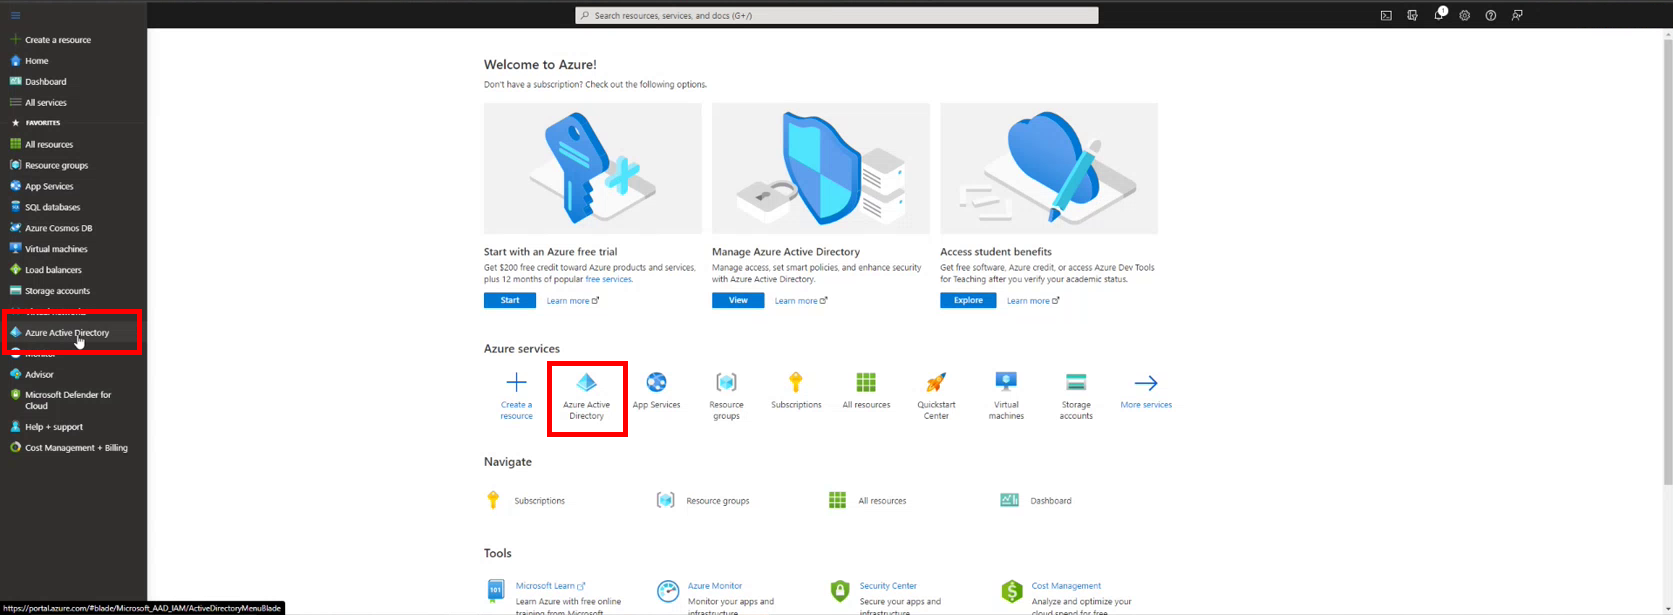
Figure 1 - Azure Active Directory
2.Next you need to register a new app by going to the App registrations page, you’ll find it on the left-side menu. Then click New registration at the top of the page.
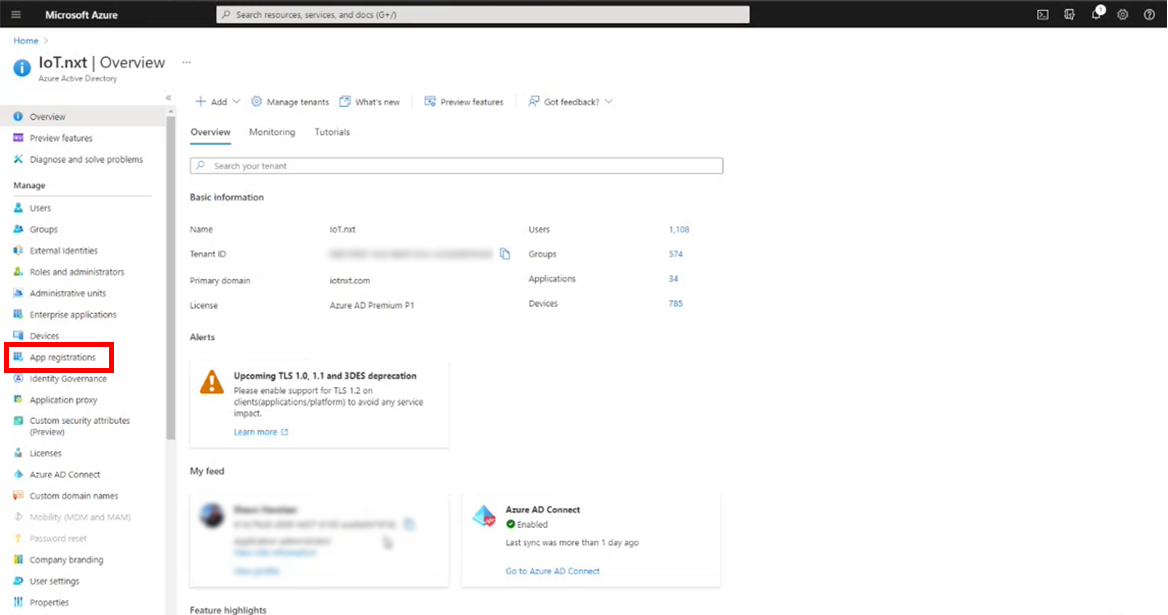
Figure 2 - Azure App registrations
3.On the Register an application page, enter the name for the application and select the Supported account types. This let’s you configure who will have access to your application via this Azure login registration configuration. If you are unsure, keep it on Accounts in this organizational directory only. Then click Register at the bottom of the page. You’ll then be taken back to the appliction dashboard.
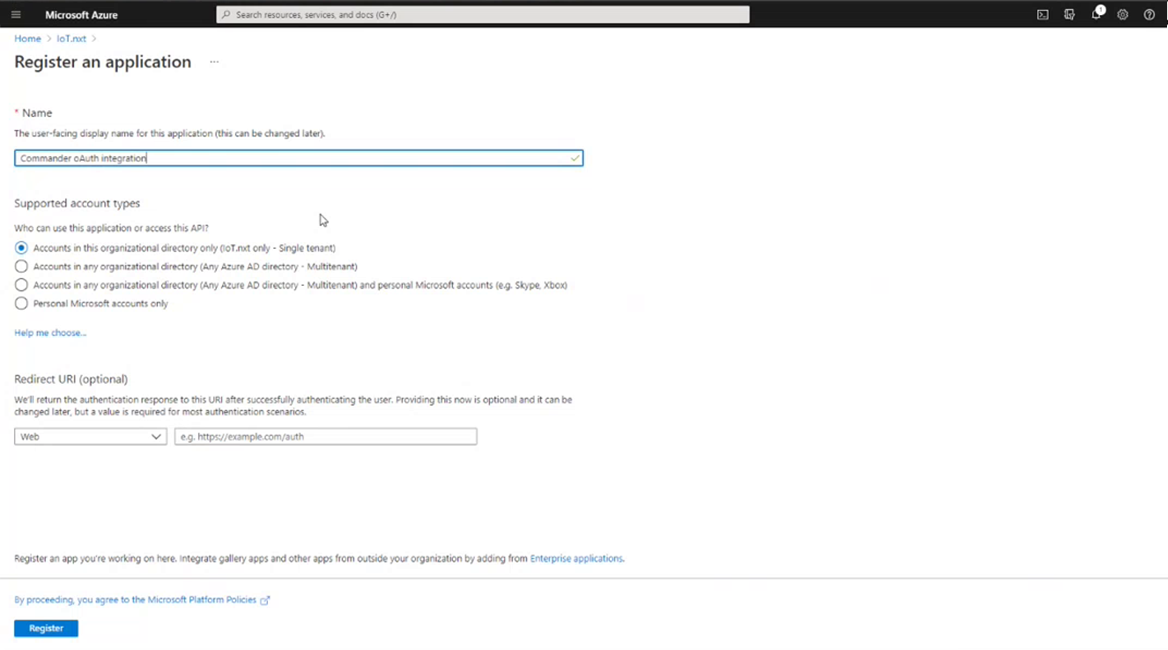
Figure 3 - Register an application
4.Next, go to the Azure Authentication page by clicking on Authentication on the left-side menu. Then, click Add a platform and select Web on the Web applications pop-up. This will pop up the web application configuration page.
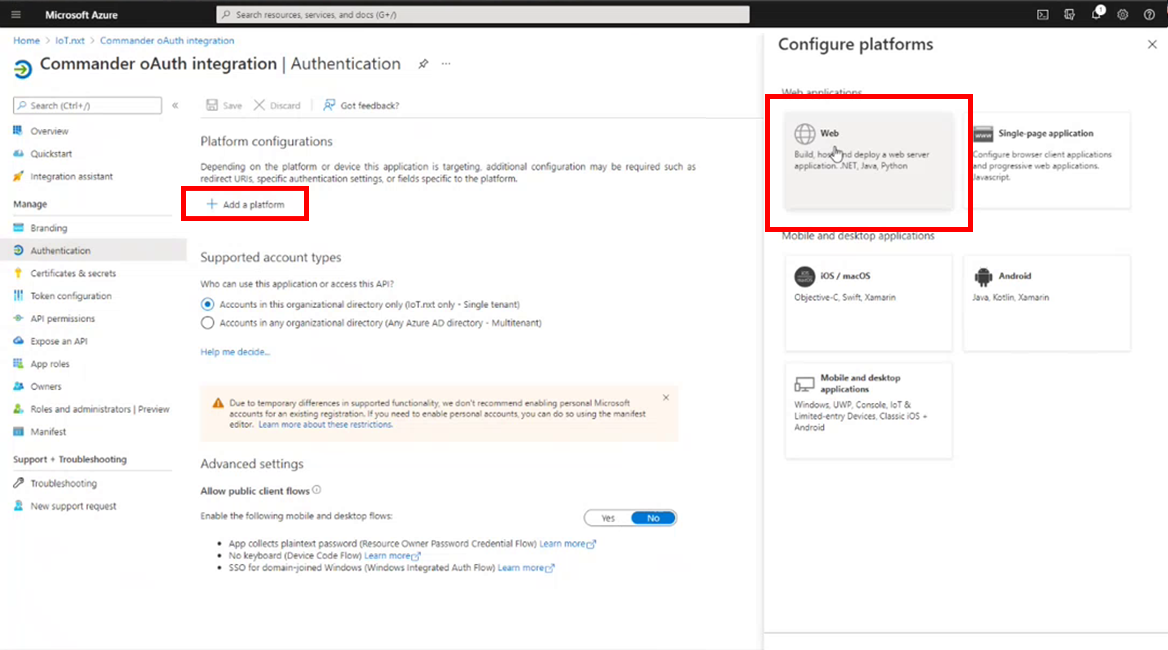
Figure 4 - Register an application
5.On the Configure Web pop up, add your Redirect URI by using this format:
https://{commander url}/auth/signin-microsoft. Simply replace {commander_url} with the details of your Commander tenant. i.e t70.commander.com
Also, make sure you check both boxes to select the tokens to be issued by the authorization endpoint. Then click Configure.
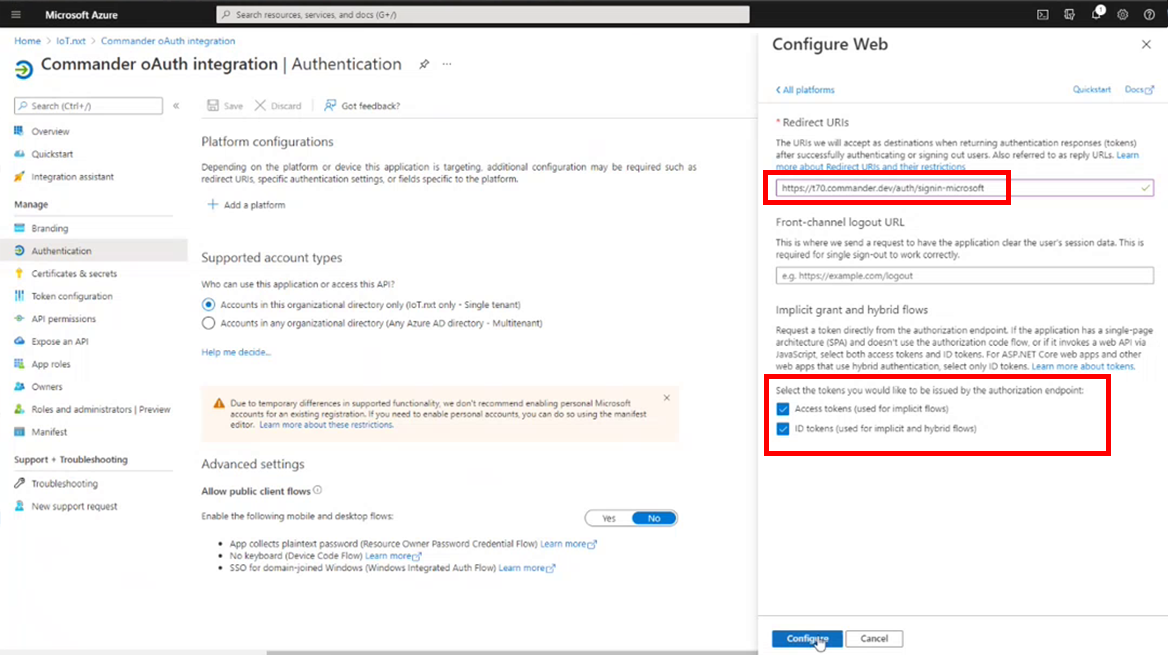
Figure 5 - Adding the Redirect URI and selecting the tokens to be issued by the authorization endpoint.
6.Staying on the Authentication page, scroll down untill you see Advanced Settings then enable public flows by clicking the Yes button. Then scroll back up to the top of the page an click Save.
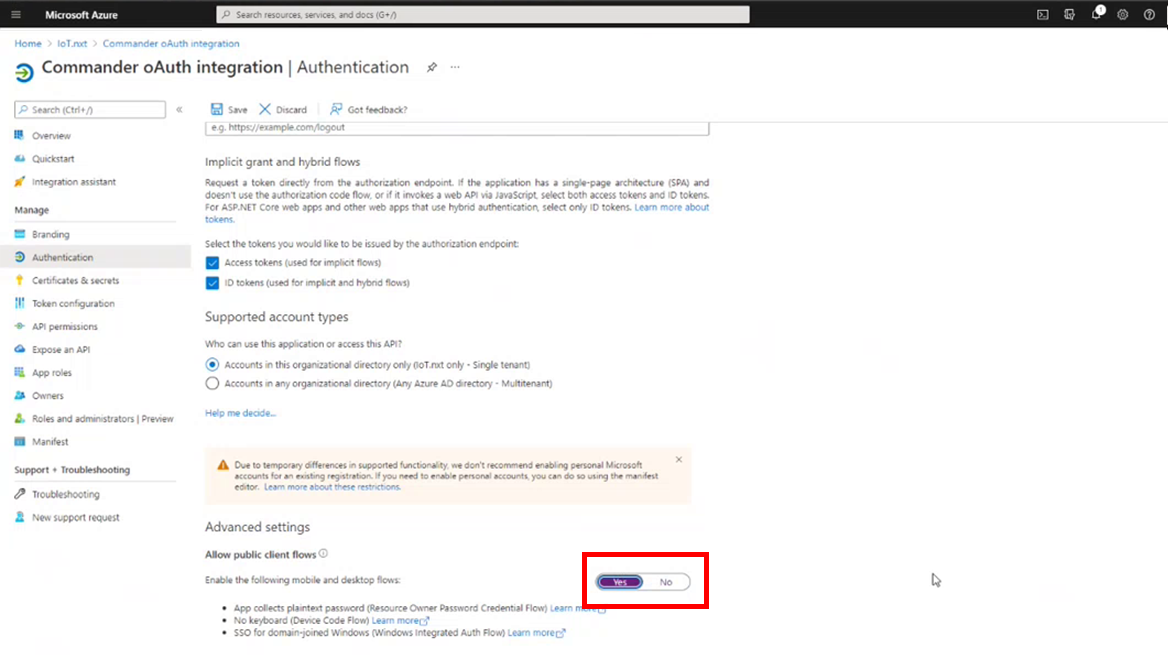
Figure 6 - Enabling public client flows
7.Next we’ll be creating the secret string required for secure communication between Azure and Commander™, Click Certification & secrets on the left side menu.
8.To create a new client secret, click New client secret. A popup window will appear on the right-side of your screen. Here you can enter the description and set an expiry date for the secret. Once this is done, click Add at the bottom right-side of the screen.
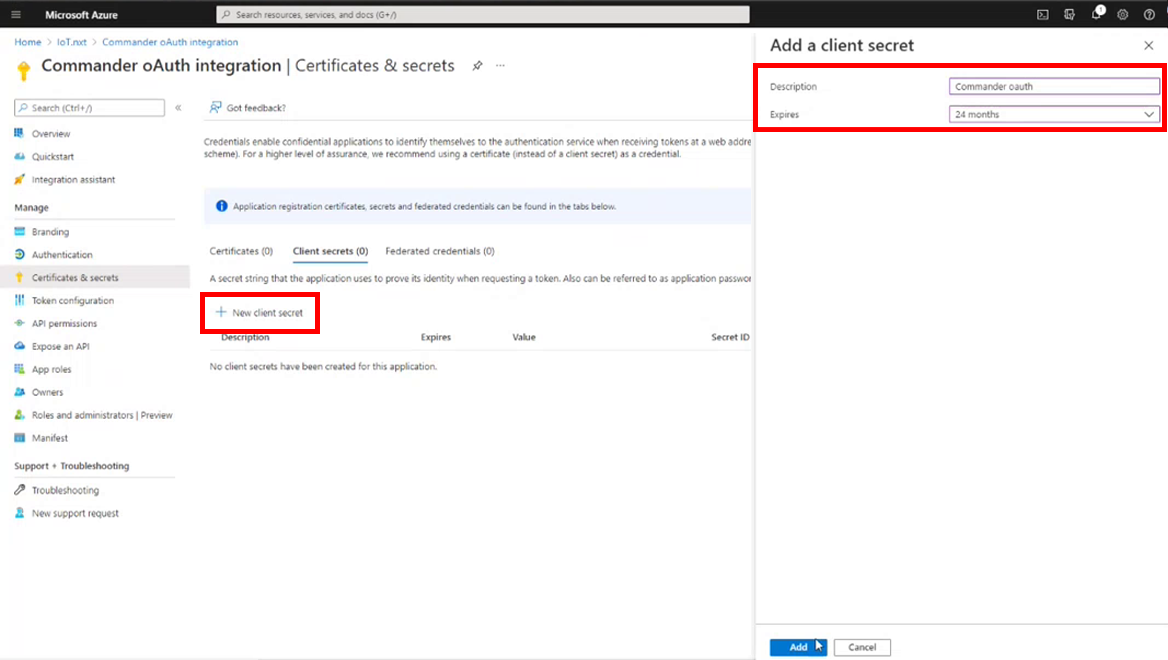
Figure 7 - Add a client secret
9.Now you’ll see the Client secret you created, along with the auto generated string. This is the password that let’s Azure and Commander™ communicate, so keep it safe, once you move away from the page, or refresh the page, you cannot retrieve it again.

Figure 8 - Make sure you keep your Client secret in a safe place
10.Click on API permissions on the right-side menu and click on Add a permission. From the Request API permissions pop up, select Microsoft Graph, then click Delegated permissions. Select openid and profile and then click Add permissions.
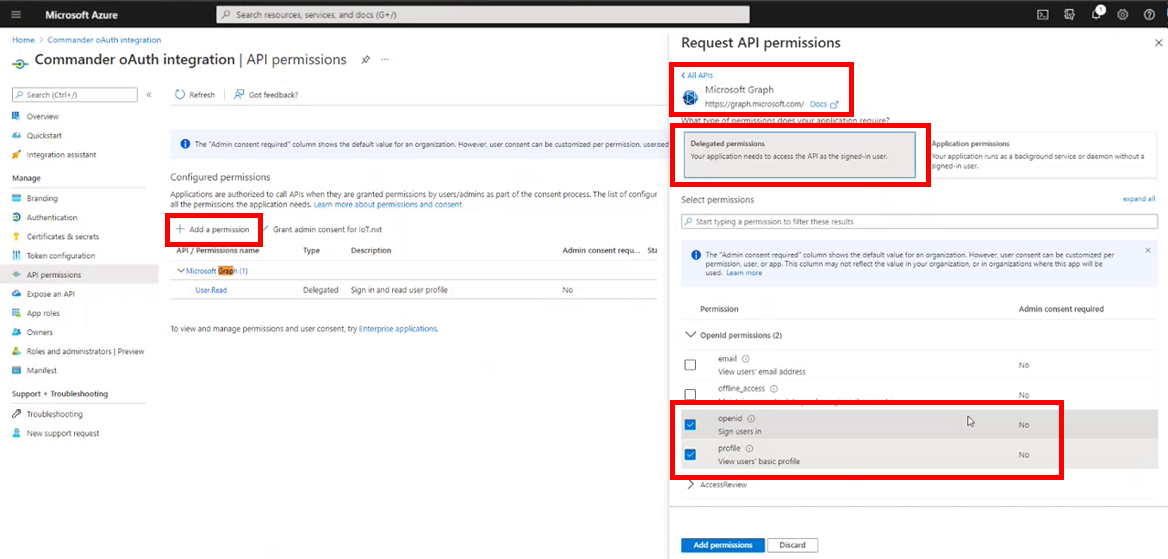
Figure 9 - API permissions
11.Now its time to head back to the Commander™ portal where we will enter the client secret we created in Azure. To set up an identity provider per account in Commander, refer to the Azure Account Identity Setup.