
Account Manager
Jan 1 2022 at 12:00 AM
- Description
- Key Features
- Account management
- Account manager
Description
The Account Manager app is used by Account Owners to manage and customize their accounts. Tenant Owners have the added ability to view all the accounts of a tenant via the Account Management application when logged in as a Tenant Owner. The Account Management app contains a list of all accounts on the that Commander™ tenant, where Tenant Owners can then create, configure or remove accounts.
Key Features
- Managing access permissions.
- Creating new accounts (Tenant Owner only).
- Viewing all accounts (Tenant Owner only).
- Updating themes and styles.
- Platform theme, logo and styles.
- Bulk user management.
Account management
In the Account Management application, Tenant Owners have the ability to create new accounts or view existing accounts on the tenant. Note, this application is only available on Commander when logged in as a Tenant Owner, and it lists all accounts on the tenant.
To create a new account the tenant owner must specify an account name and the details of the account owner. If the username already exists on the tenant, the user will be linked to the new account. However, if the username does not exist on the tenant, the user will be invited to join and will be linked to the account once they accept the invitation. The tenant owner who created the account will be linked as an owner on the new account. This allows them to assist with the configuration of the new account.
The following restrictions apply on the name of the new account:
- Minimum 2 characters
- Maximum 25 characters
- Name cannot start or end with special characters
- Only the following special characters are allowed: ‘ ‘ - space, ‘-‘ - Hyphen, ‘_’ - Underscore
When account owners open the Account management app, they will go directly to the account details page where the Account details, Themes (v4 only), User groups, and Entity access groups can be accessed.
Account manager
When the user logs into an account (not available on the tenant owner) on Commander™, they can navigate to the Account management app via the Commander™ home screen. The Account details screen will list all accounts on the tenant. From the Account details screen, tenant owners can manage account members and the identity of the account.

Figure 1 - The Account details page
Account identity
The user is prompted to set up their account identity, and this includes colours, logos, and layout as shown in Figure 2.

Figure 2 - Setting up your account identity
However, if it has been configured already they have the option to edit the account identity by selecting the UPDATE YOUR ACCOUNT IDENTITY button. To reset the Account identity to default, the user can select the RESET TO DEFAULT button on the Account details screen (see Figure 1), and the message below will be displayed (see Figure 3). If the user selects Yes, they will be taken to the SETUP YOUR ACCOUNT IDENTITY screen (see Figure 2) to setup their account identity.
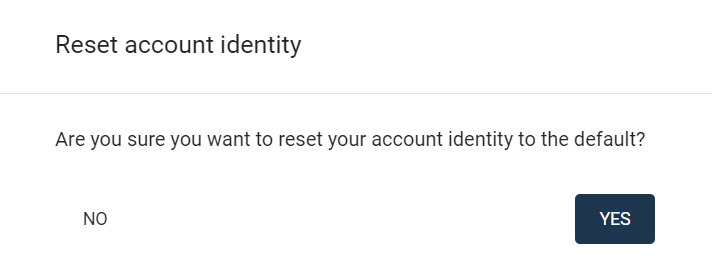
Figure 3 - Setting up your account identity
Style
The Style section under Account identity allows a user to change the account's main image and text. This is useful for creating a unique identity for each account, or branding the account with the relevant company details.
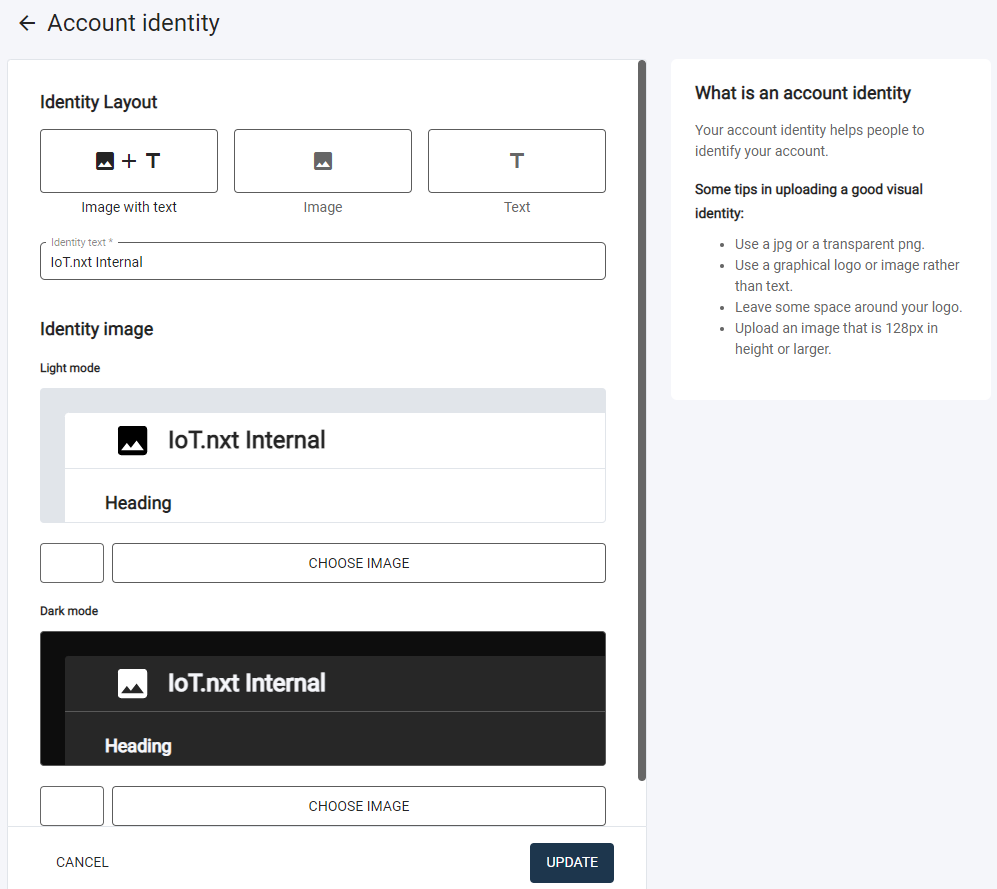
Figure 4 - You can customise the look of your account with a custom visual identity
There are three layout options a user can choose from:
- Image with text
- Image only
- Text only
The Identity text and image are displayed on the top bar throughout Commander™ Portal, Dashboard, Radar, and all the standard applications added to Commander™. The image can be set per theme type for light and dark themes.
| The light theme icon is the default icon used if a user does not specify a dark theme icon. |
| Some tips for uploading a good visual identity: |
| - Use a jpg or a transparent png. |
| - Use a graphical logo or image rather than text. |
| - Leave some space around your logo. |
| - Upload an image that is 128px in height or larger. |
Sound
This allows a user to customize and set the sound notifications for high, medium and low-priority alarms. They can click on the alarm name to open and see a list of the different types of sounds that are available.
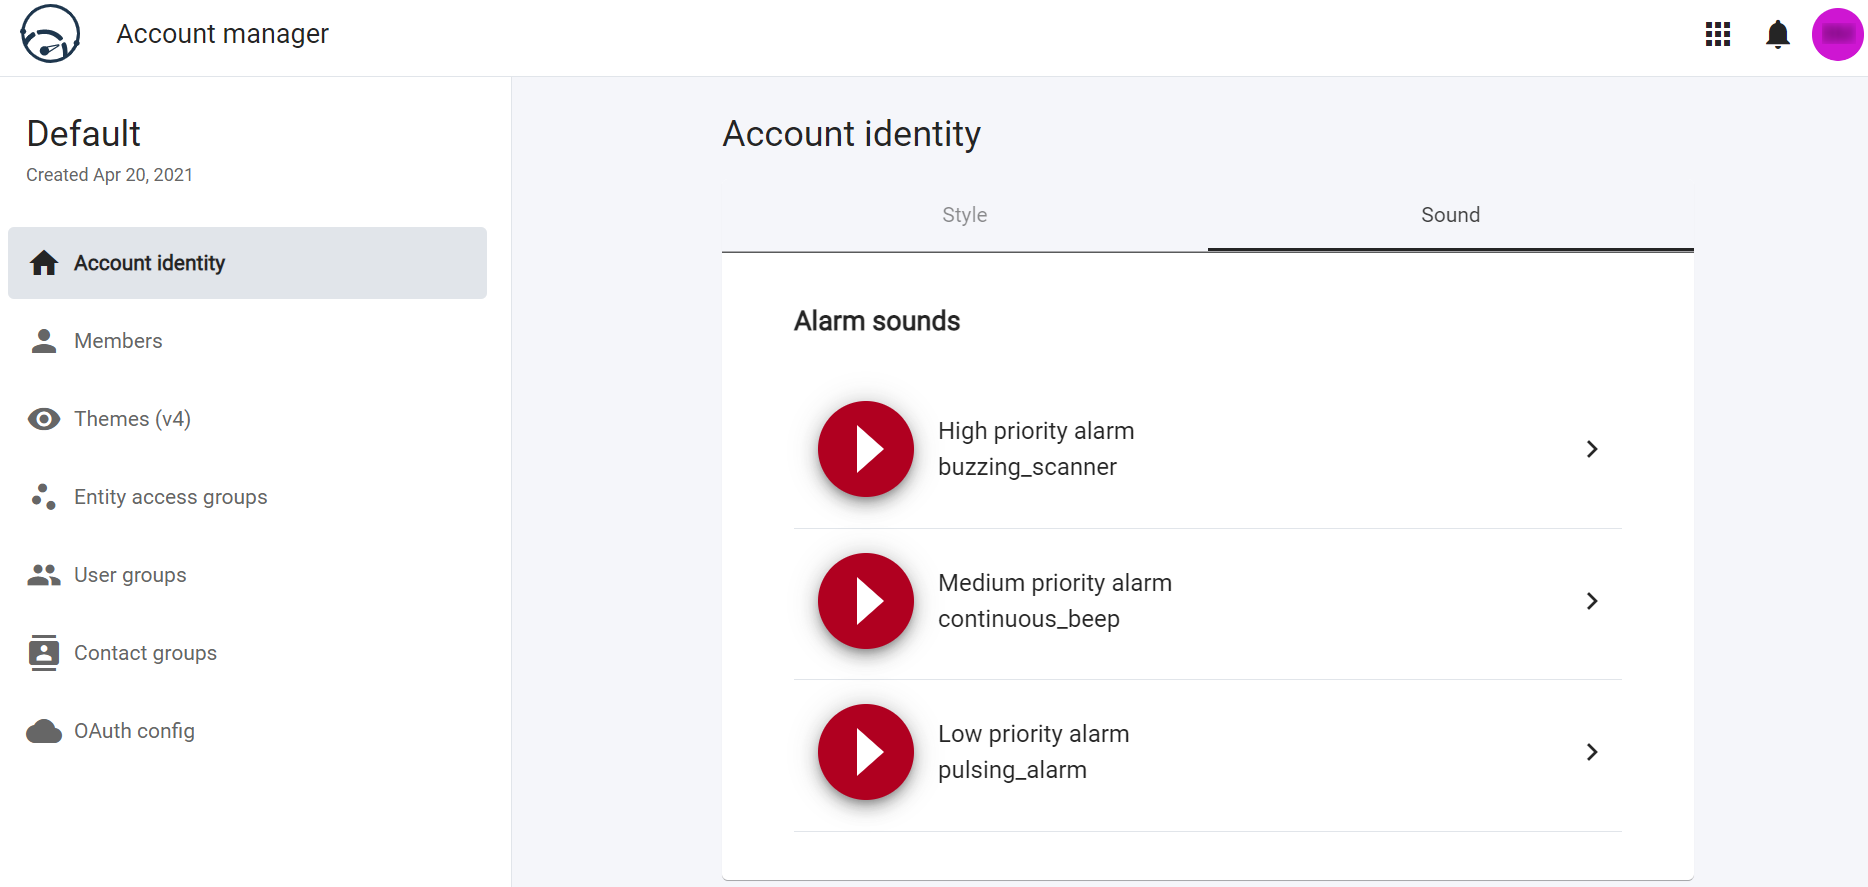
Figure 5 - You can customise your alarm sounds for each alarm type
To select a sound, simply click on it and it will automatically play a preview. Users can also turn off the alarm sound by selecting the None option. When you have selected your preferred alarm sound click the UPDATE button at the bottom of the page as indicated in Figure 6 below.
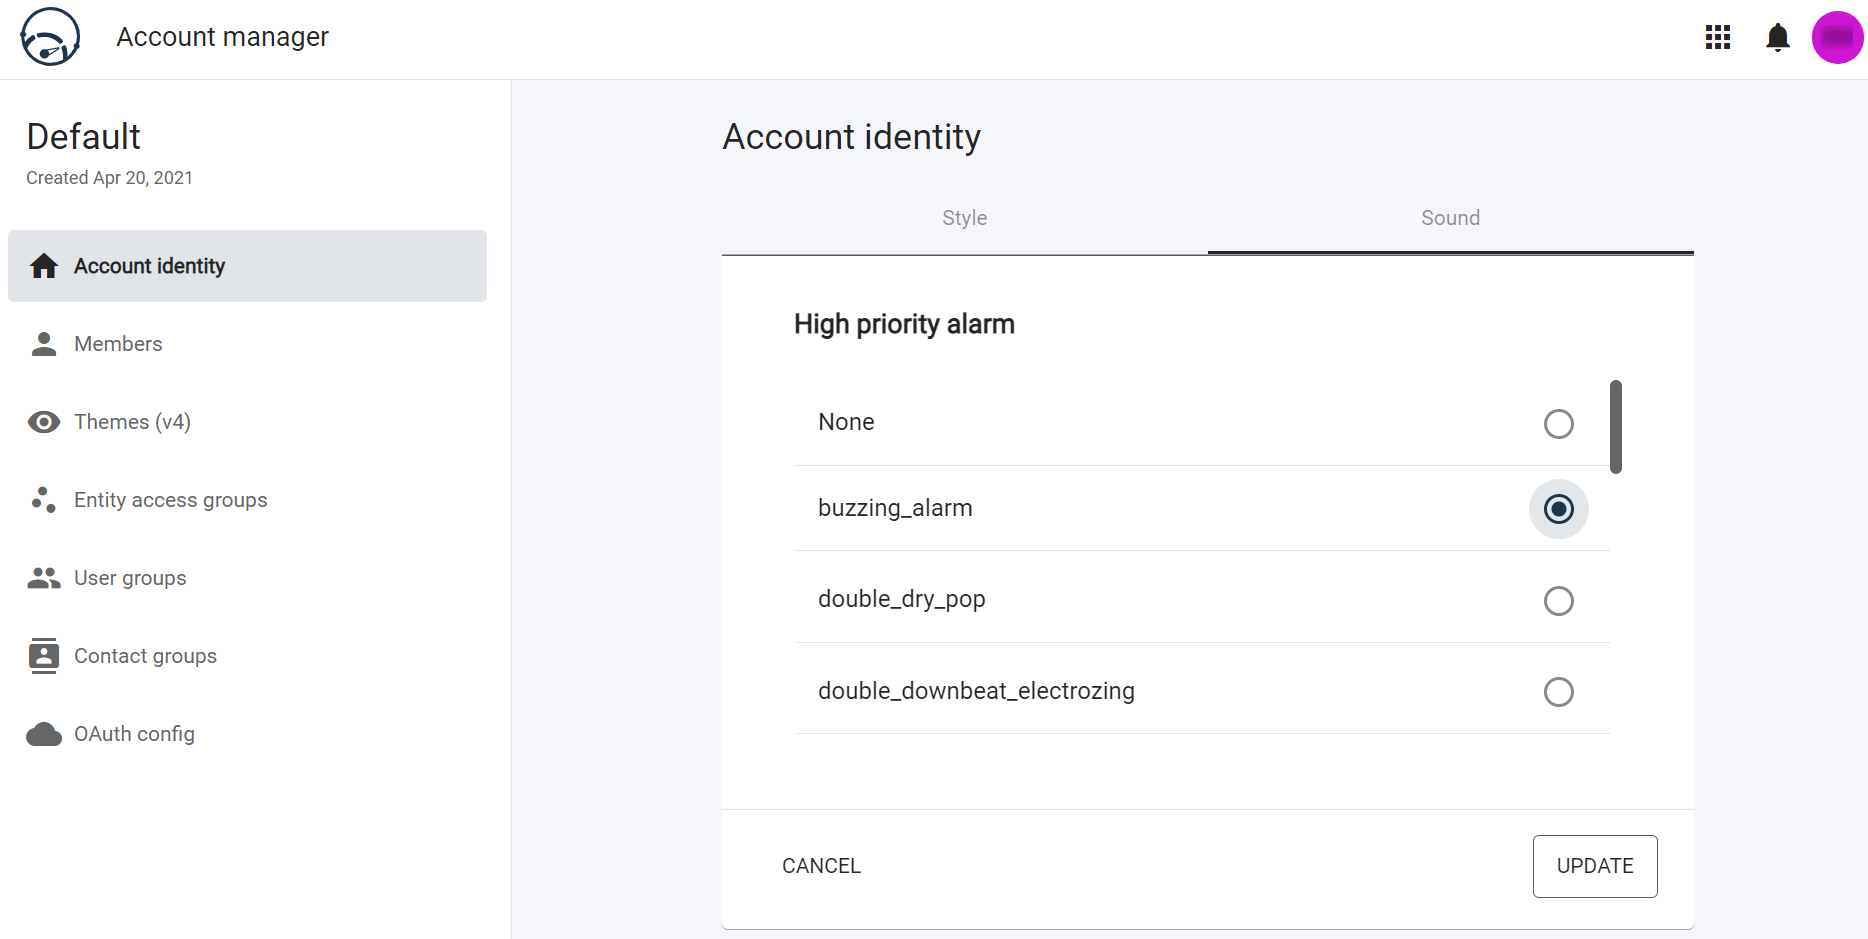
Figure 6 - Customising your alarm sounds
Members
Account owners can invite new users to the account or edit existing Owners and Members of the account. A user is able to view owners on the account or members on the account. At least one account owner must be set up per account with no restriction on the maximum number of account owners.
| A user cannot be invited as an account owner directly. The user must first be invited as an account member by accepting an email invitation. Only then can the Member be made an Owner. |
Add a new member
When adding a new member, the member will receive an e-mail after the invite is sent, prompting them to set up their password for the account, after which they can log in.

Figure 7 - Managing account owners and members
To add a new member click on the Add member icon on the top right side of the screen. An Add member screen is displayed as shown in Figure 8.
| A user can add a single member or add members in bulk. |
On the Add member screen a new member can complete the relevant user information (each required detail is described in full in the list below), and then click the INVITE button at the bottom of the form.
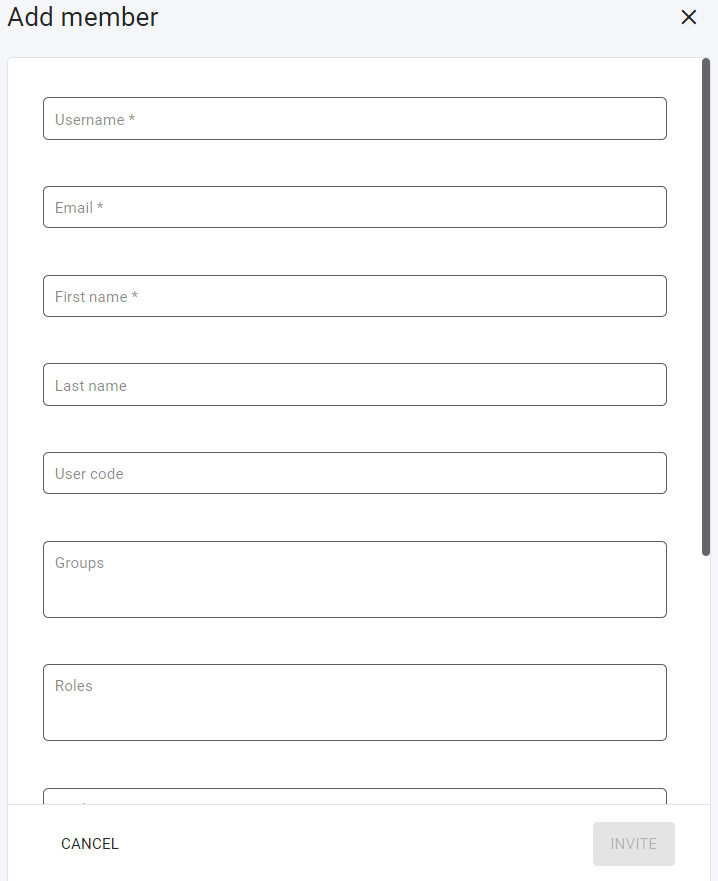
Figure 8 - Add new member
- Username - Member username (Required)
- Email - Member’s email address, this is where the invitation will be sent (Required).
- First name - Member’s first name (Required).
- Last name - Member’s last name.
- User code - The code used to acknowledge an alarm when it is triggered. On the alarm entity, the alarm can be marked as “Requires PIN acknowledgement” which will force a user to acknowledge the alarm using the User code and pin. The user code can be set from the User preference menu.
- Groups - Select the User Group(s) that the member will belong to. A Group is a predefined list of roles and application permissions that would apply to the user, instead of defining the roles and application permissions per new user. This way roles and applications can also be managed at scale for specific users.
- Roles - Select the user roles for the new member. This is configured here if a User Group is not selected for a user.
- Applications - Select the applications that the member will have access to. This is configured here if a User Group is not selected for a user.
- Entity access groups - Select the Entity Access Groups that the member will have access to. Entity Access Groups are group configurations with predefined entity tree access permissions that a user can be linked to rather than manually selecting the entity permissions per new user. This way entity permissions can also be managed at scale for specific users.
- Entity access - Select the entities that the member will have access to. This is used if a user has not been set up with an Entity Access Group.
Edit an existing owner or member
To edit a new member click on the icon on the right side of the Owner or Member on the Manage members screen. The options to Edit, Remove member or Move to owner and vice versa are displayed on the screen as shown in Figure 9.
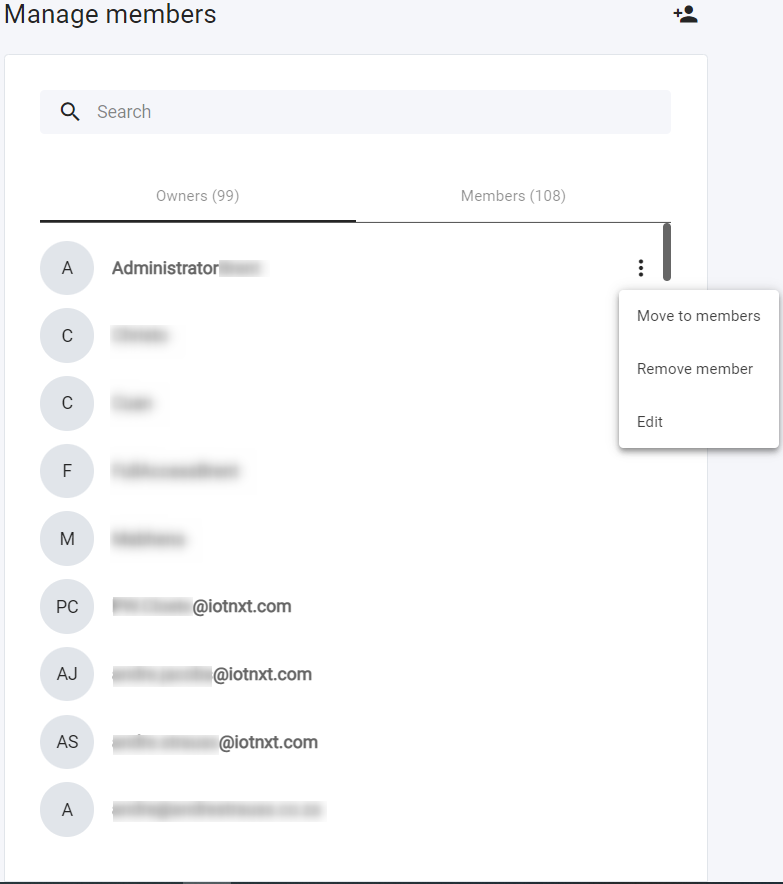
Figure 9 - Edit member options
The user can select the Edit option and this will take them to the screen below:
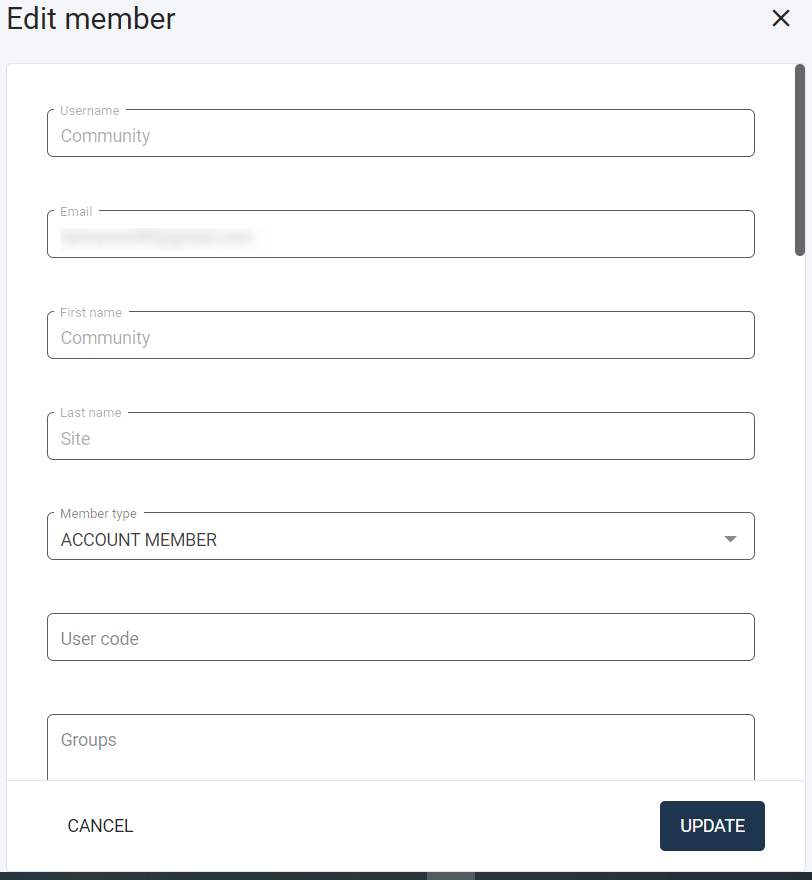
Figure 10 - Edit member
On the Edit member screen, a member can edit the user information (the same list as above), and then click the UPDATE button at the bottom of the form.
Creating a bulk user invite
To add multiple users at the same time, select Bulk members and upload the CSV file with the new member list. A user can also download the template CSV file in order to populate the list of users to add in bulk. The link is situated below the upload box.
When the CSV file is created, simply upload and click Continue.
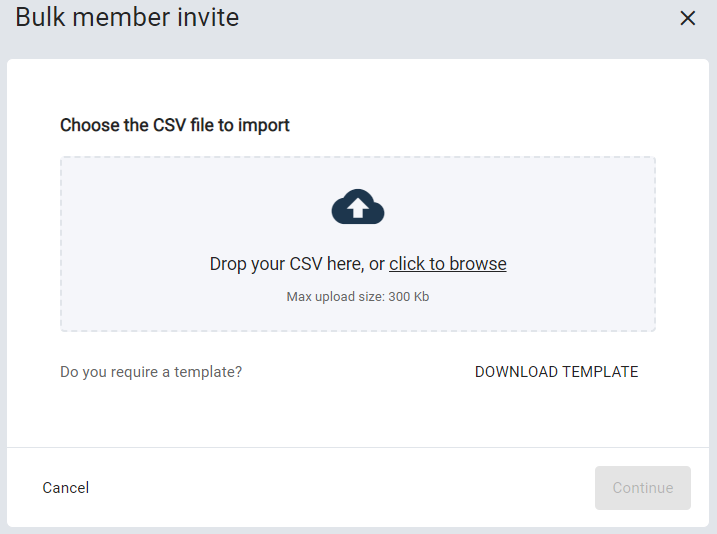
Figure 11 - Bulk member invite
Themes (v4 only)
All tenants will have access to the default light and dark themes. Tenant and account owners cannot edit or delete the shared themes but can disable them so that the themes are not available on the accounts. Tenant owners can create additional themes and make the themes available to all accounts on the tenant. With Radar(v4)themes we have taken a new approach with theming and added a default light and dark theme per account. Users now have the ability to select from the available themes or create their own.
| The Radar (v4) themes created using the Account manager are not available for Dashboard (v3). Dashboard (v3) themes can still be set from the Environment settings module in Portal. All v4 Apps, Landing pages, Radar, Account management etc will make use of the v4 themes. |
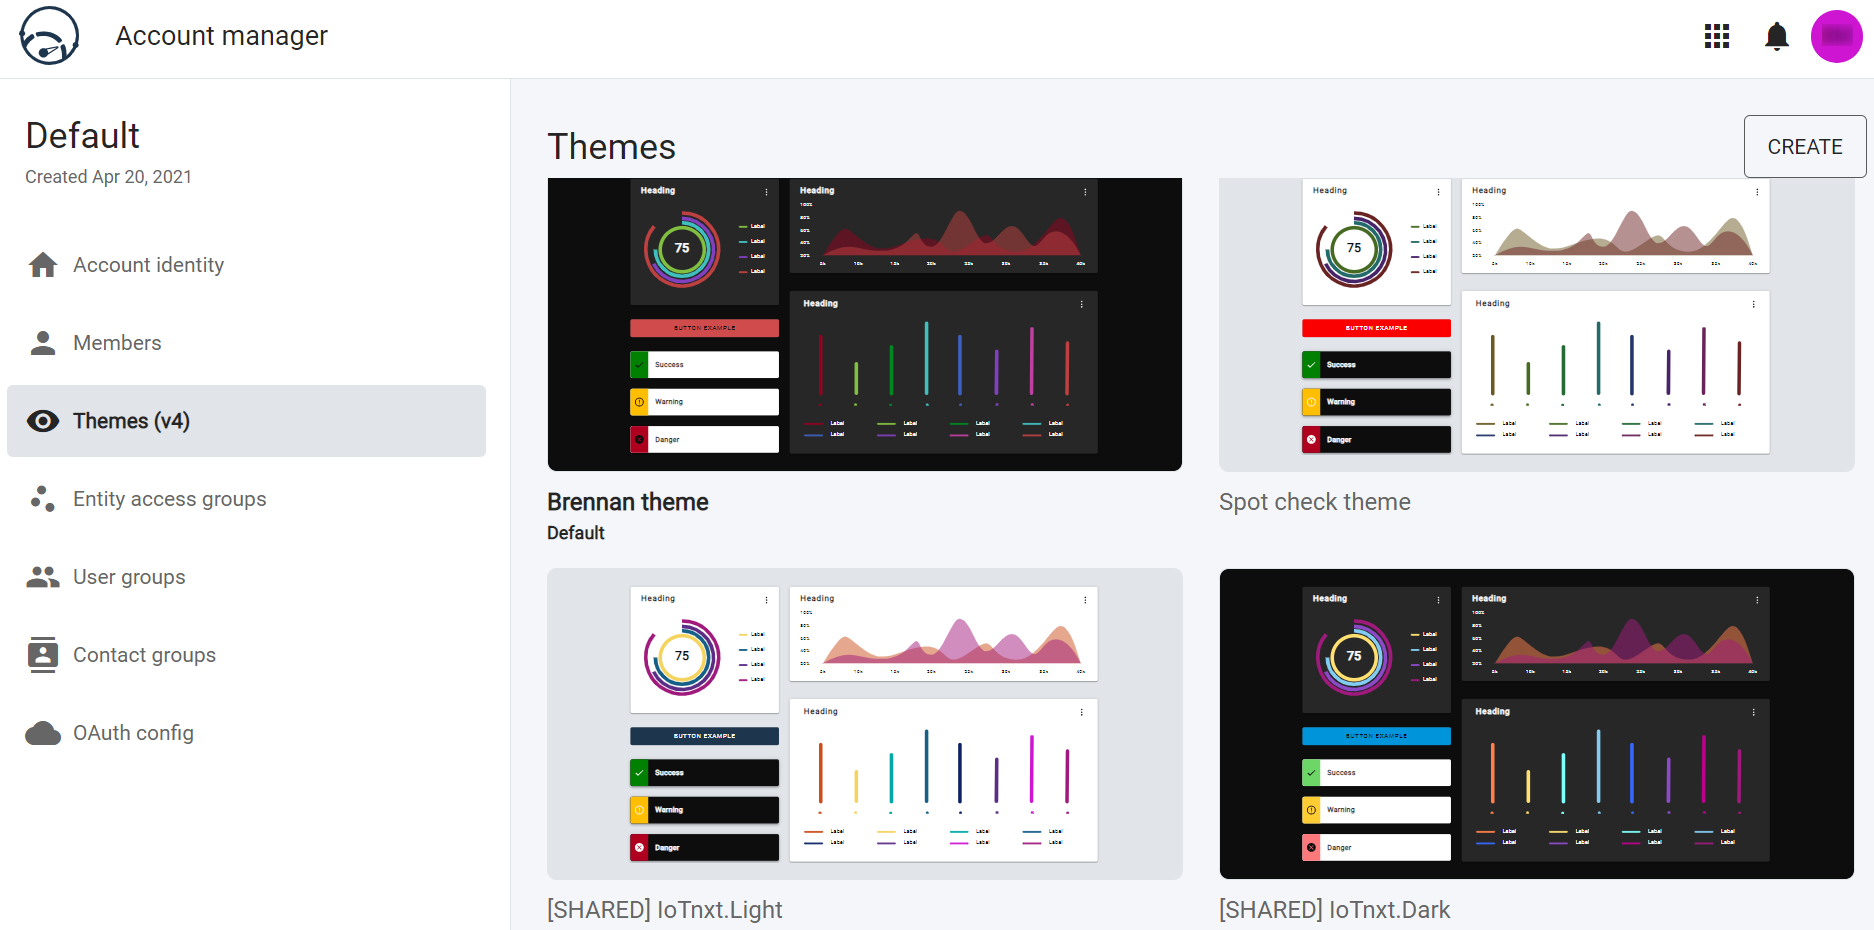
Figure 12 - You can customise the look of your Radar Dashboard with Themes
Creating a theme
Account owners can create and edit themes using the new theme builder functionality. All a user needs to do is select the primary colour and the data visual colours will be generated automatically. The suggested Data visual colours can also be changed by the user if needed.
Account owners can disable themes while they design the theme, then enable the theme when it is ready to be deployed. Account owners can also set the default theme for members of the account. To create a new theme,
Click the CREATE button at the top right corner of the Themes page. A Create new theme screen will be displayed as shown below:
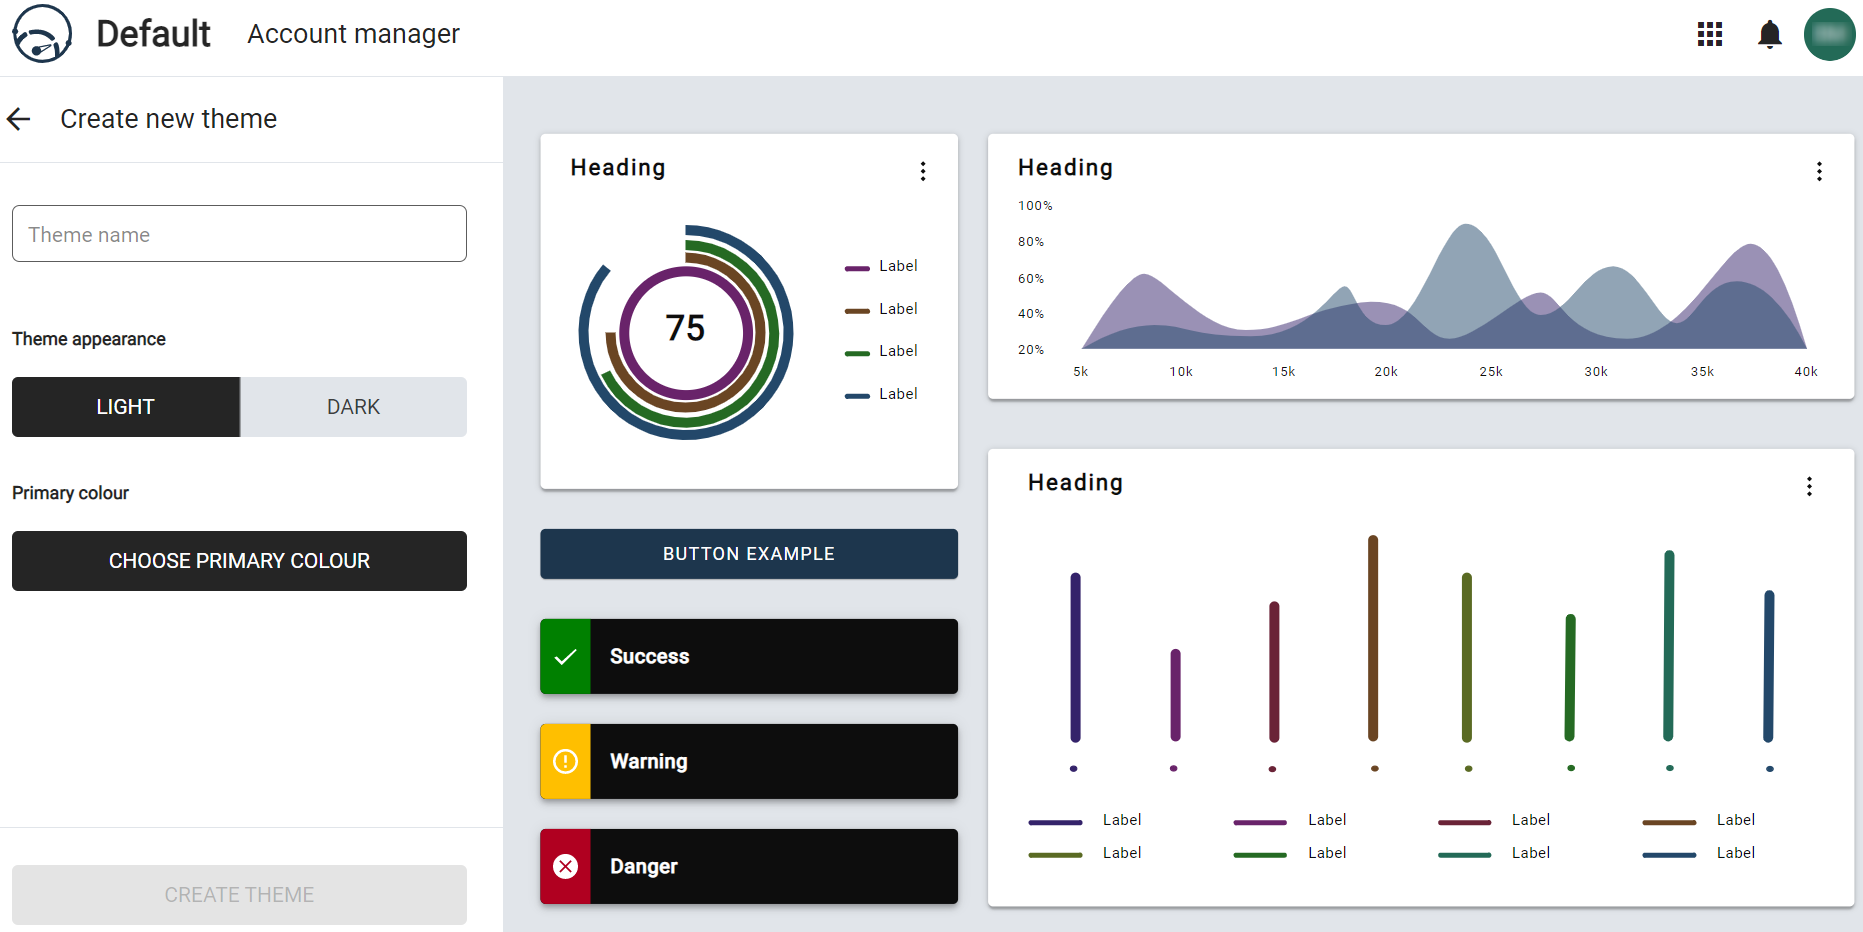
Figure 13 - Creating a theme is made easy with the intuitive theme editor
- The user can enter the theme name and select a theme appearance, light or dark.
- Choose the primary colour for the theme. Once the primary colour has been selected, the user will see the colour palette for the theme created automatically.
- To customise the Data visual colours and the Alert colours, simply click on the auto-generated colour palettes. A user can stick with the recommended hues or they can choose new colours for each of the data visualisations or alerts.
- If the user is happy with their theme colours, they can click the CREATE THEME button.
Editing a theme
To edit an existing theme’s colour palette, the user can click on the ellipsis menu for that theme and select the Edit option. They will be taken to the theme’s colour configuration screen as shown in Figure 14. This page allows users to edit the colour palette for that theme.
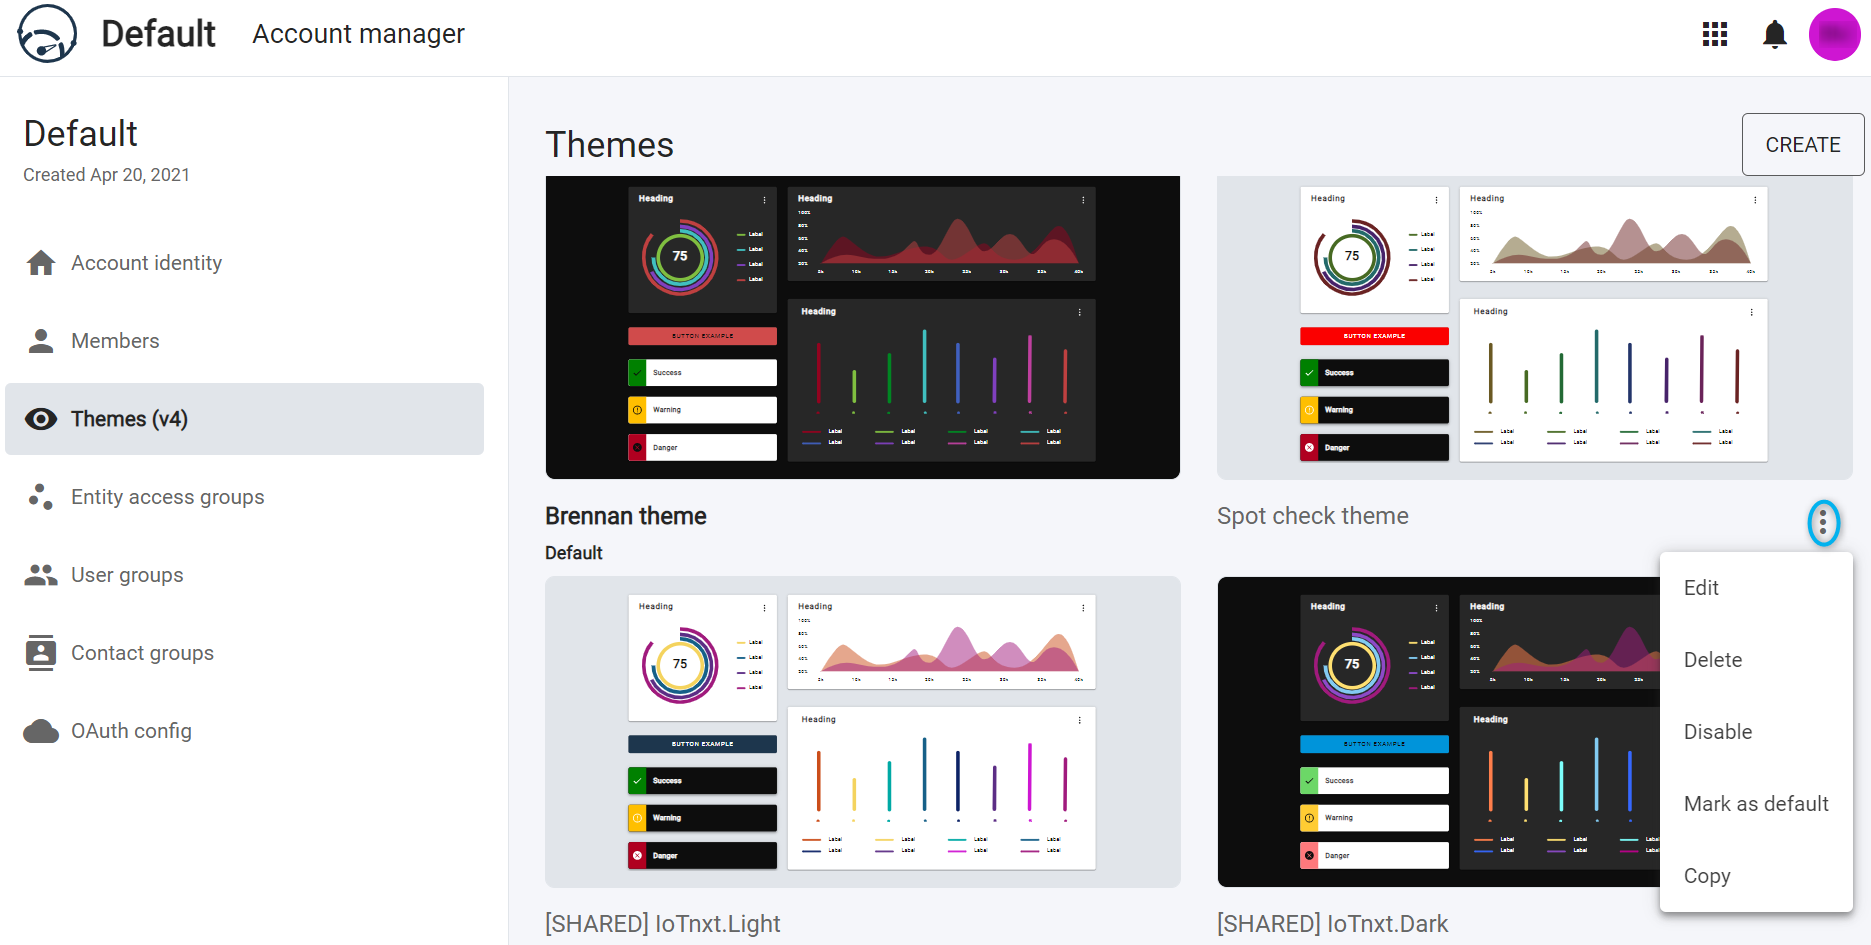
Figure 14 - Editing a theme
Entity access groups
Entity Access groups work the same way as they did in Portal, and govern what entities a user has access to on their account. To assign Entity access groups simply select the relevant groups from the list provided (see Figure 15).
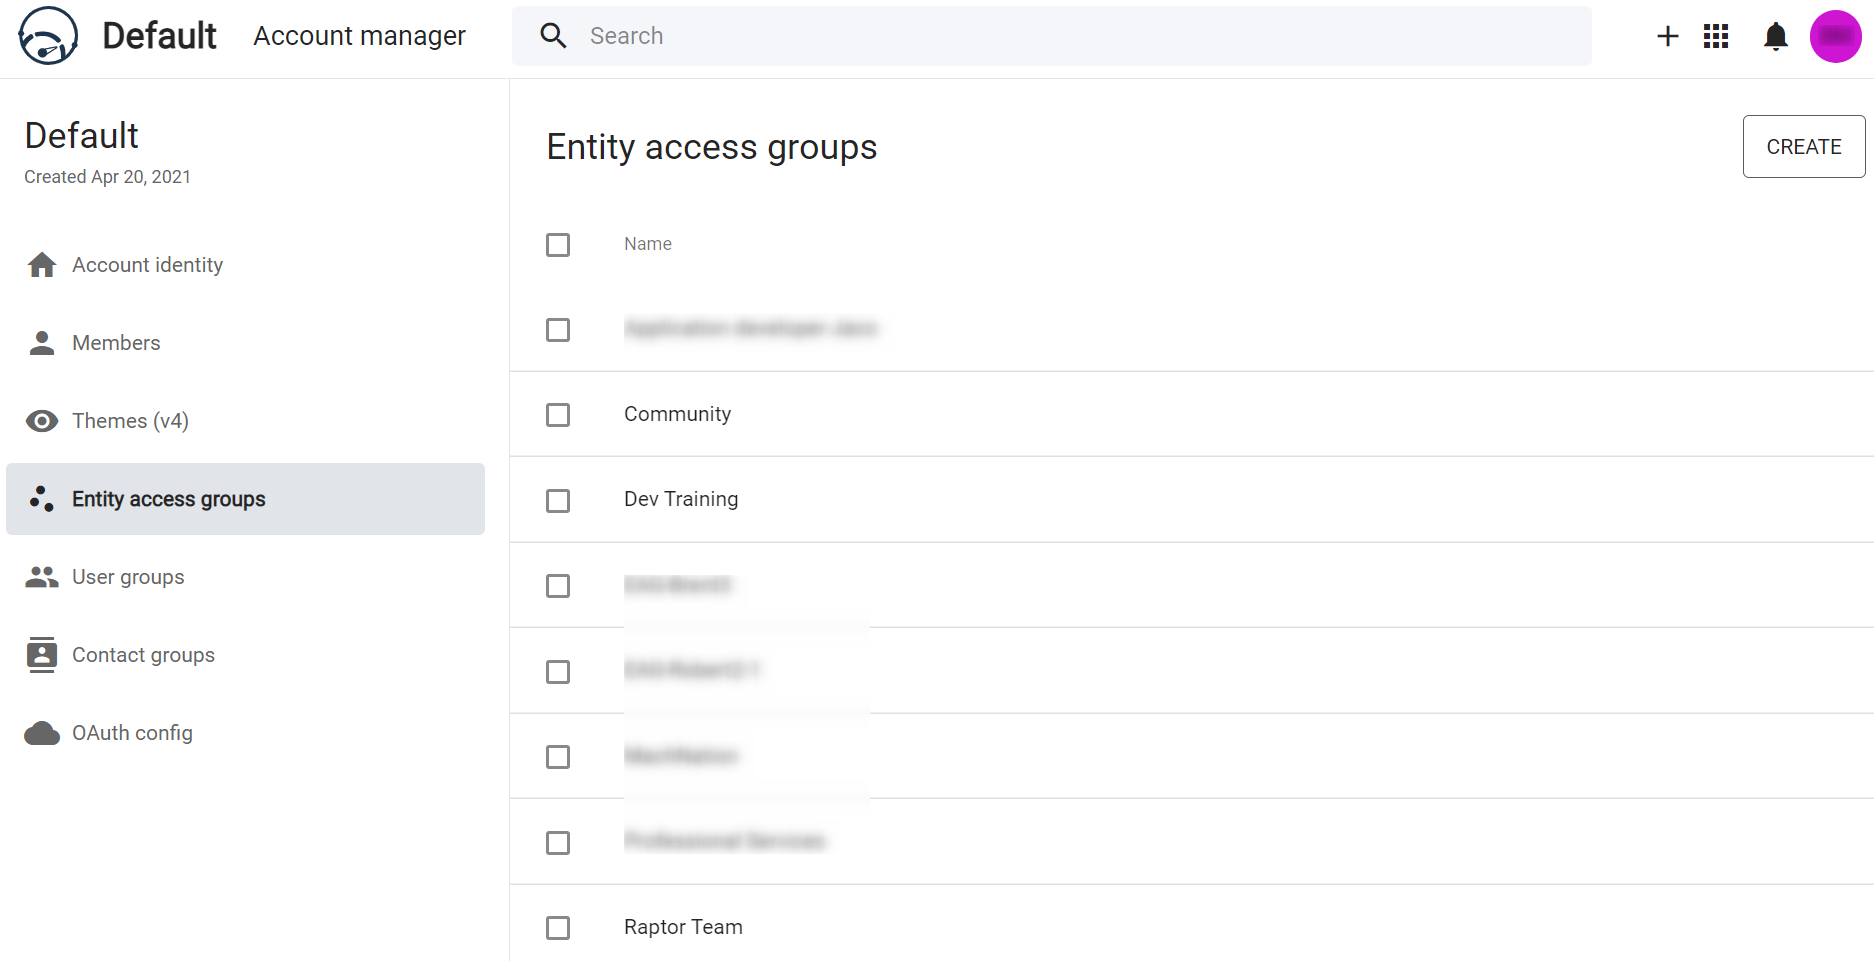
Figure 15 - Entity access groups
The user can also create a new Entity Access group by clicking Create on the top right side of the screen. The Add entity access group screen is displayed as shown in the figure below. When creating members, a user can assign them to the group rather than select the entities they are allowed to visualize every time there is a new user.
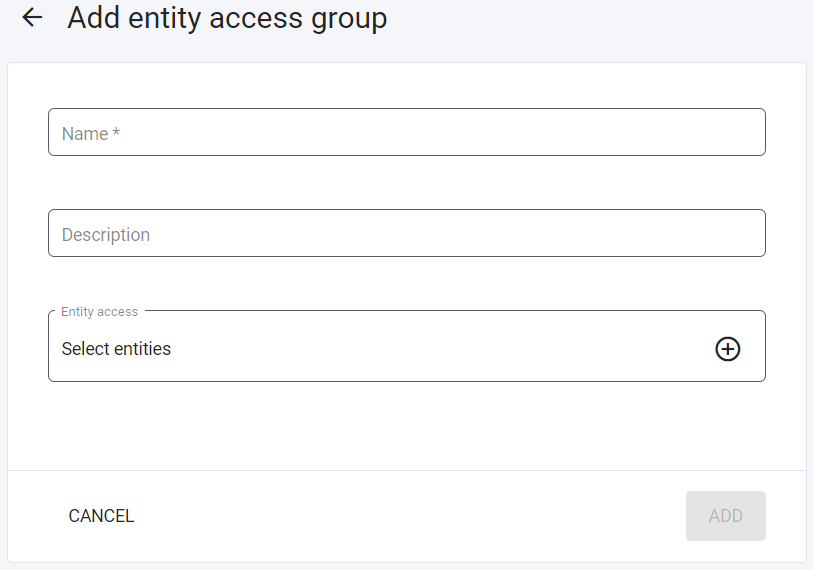
Figure 16 - Add entity access groups
User groups
User groups work the same way as they do in Portal, and govern what User groups an account has access to. They define a group by permissions, and applications that are permissible to the group. The group is then linked to a member when being created and invited to the account to have the specific permissions of that user group.
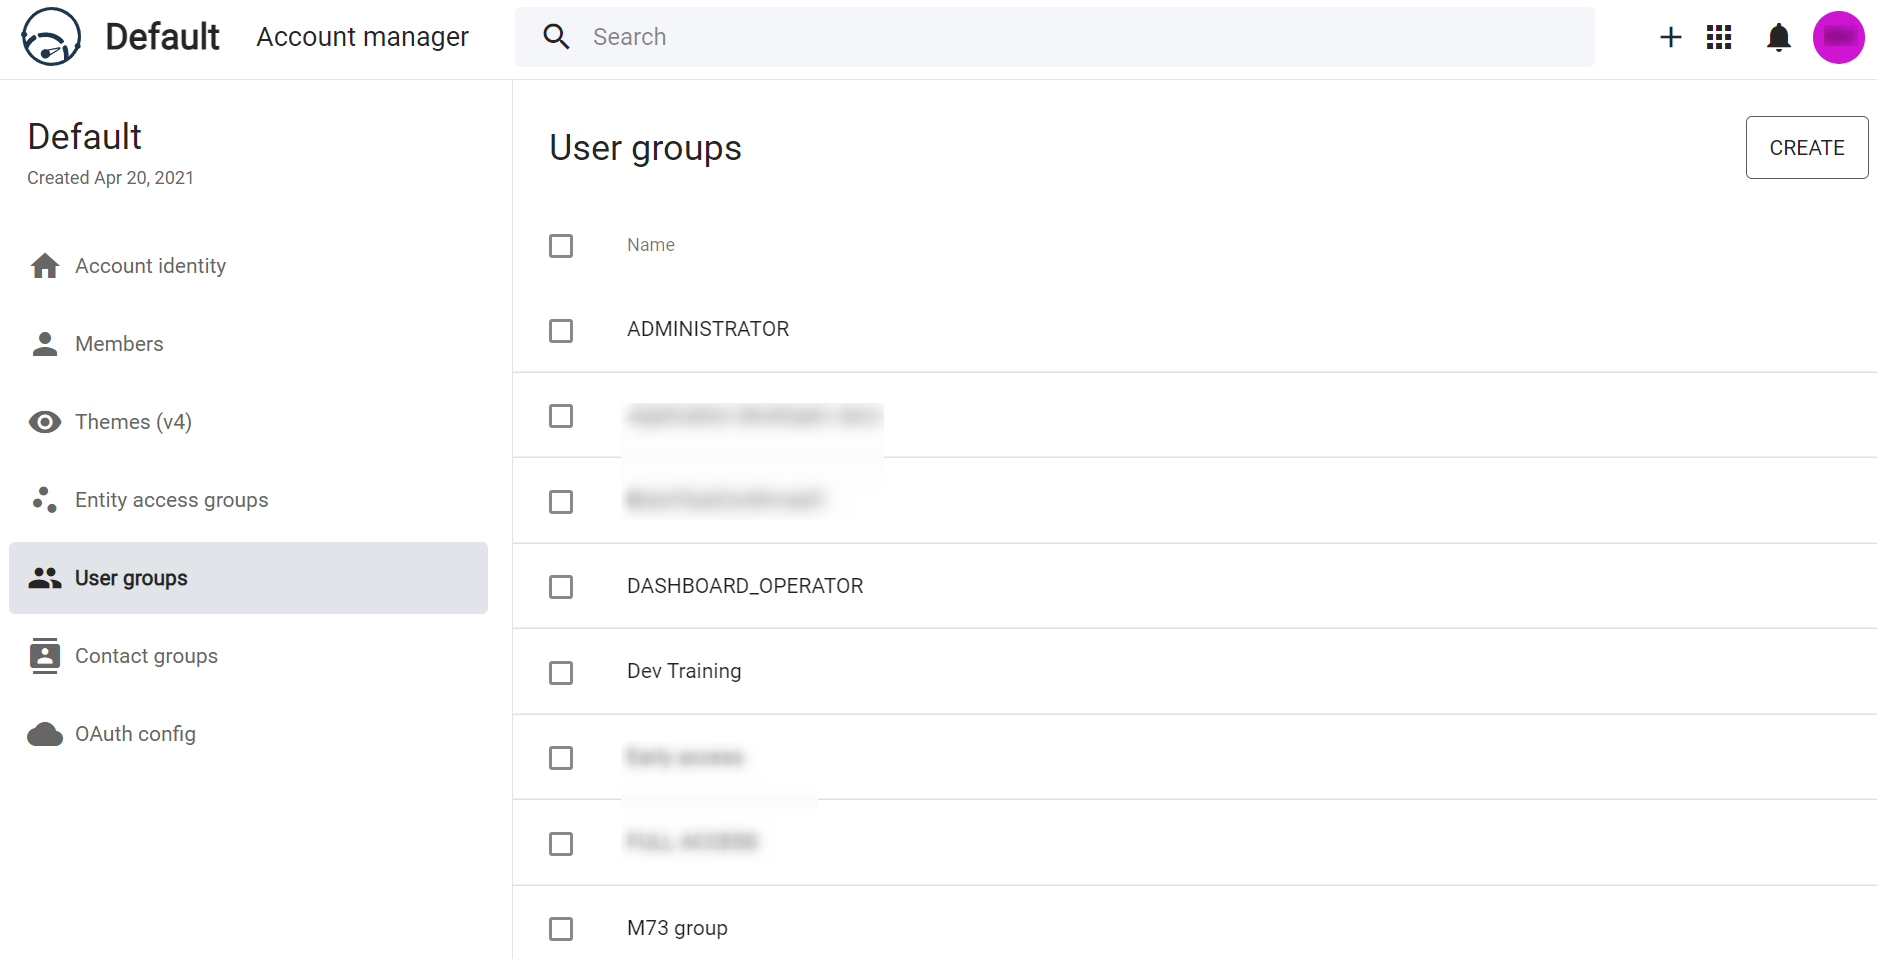
Figure 17 - User groups
The user can also create a new User group by clicking CREATE on the top right side of the screen. The Add user group screen is displayed as shown in the figure below.
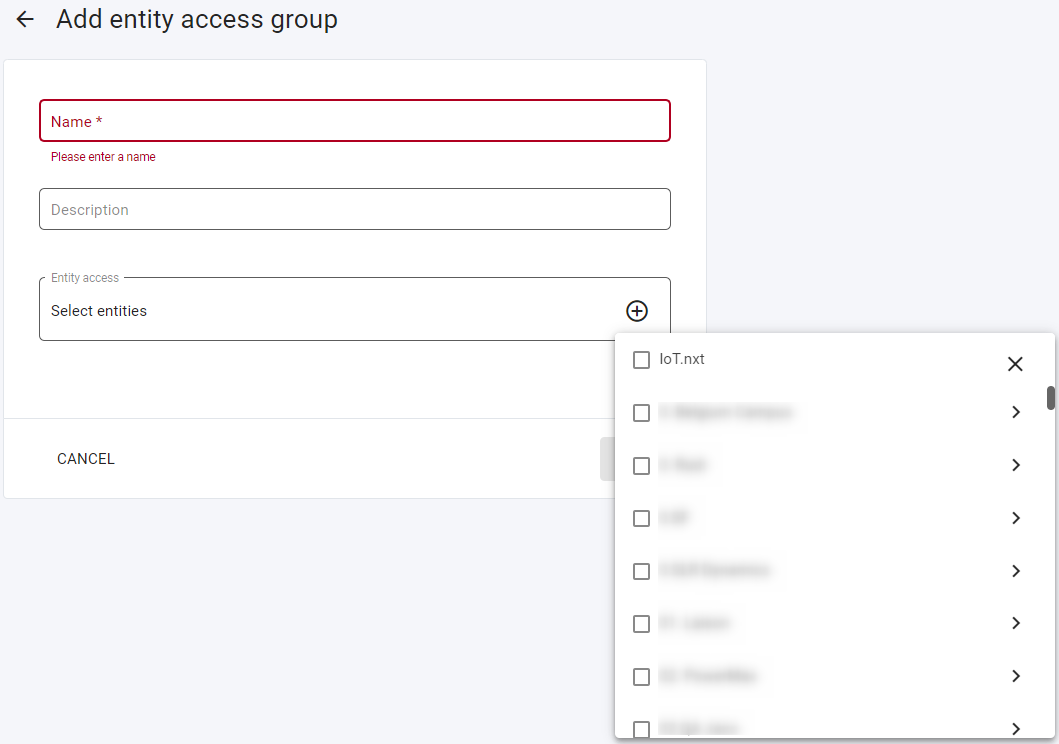
Figure 18 - Add user group
This is used when creating members to assign them to a group rather than selecting the permissions per new member.
Contact groups
Contact groups are users that will receive notifications when an alarm occurs. Figure 19 below displays the names of the contact groups available, when and who created the contact group, the number of contacts for each contact group and if it is active or not.

Figure 19 - Contact groups
Add a contact group
The user can also add a contact group by clicking ADD CONTACT GROUP on the top right side of the screen. The Add contact group screen will be displayed as shown in Figure 20.

Figure 20 - Add contact group
A user will be required to enter a name for this contact group and an optional description to describe the group. Contact groups can also be marked Active or Inactive, depending on when they are needed.
To add a contact, users can click on the ADD CONTACT button below the contact search bar to add one or more contacts to their group. The Select contacts screen will be displayed as shown in Figure 21 below. This is where they will have their contact information, including the e-mail and phone number of the contact.
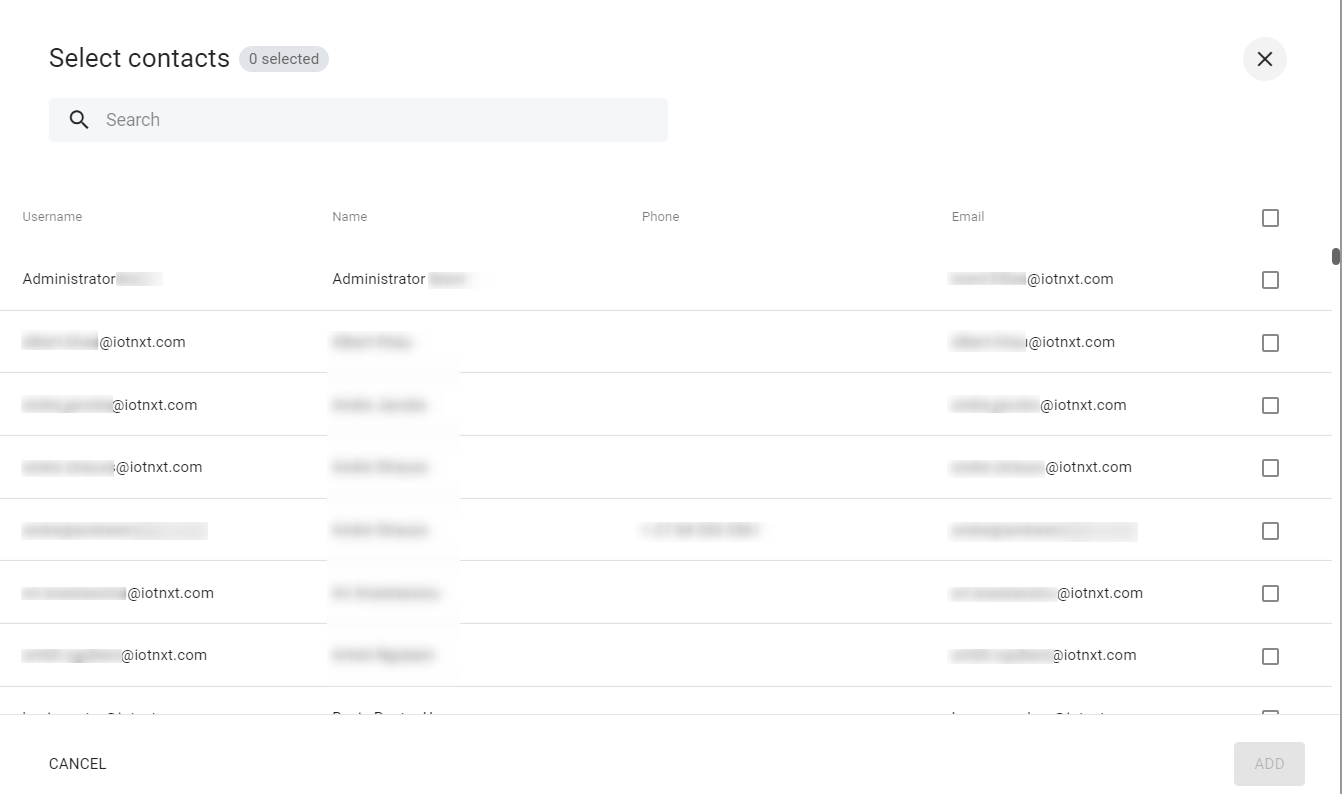
Figure 21 - Select contact
Edit an existing contact group
The user can also edit a contact group by hovering their mouse over a particular contact group in the list and an edit icon and delete icon options are displayed (see Figure 22).
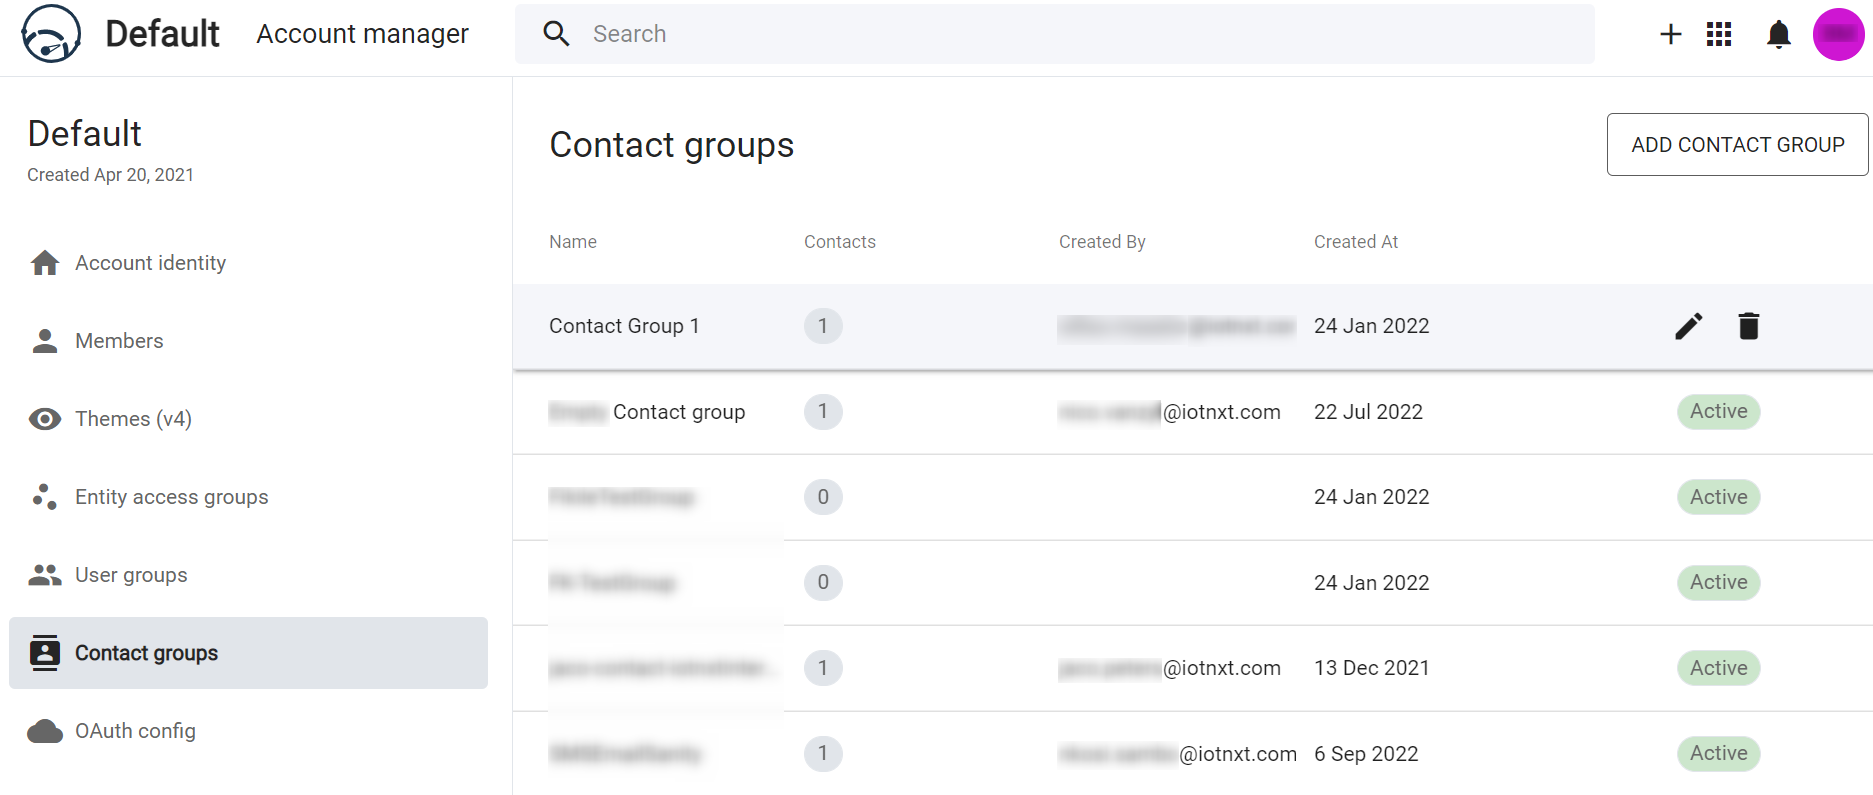
Figure 22 - Contact groups.
Once they select the edit icon(pencil) on the right side of the contact, the Edit contact group screen is displayed as shown in the figure below.
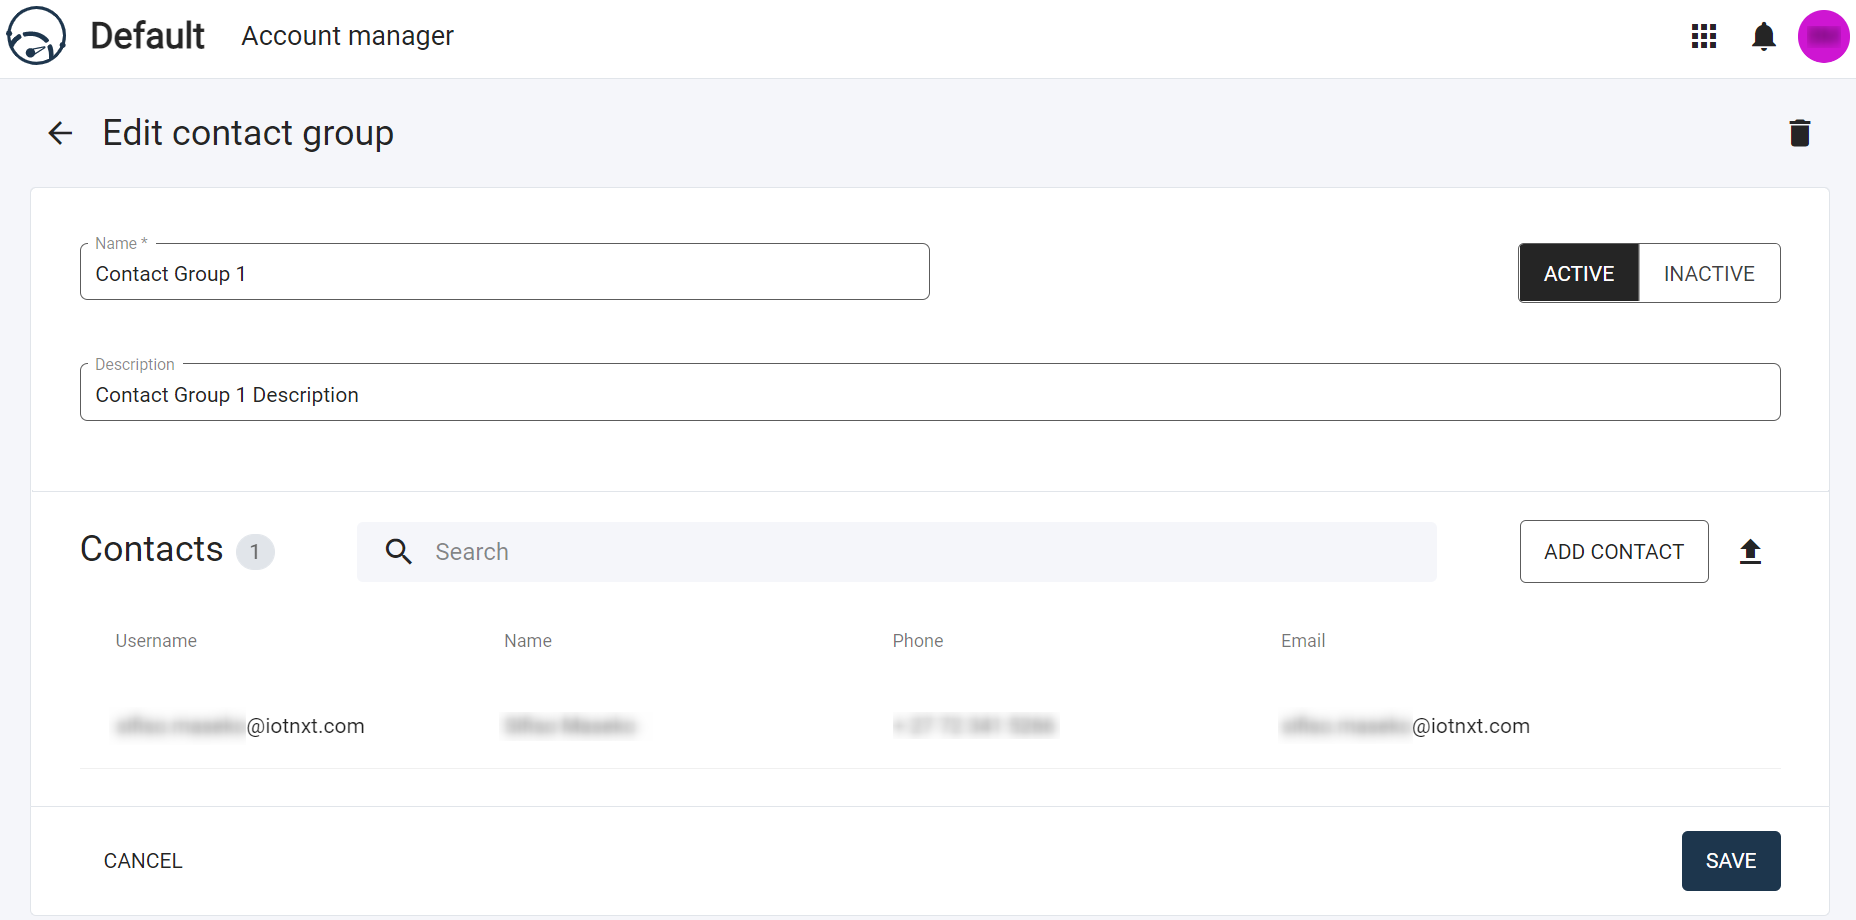
Figure 23 - Contact groups.
This allows the user to edit the name for the contact group and the optional description to describe the group. They also have the option to add a contact, by clicking on the ADD CONTACT button which will navigate them to the Select contact screen (see Figure 21) from where they will pick a contact. Once the user is satisfied with their edit they can click SAVE to update the contact group details.
Open Authorization (OAuth) config
The Open Authorization (OAuth) Config allows the user to integrate with different services to provide alternate means of logging into Commander™, therefore logging in via a third party application. It also allows the permissions for a user in that third party application to map to specific roles and permissions in Commander™. A user does not need to configure user permissions on both applications, they only have to do it on one. If a user is an administrator in Commander™, they will automatically be an administrator the third party application.
When the user selects the OAuth Config option from the menu, the OAuth subscriptions screen is displayed.
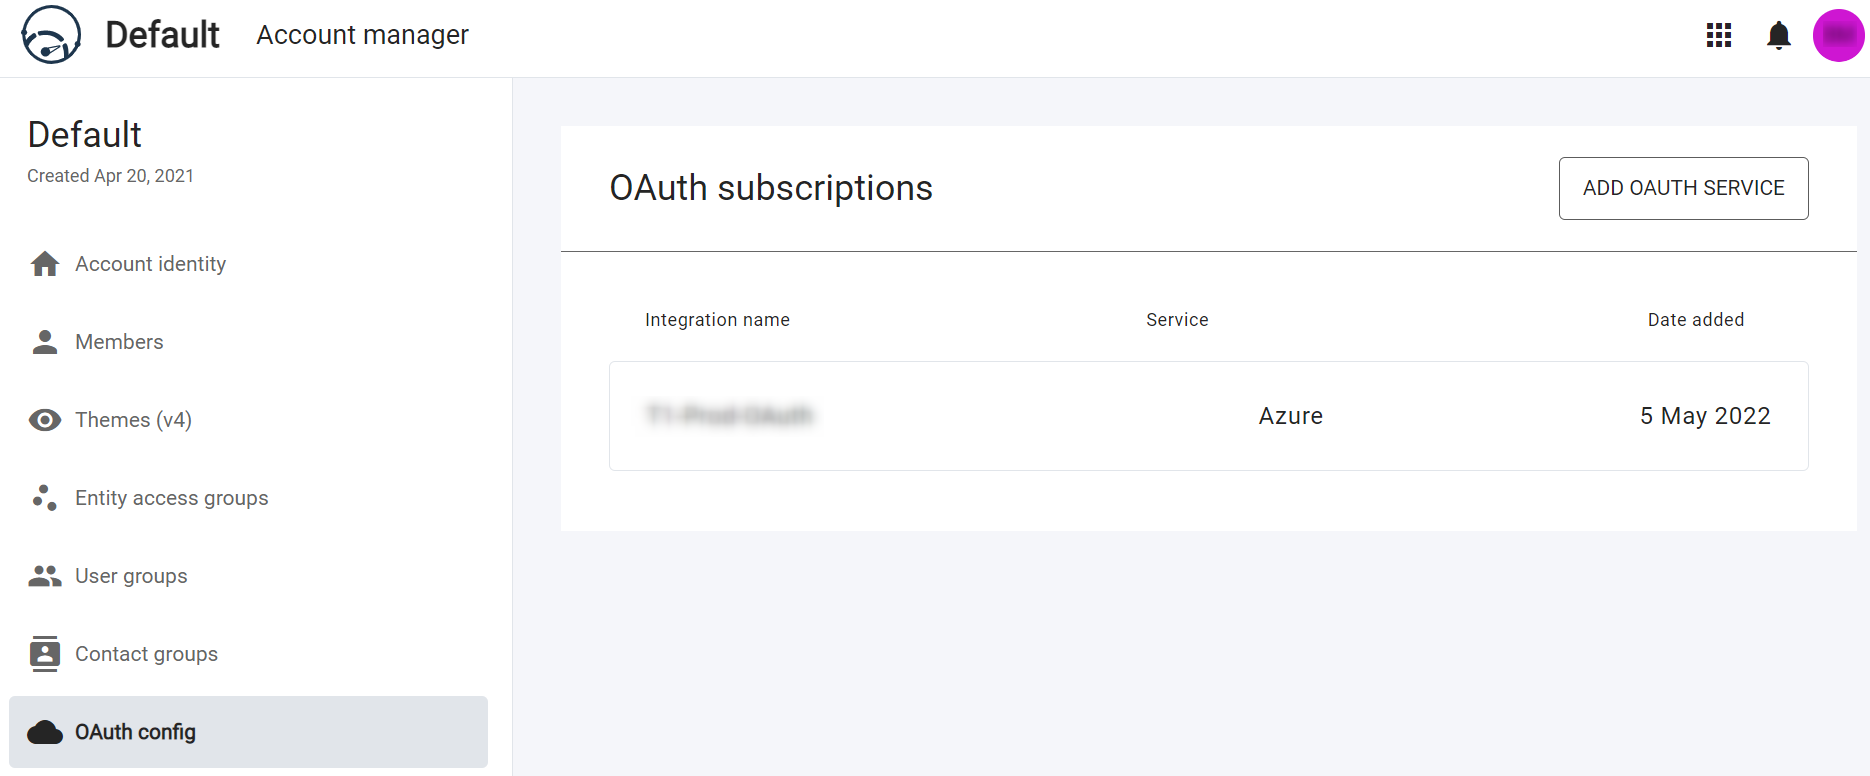
Figure 24 - OAuth Subscriptions.
Add OAuth subscriptions
OAuth Config gives users the option to log in via a third party application. The user can add an OAuth service by clicking ADD OAUTH SERVICE on the top right side of the screen. This will navigate to the OAuth Services screen as shown below.

Figure 25 - OAuth Service
When a user selects one of the OAuth services options available, a green tick will appear on the top right-hand corner of the service indicating their chosen service. The user can then click the NEXT button at the bottom of the screen, and this will display the service credentials page (see the figure below) used when setting up the integration.
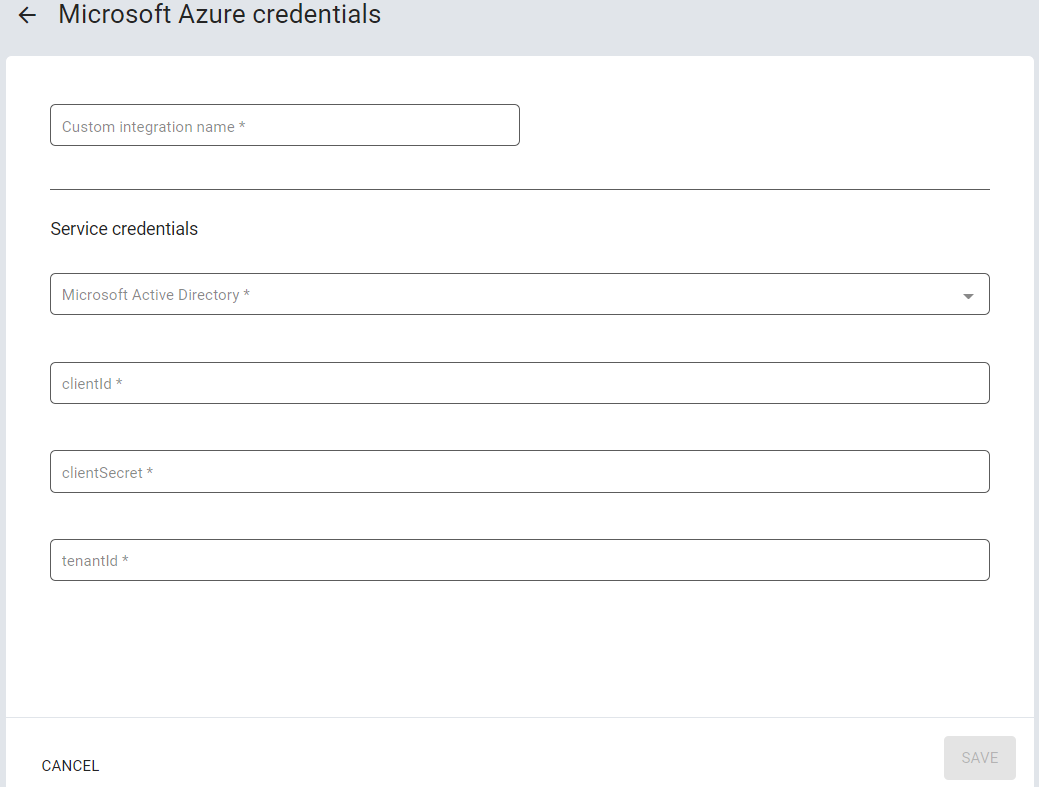
Figure 26 - Service Credentials
| Retrieve the service credentials from the Google Integration menu. |
This is were a user is required to complete the credentials form and click SAVE to create this integration. Once it is created, the user can click on the subscription to navigate to Figure 27 below. This is were users can map the third party application service roles to Commander™ user groups and entity groups, therefore permissions will only need to be managed on one application rather than both.
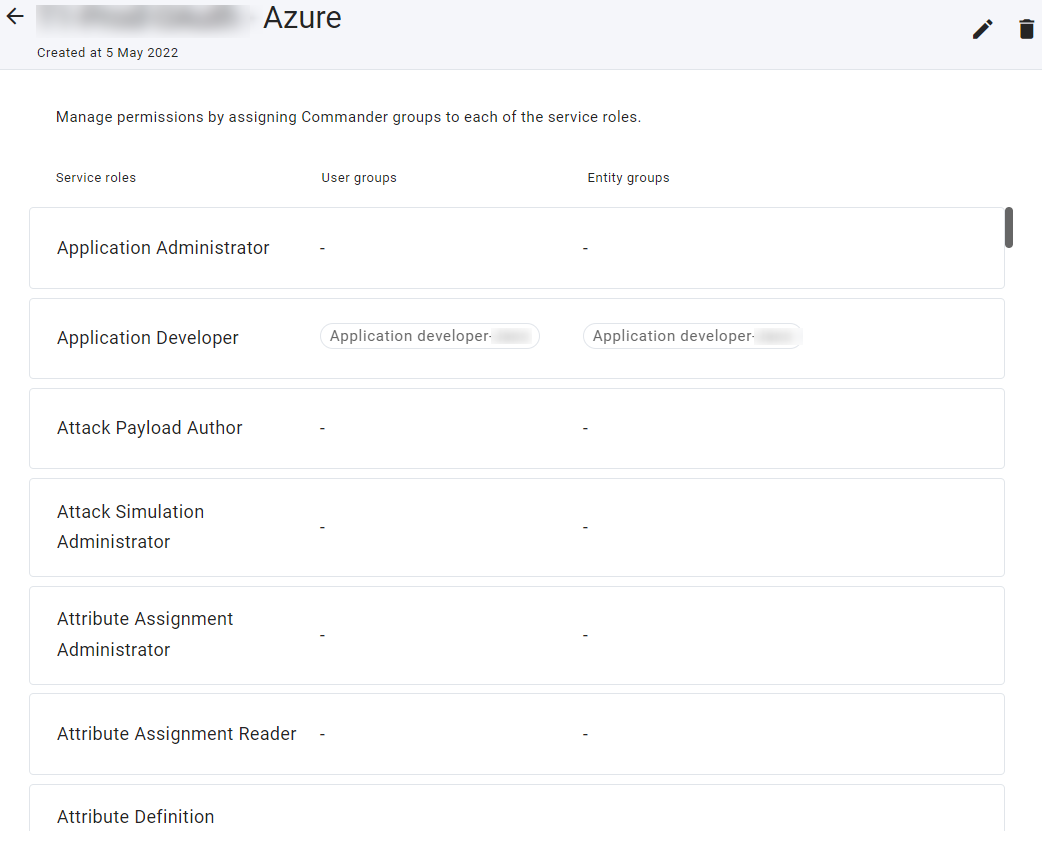
Figure 27 - Manage permissions
Edit OAuth subscriptions
A user can also edit an OAuth subscription by hovering their mouse over a particular subscription in the list and the edit icon and delete icon options are displayed (see Figure 28).
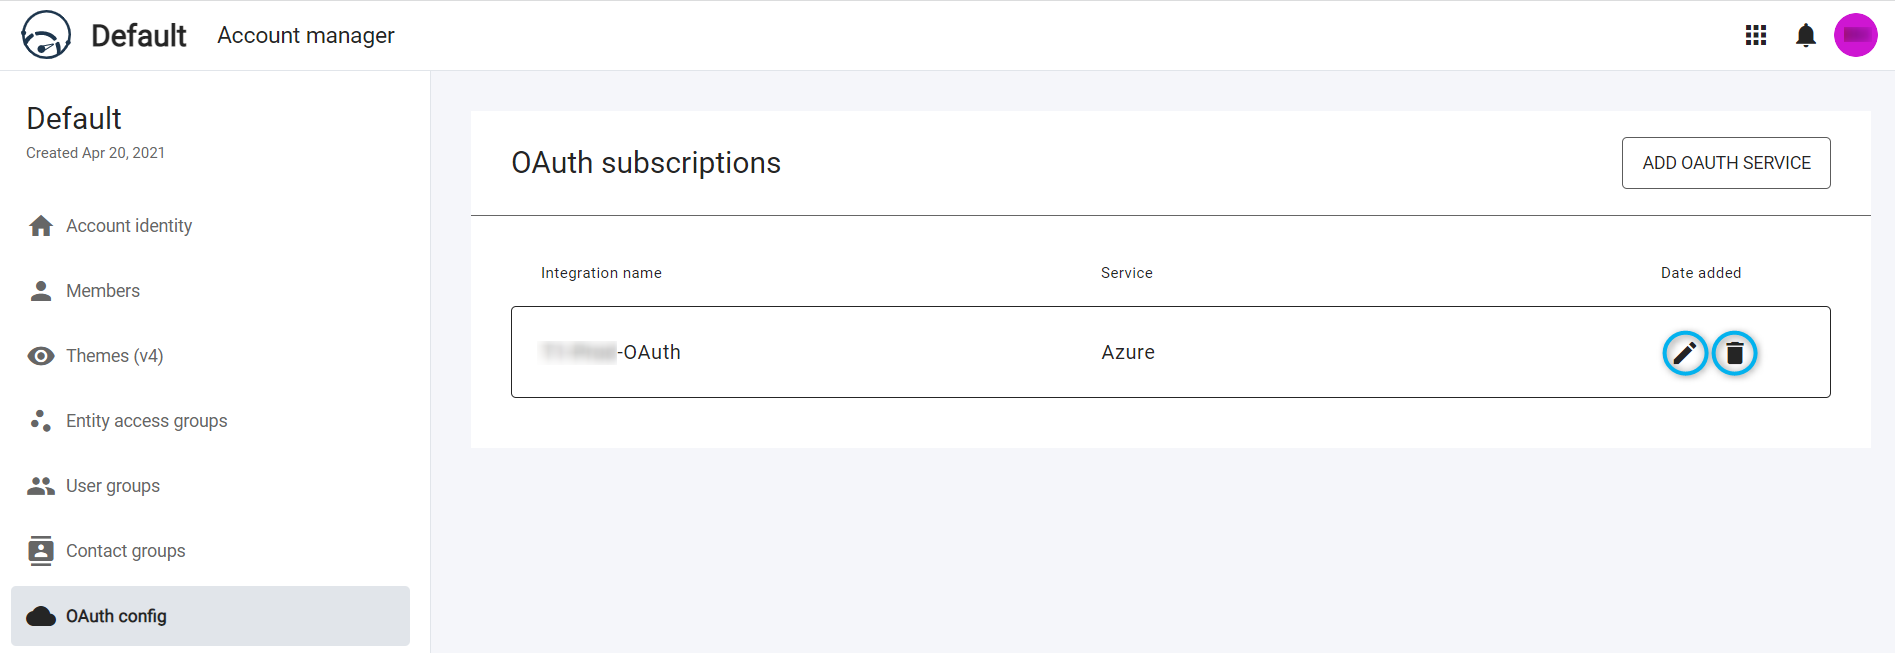
Figure 28 - Editing a OAuth Subscription
Once they select the edit icon(pencil) on the right side of the listed subscription, a credentials screen is displayed as shown in the figure below, ready for editing.
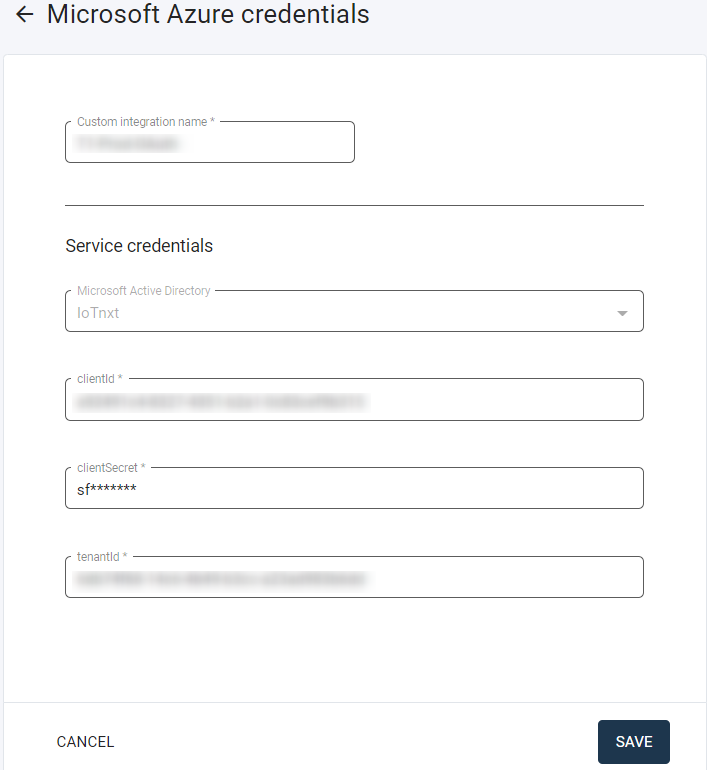
Figure 29 - Existing OAuth subscription credentials
This allows the user to edit the an existing OAuth Subscription. Once the user is satisfied with their edit they can click SAVE to update the credentials.