
Product Store
Jan 1 2022 at 12:00 AM
- Overview
- Device Templates
Overview
The Product store makes it easy for developers to create plug-and-play applications for physical IoT devices. These products hide all the complexity from the end-user, allowing them to build a solution without having to write a line of code.
This is especially useful when you want to simplify the setup and configuration of devices as well as creating Digital Twins. Equipped with these products, the user will also be able to build functional dashboards to display data sets from.
Please note that when you onboard one of these products, you will need to specify where in the tree it needs to be provisioned and you’ll need to specify its gateway Id. From there you will be able to modify/update the thresholds.
Accessing the Product store
The Product store is accessible via the Commander landing page. To access it, click on the ‘Apps’ menu on the top left-hand side of the screen. You can also pin it as a favourite app by clicking the heart symbol, to ensure easy access from the landing page.

Figure 1 - Accessing the Product store
Designing a Product
There are three steps to designing a product:
- Create a Digital Twin template
- Create your device template
- Create your product template
What is a Digital Twin
A Digital Twin is a virtual representation of a physical device and allows for the creation of templates (groups of entities) that can be created once and applied multiple times. For example, sites (i.e. Weather stations) may contain the same sensors (i.e. wind speed sensor), with a sub-group that the user may want to create multiple instances of. The Digital Twin with the relevant Nested Digital Twins (NDTs) can then be used to create multiple instances of that structure. For more information on how to create a Digital Twin, click here.
Device Templates
The device template defines the device’s properties, this can be anything such as serial numbers, model numbers, manufacturing date, or colour. Moreover, there are two types of properties that be defined, General and Specific. Device templates also serve as the template that devices can be based on. This is used later in the Product template to map between a Digital Twin and an actual device.
Device templates are used in a Product template and make it easy for you to add products to the Product Store.
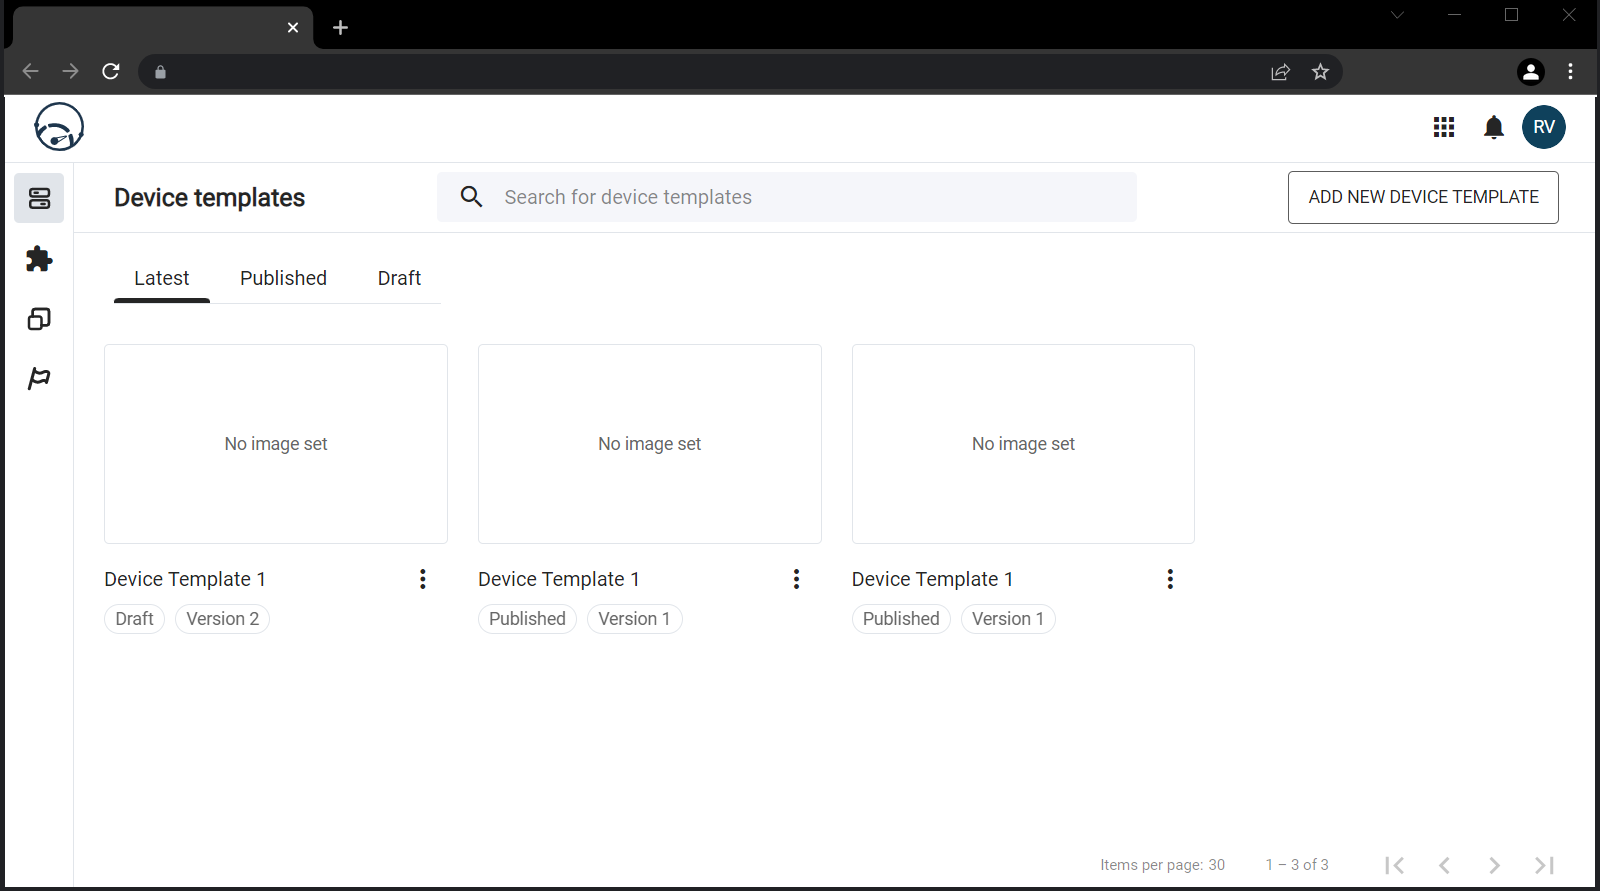
Figure 2 - Device templates
On the Device template dashboard in the Product store, you can create new Device Templates or edit existing templates. When you create a device or product template, you have the option to publish it, or save it as a draft item. When saved as a draft, the device or product template will not be visible on your Product store, and it won’t show up when you want to build a new template. This is to prevent product templates from referencing device templates when they are not ready to be used.
Creating and editing a new device template
When you launch the Product store app you’ll be taken to the Device templates dashboard. From here you can also access the Product templates and the products that are ready to be published, using the menu on the right side of the screen.
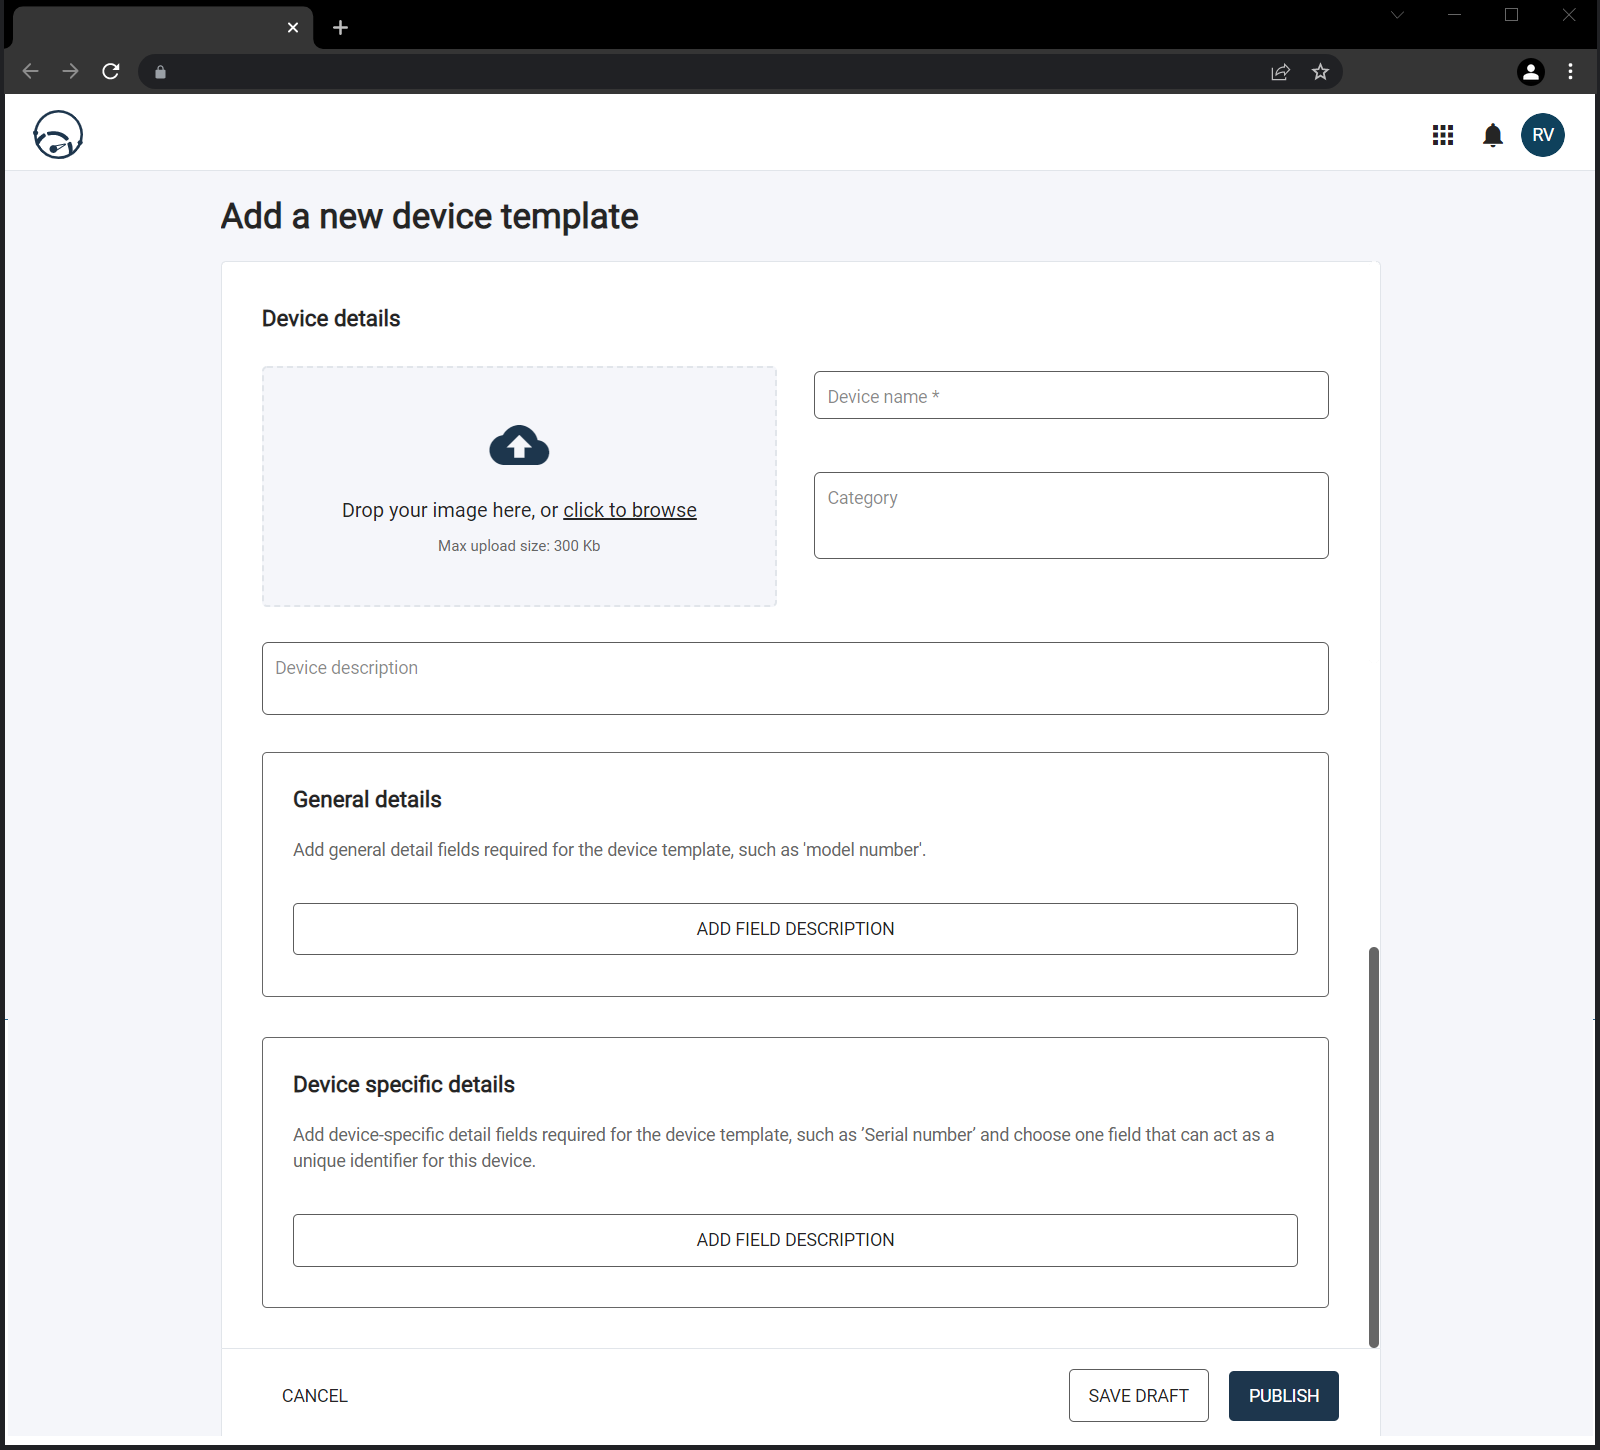
Figure 3 - Adding a Device template
Device Details
- Enter a device name, or device related meta data.
- Select the relevant categories from the list that is available or add your own by typing directly in the Category field.
- Add an image of the device and please ensure it is smaller than 300kb
- Enter a description of your device.
General Details
The General details section defines the general data fields that is required for the device template, such as model number, colour etc. These general properties are consistent across all devices based on this template. Please note this is not a unique identifier.
- Add a field description to label the device you are using i.e. Model Number
- Add a field value to identify the actual device i.e RGS001
- You can add more Field Descriptions by clicking the ‘Add Field Description’ button.
Device Specific Details
The Device Specific Details section defines unique descriptions to identify each device, such as serial number or barcode. You can create multiple Field Descriptions but can only assign one Field Description as the unique device identifier, such as device serial number.
- Add a field description by entering your text and clicking the Add Field Description button.
- To select your Device Identifier, simply click the checkmark next to the Field Description.
Product templates
Product templates define a map between a Digital Twin and the devices that you include in your product template. A Product template also maps device properties to Digital Twin regex tokens, and links static endpoints from a Digital Twin to a device.
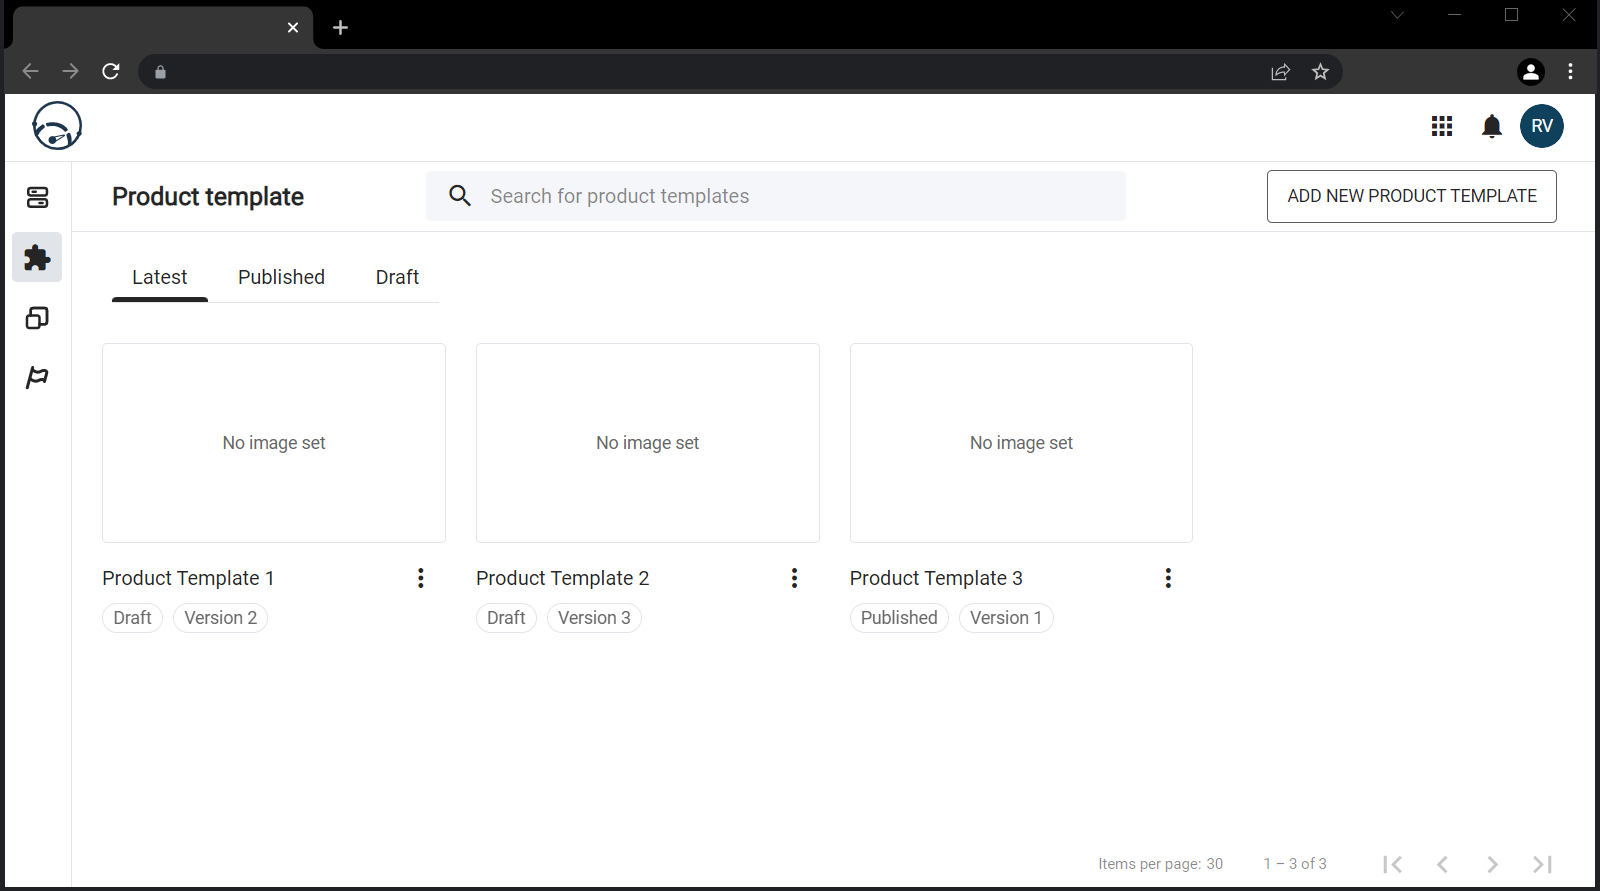
Figure 5 - Product templates
Creating and editing a new Product template
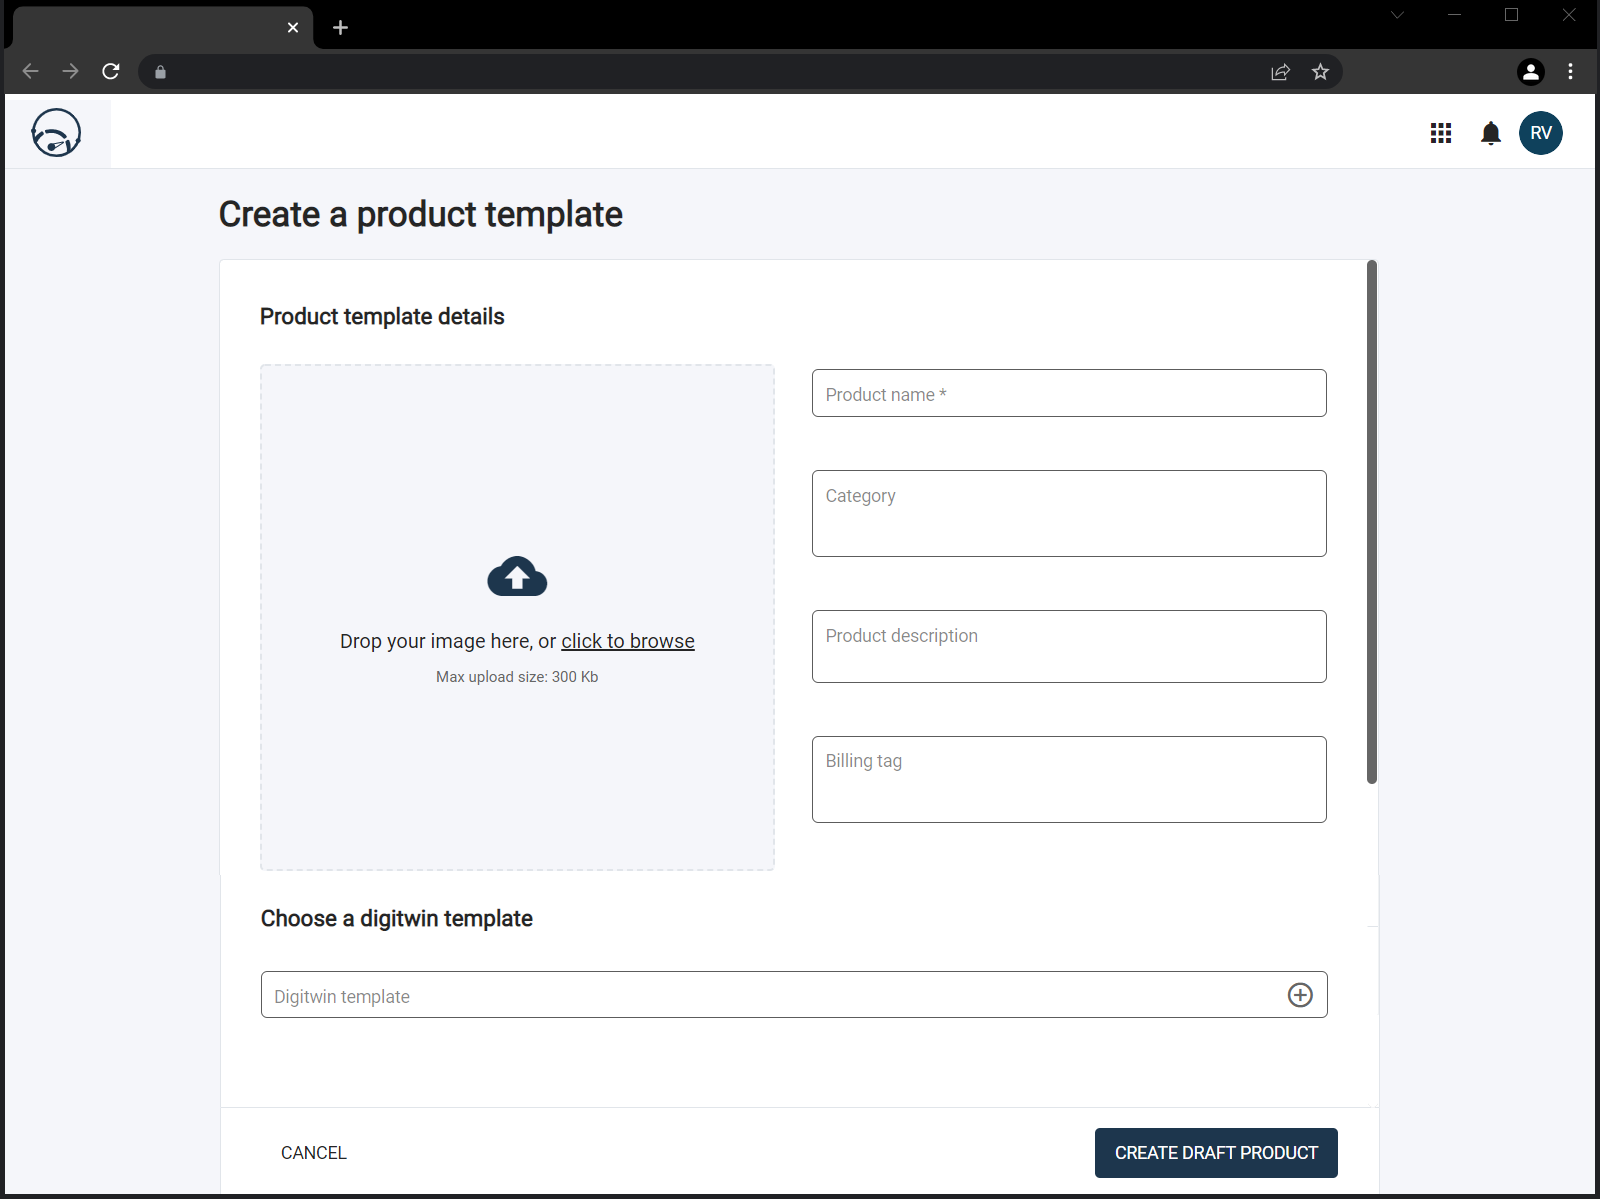
Figure 6 - Creating a Product template
1. Enter a product name.
2. Select the relevant categories from the list that is available or add your own by typing directly in the Category field.
3. Add an image of the device, must be smaller than 300kb.
4. Enter a product description.
5. The last step in creating the Product template is to select which Digital Twin template the product will be based on and mapped to.
6. When you are done, click Create Draft Product. This will create your product template and leave it in a draft format.
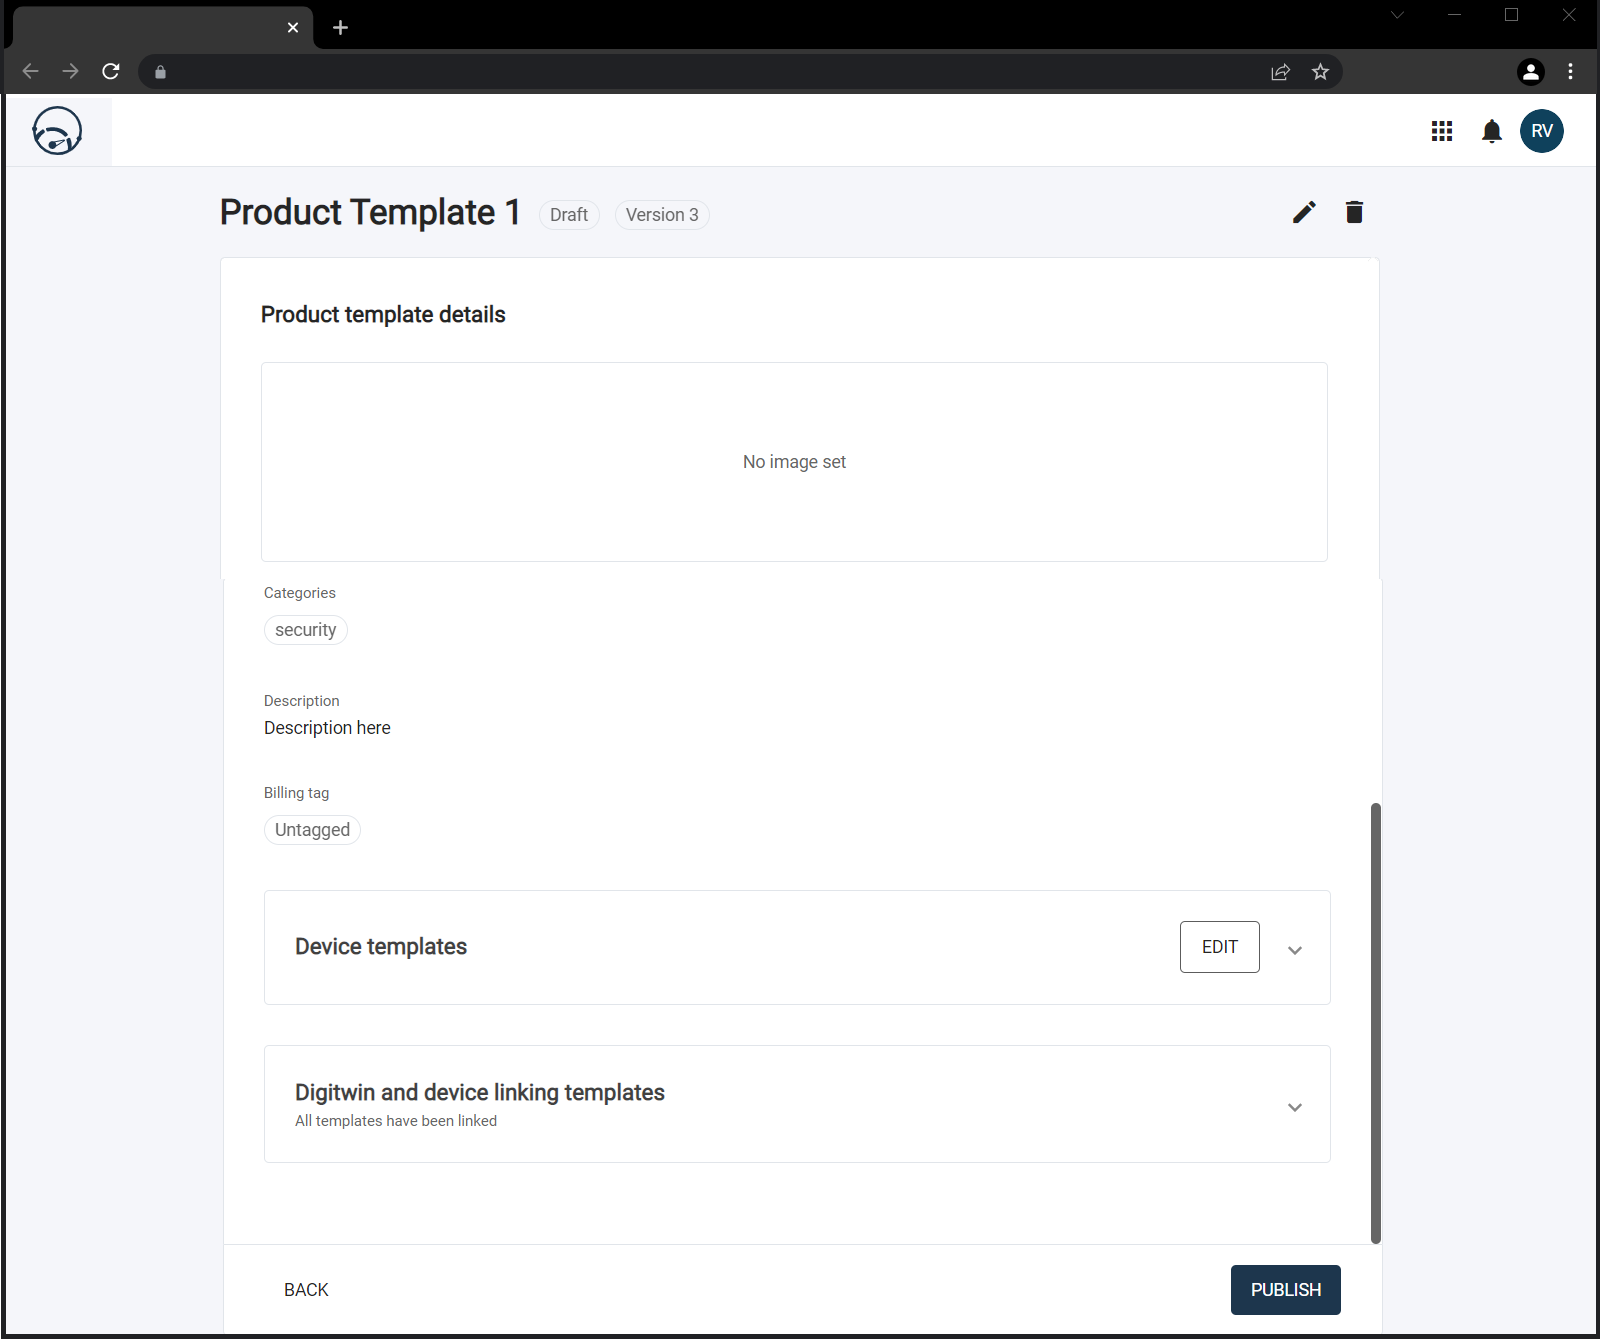
Figure 7 - Product template details
With your newly created product template in draft mode, you can now add the device templates that you want to map to your Digital Twin.
7. To add a Device template, select one from the list of created devices. If you do not see any devices here, you will need to add them.
8. When you add device templates you can add a unique name to distinguish between multiple devices.
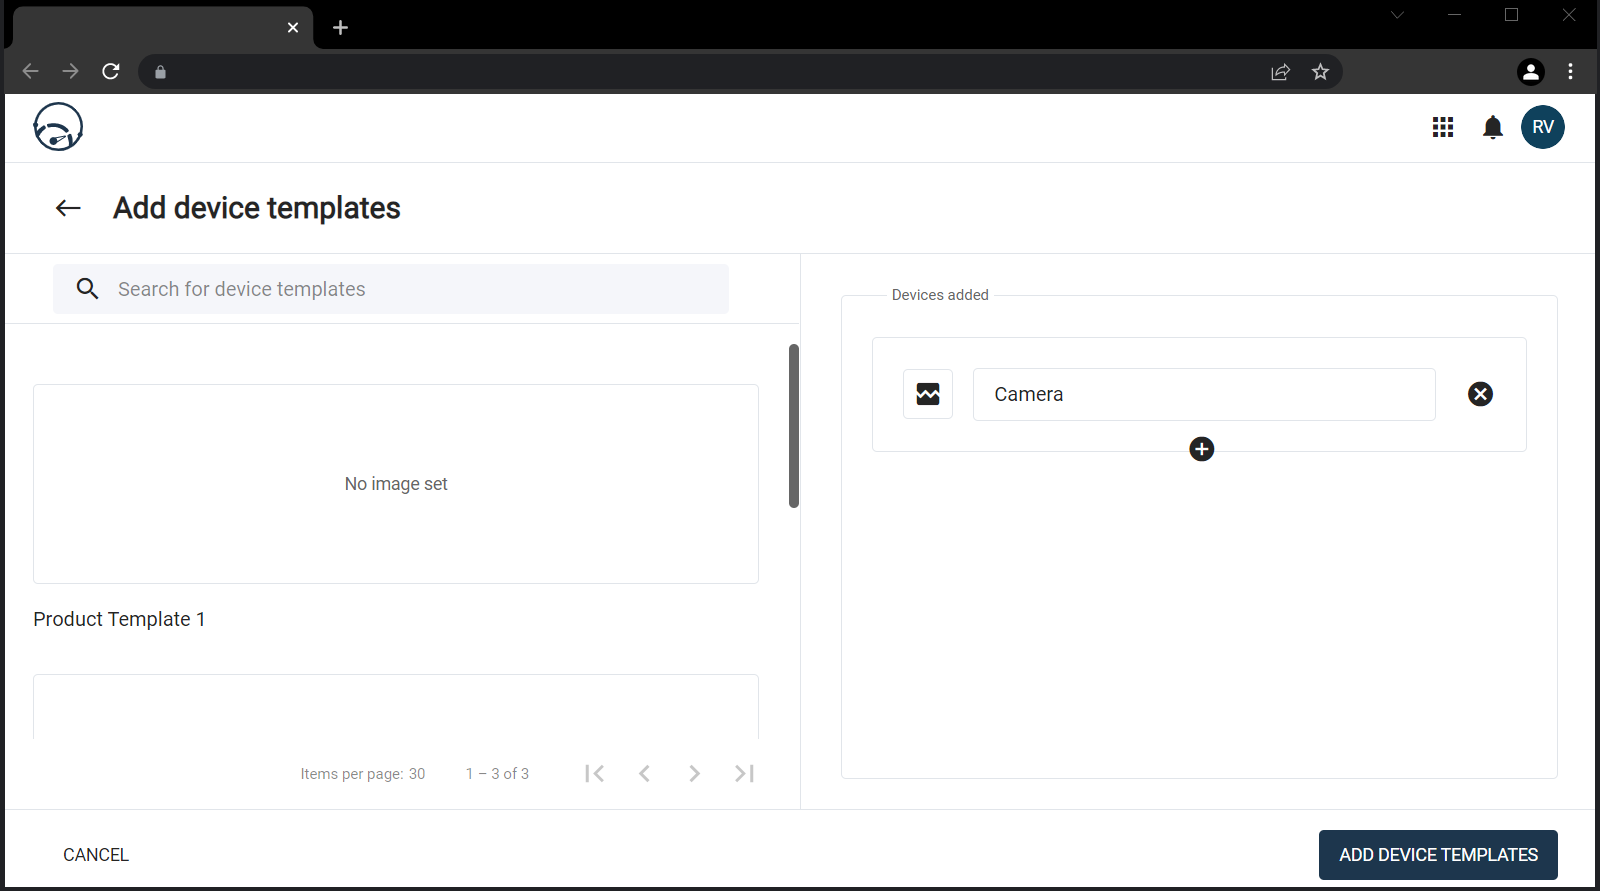
Figure 8 - Add device template details
9. Once you have added the devices you need, click ‘Add Device Templates’ to link them to your product. You’ll then be taken to your Product Template page where you will see the Digital Twin and devices that you have linked.
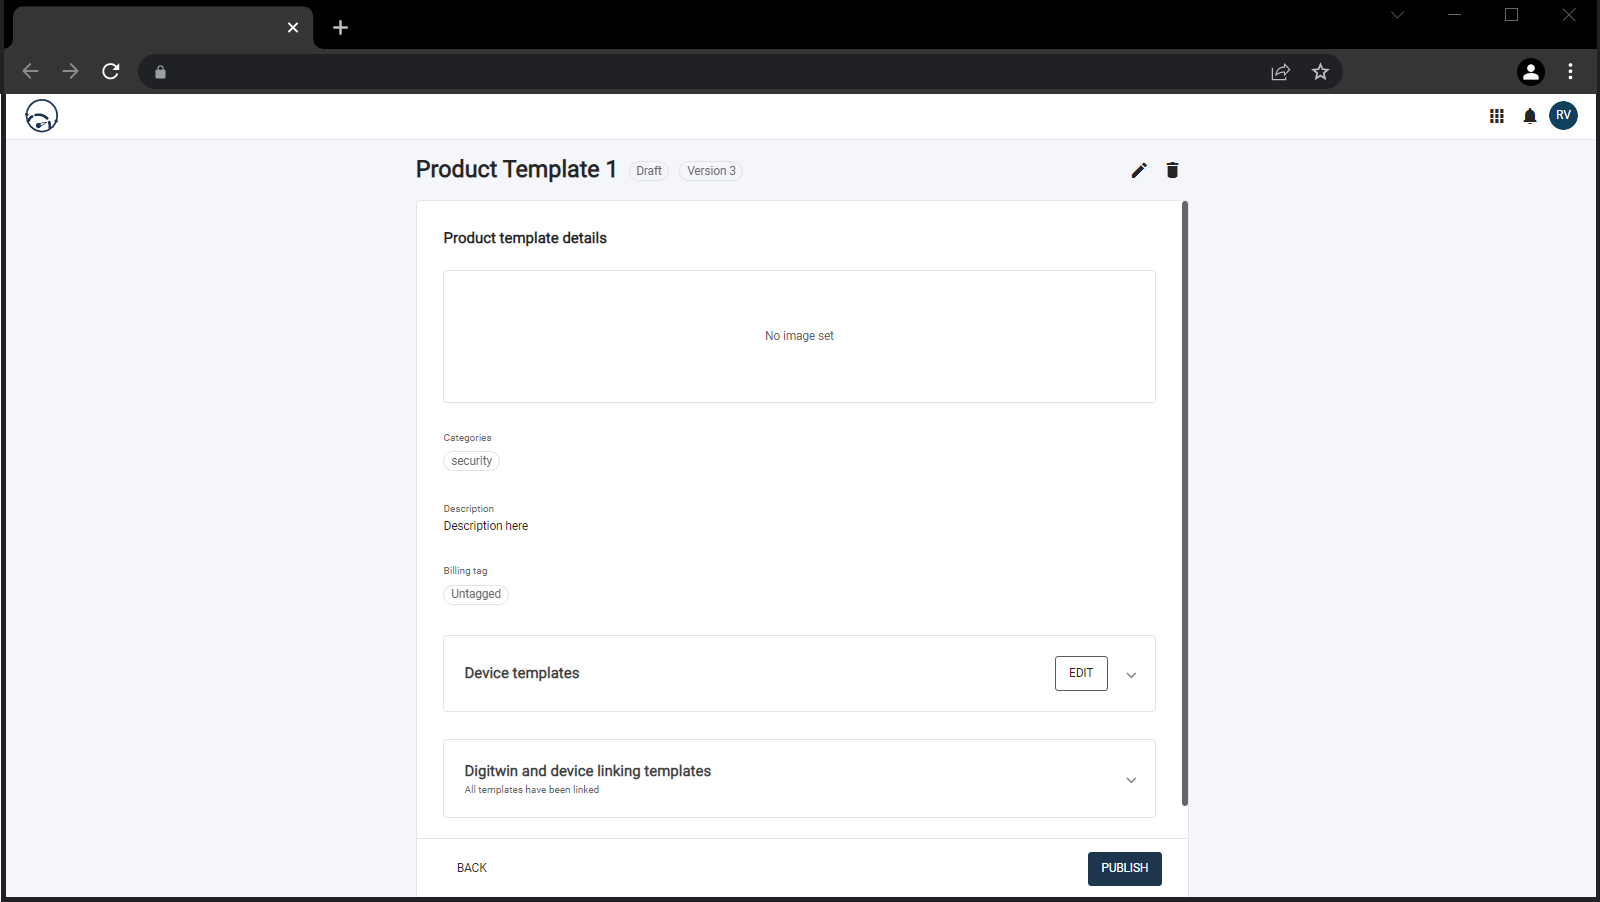
Figure 9 - Add device template details
10. Now you can start mapping your Digital Twin’s regex tokens to your device template’s properties.
How to link your device properties to your device token
Linking your device properties to your Digital Twin token will help map the correct data to the required fields when you add your devices within the product.
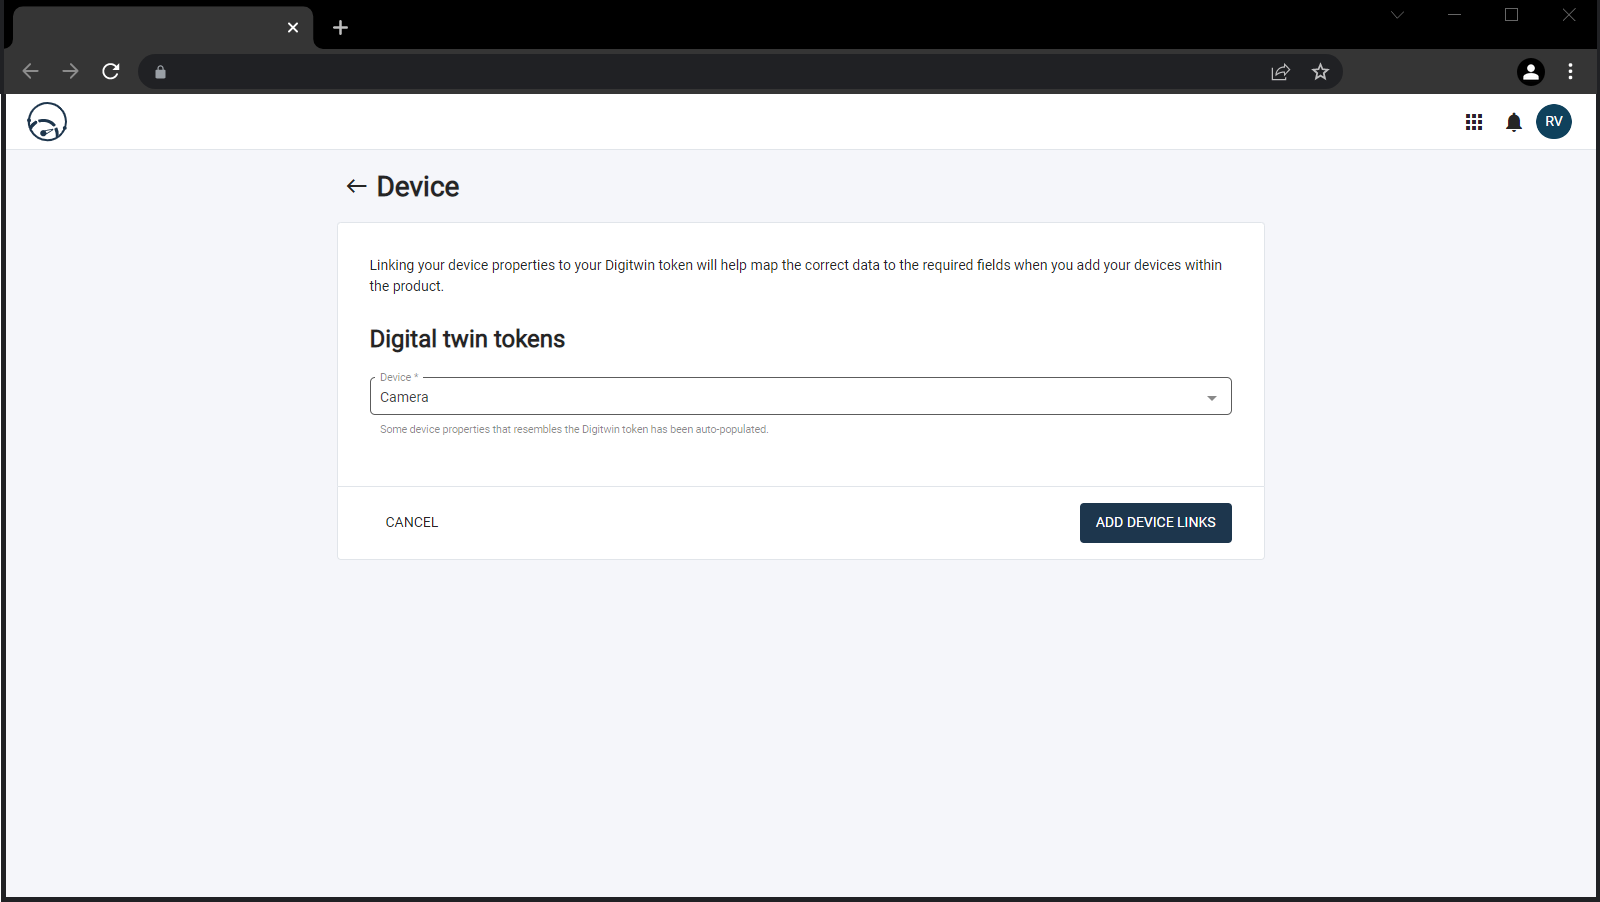
Figure 10 - Linking your Digital Twin tokens
11. Here you need to decide which device template you want to link to your Digital Twin. These tokens come from the Digital Twin and the device template that you have already created.
12. From the dropdown list on both the <deviceid> or <model> select the token properties that you’d like to link to your device. These tokens belong to the Digital Twin that you are linking to.
13. Once you have mapped all the device links, you can publish your product template.
Creating a product
Now that your product template has been created, you are one step closer to publishing your product. The hard work has been done and now your next steps will be to populate the Product template properties that you have set up.
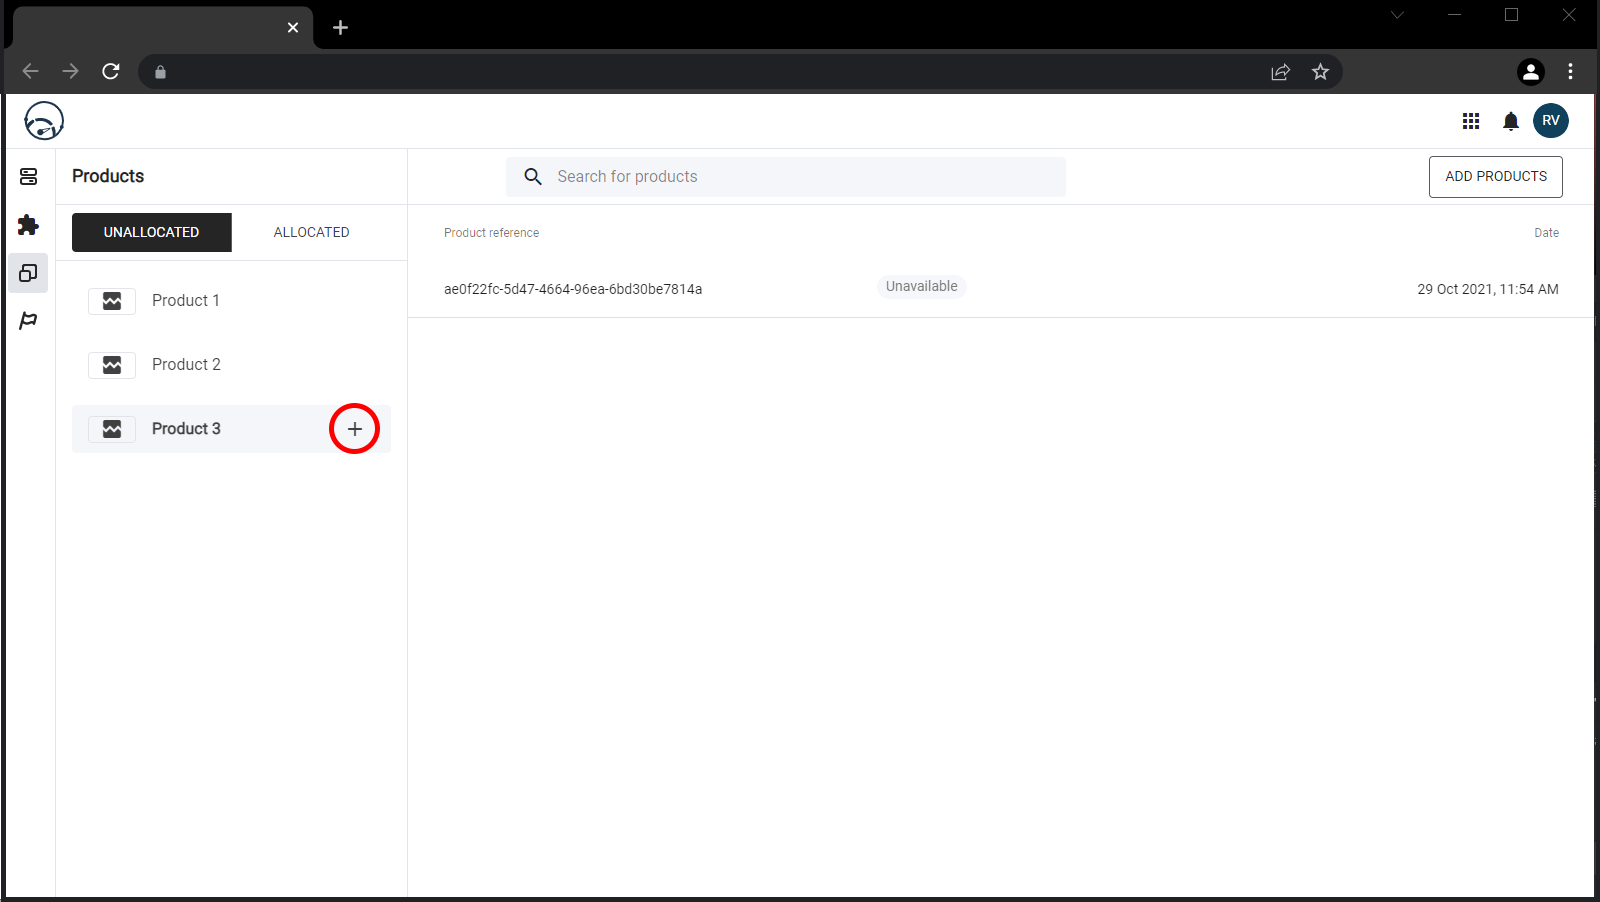
Figure 11 - Create your product
1. From your Product store dashboard, click Products from the left-hand menu bar.
2. Select the Product template you wish to use for your Product and click on the + symbol.
3. A pop-up window will display your newly created Product, featuring the devices and properties that have been defined for the Product template.
4. Now we need to connect the template properties to the physical devices specified for this template.
5. For each device, click on its edit button and you’ll be taken to the Device specific details that are required for the product to function.
6. You can make bulk edits to the device properties to speed up the process.
7. When you have entered all the required, click Update.
8. Now we need to mark the Product as available before we provision it.
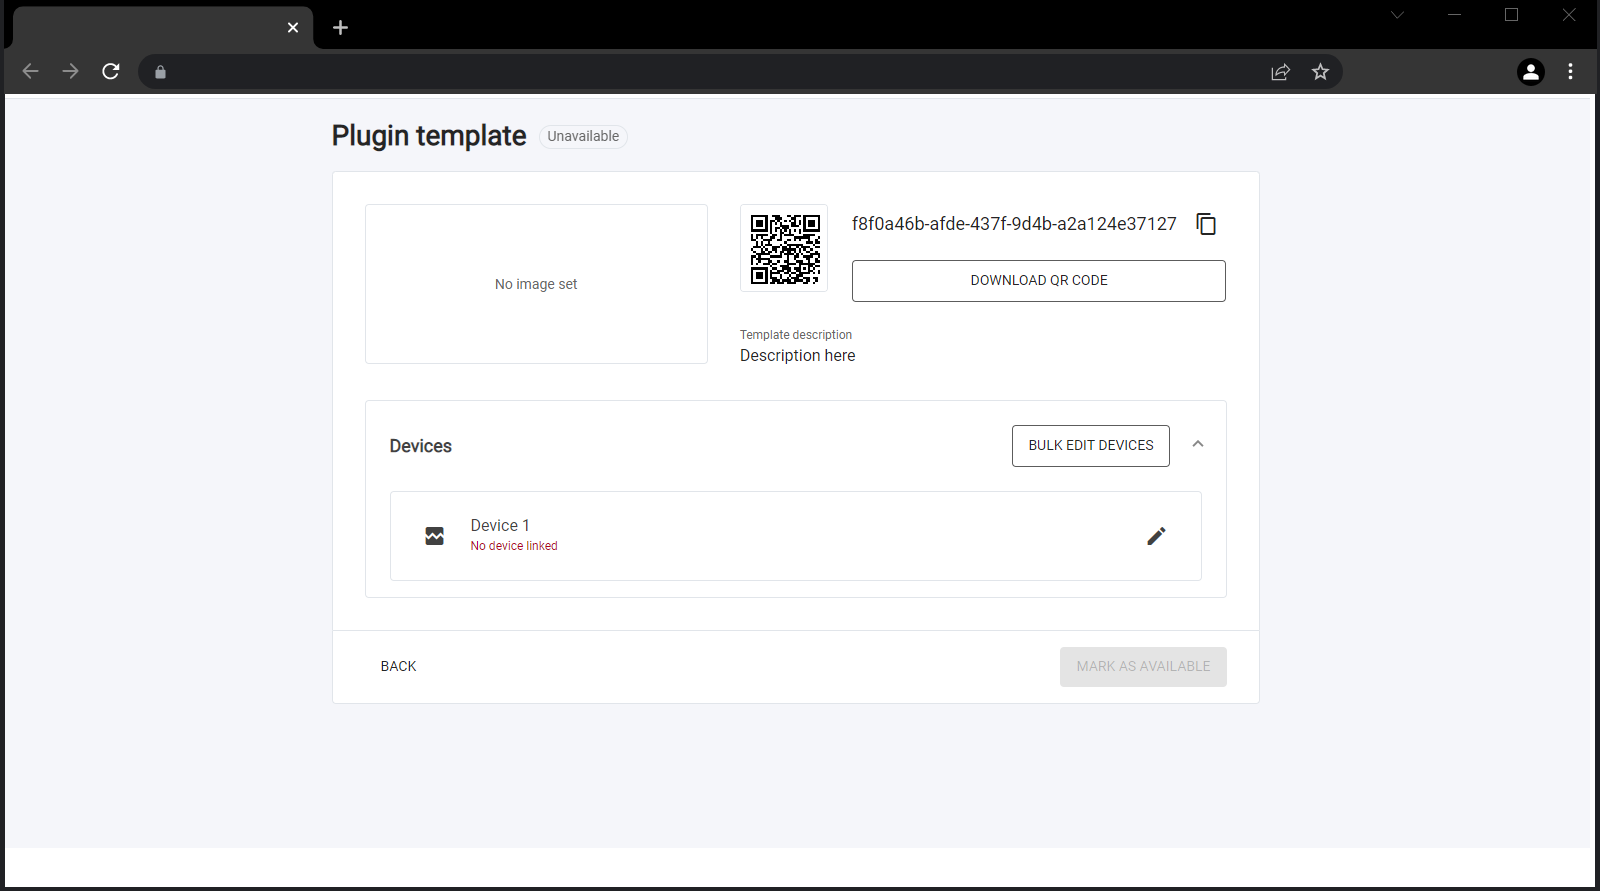
Figure 12 - Provisioning your product
9. The produdct will then be listed on your dashboard as an unallocated Product. When the Product gets provisioned, it will be marked as unavailable and will appear on the Allocated tab list.
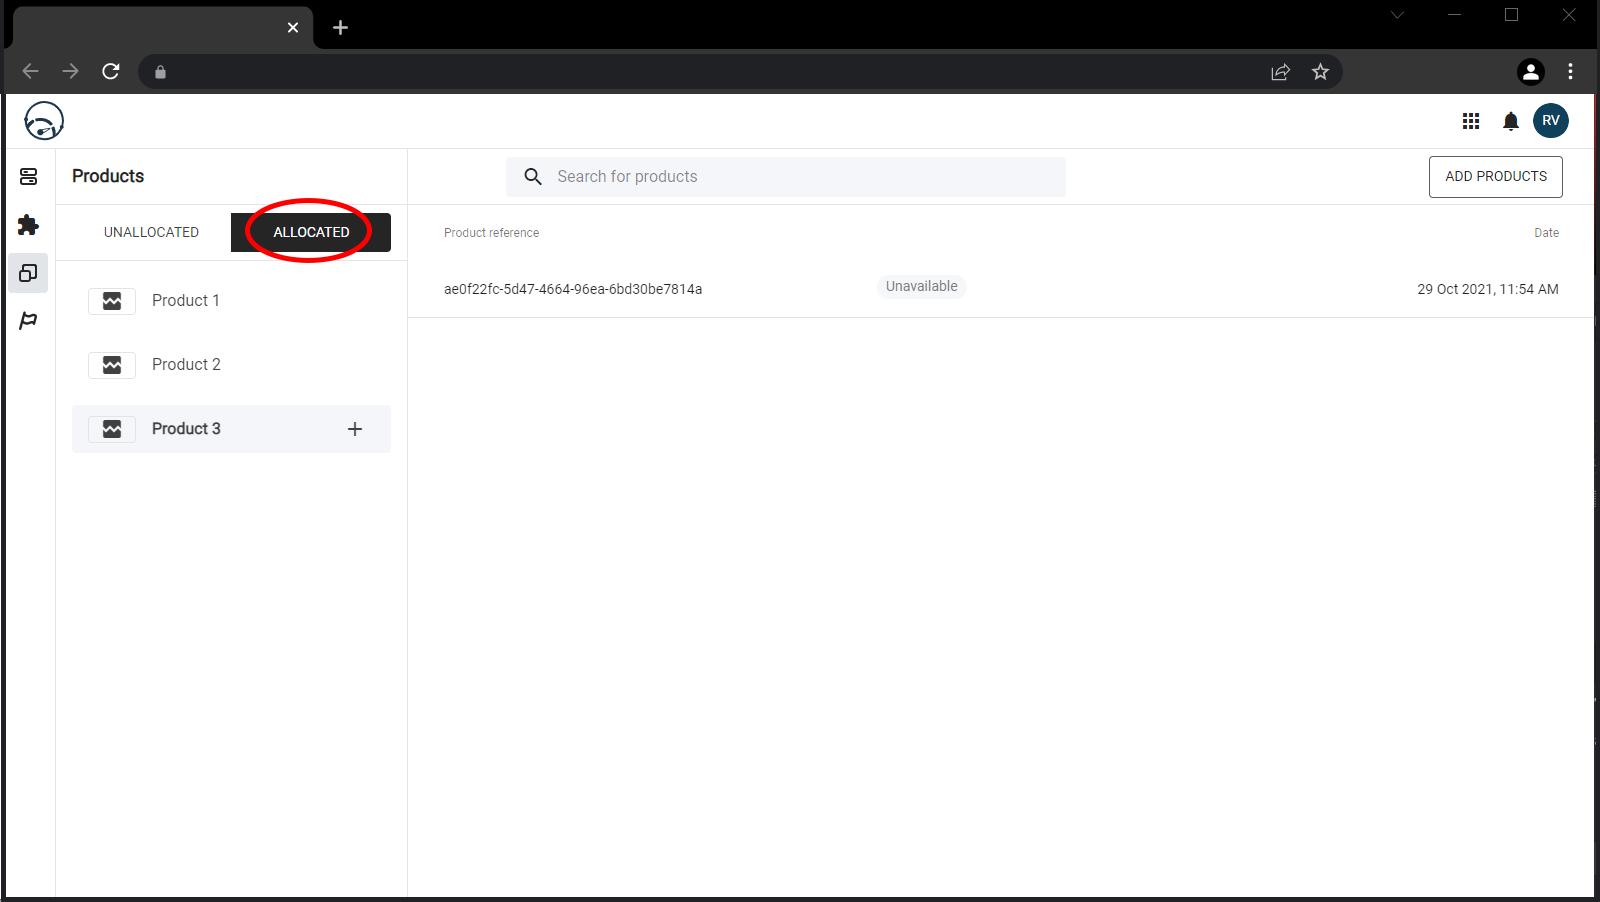
Figure 13 - Allocating your product
Provisioning your Product
Before you can publish your product template, the following conditions should be met:
- All device specific properties must have values
- The product must be marked as available When you are provisioning your product, the following actions take place in the background:
- Product is allocated to your account
- A product instance is created
- The map on the product template is then used to populate the Digital Twins regex tokens and static endpoints.
- Finally, the Digital Twin rollout is requested.

Figure 14 - The Product provisioning process
Device Thresholds
Device thresholds gets static end-point data from a Digital Twin.
Updating your product
The only thing you can modify on your product instance is the device threshold, doing so requests a Digital Twin update.

Figure 15 - Updating your Product
Upgrading your product
You only need to upgrade if a product has been modified. This is what happens when you upgrade your product:
- Product instance is notified of available updates
- User actions update, this triggers a product instance upgrade
- Updates the product in stance
- Using the maps on product template, we populate the Digital Twins regex tokens and static endpoints.

Figure 16 - Upgrading your Product
When you provision a product, a product instance is created to show what the product looks like when the user provisions it. This will allow you to make changes to the product without affecting the user.